

⚡ Compact power, limitless potential.
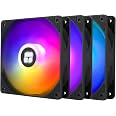
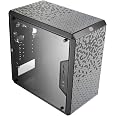
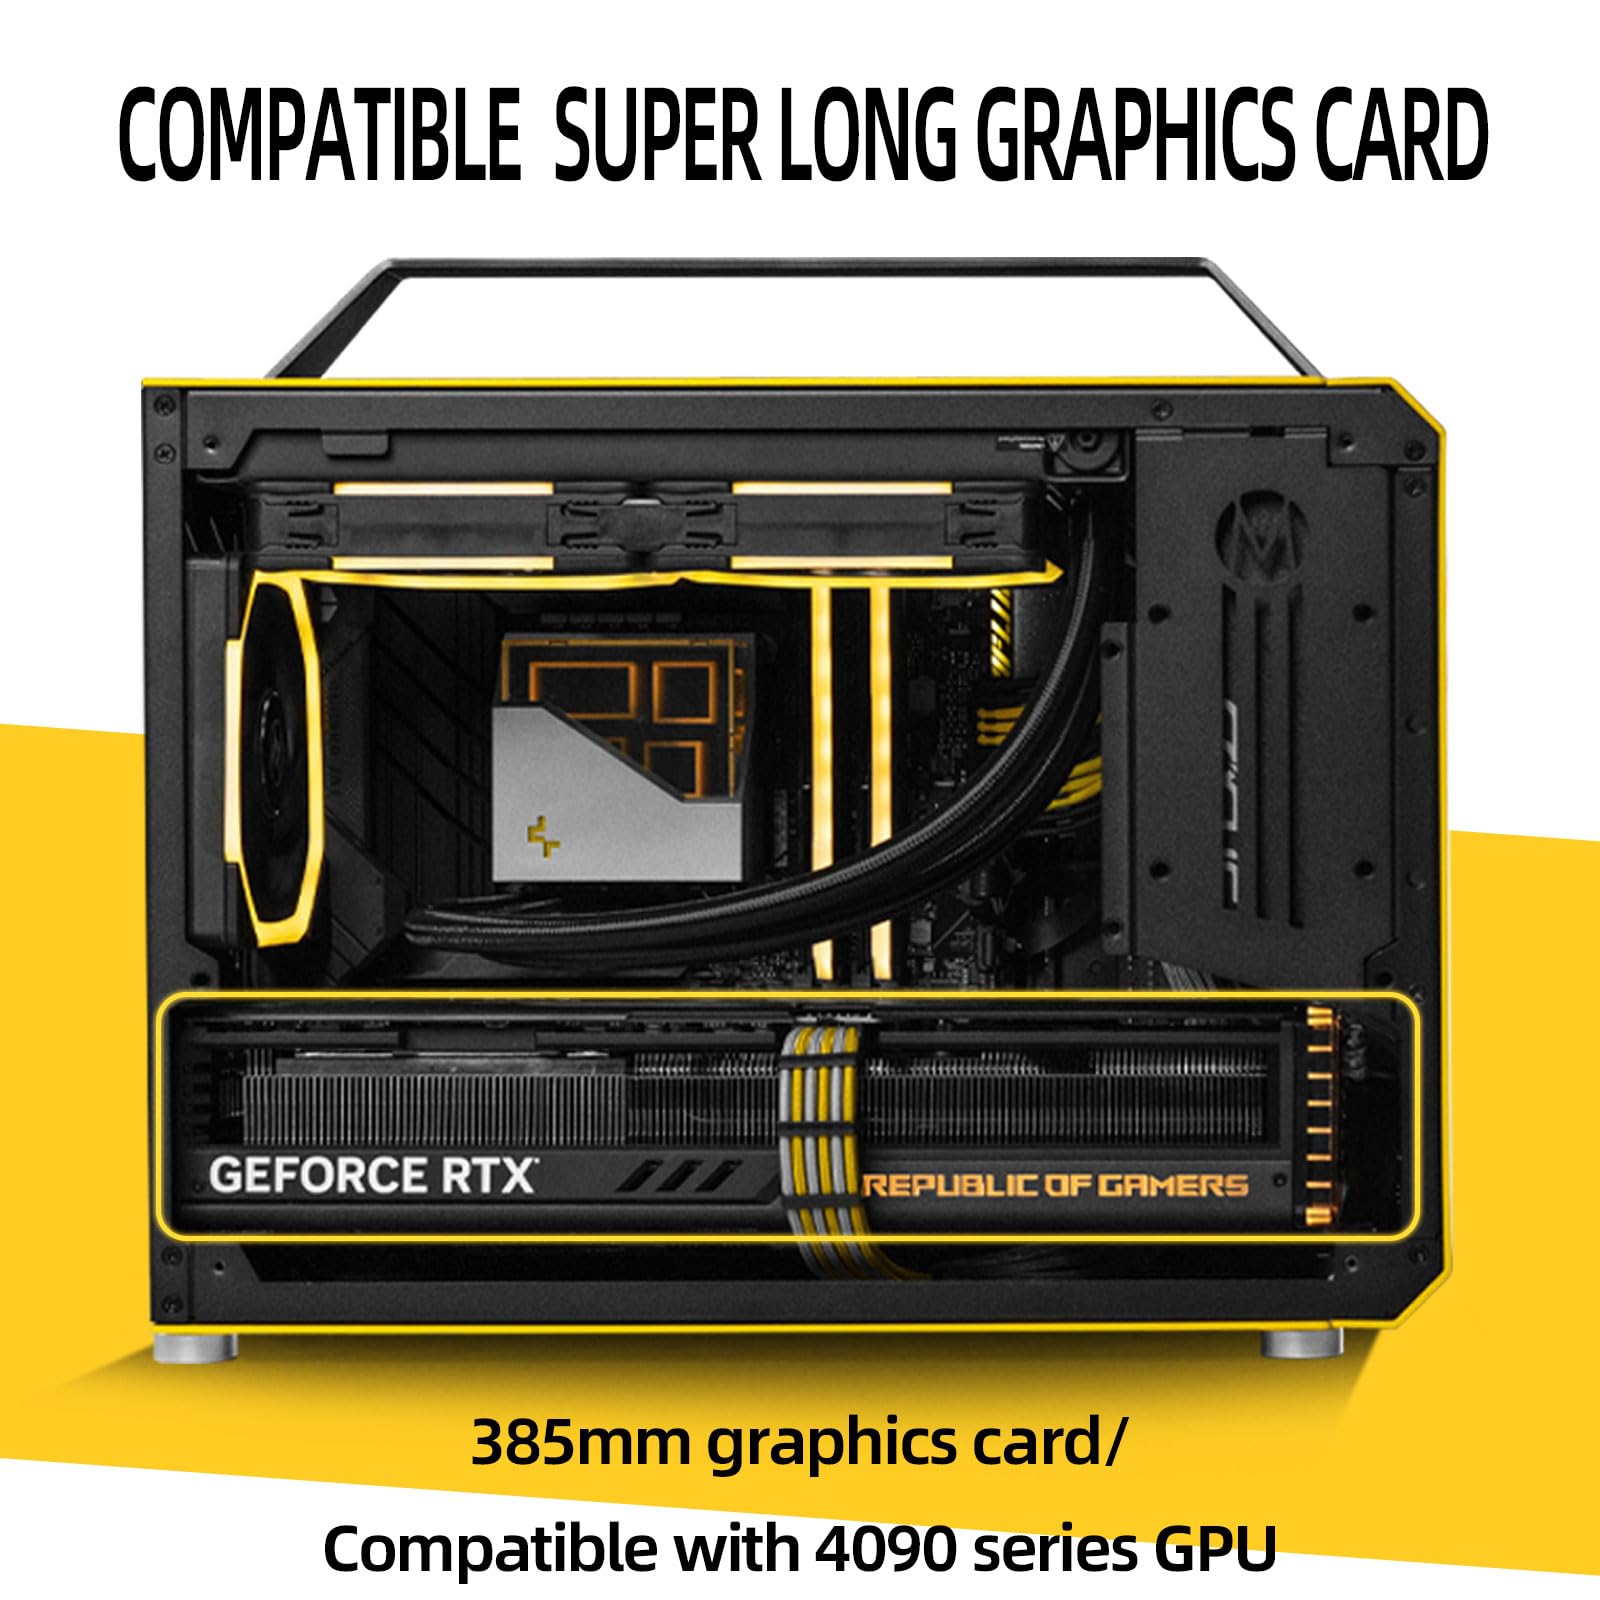
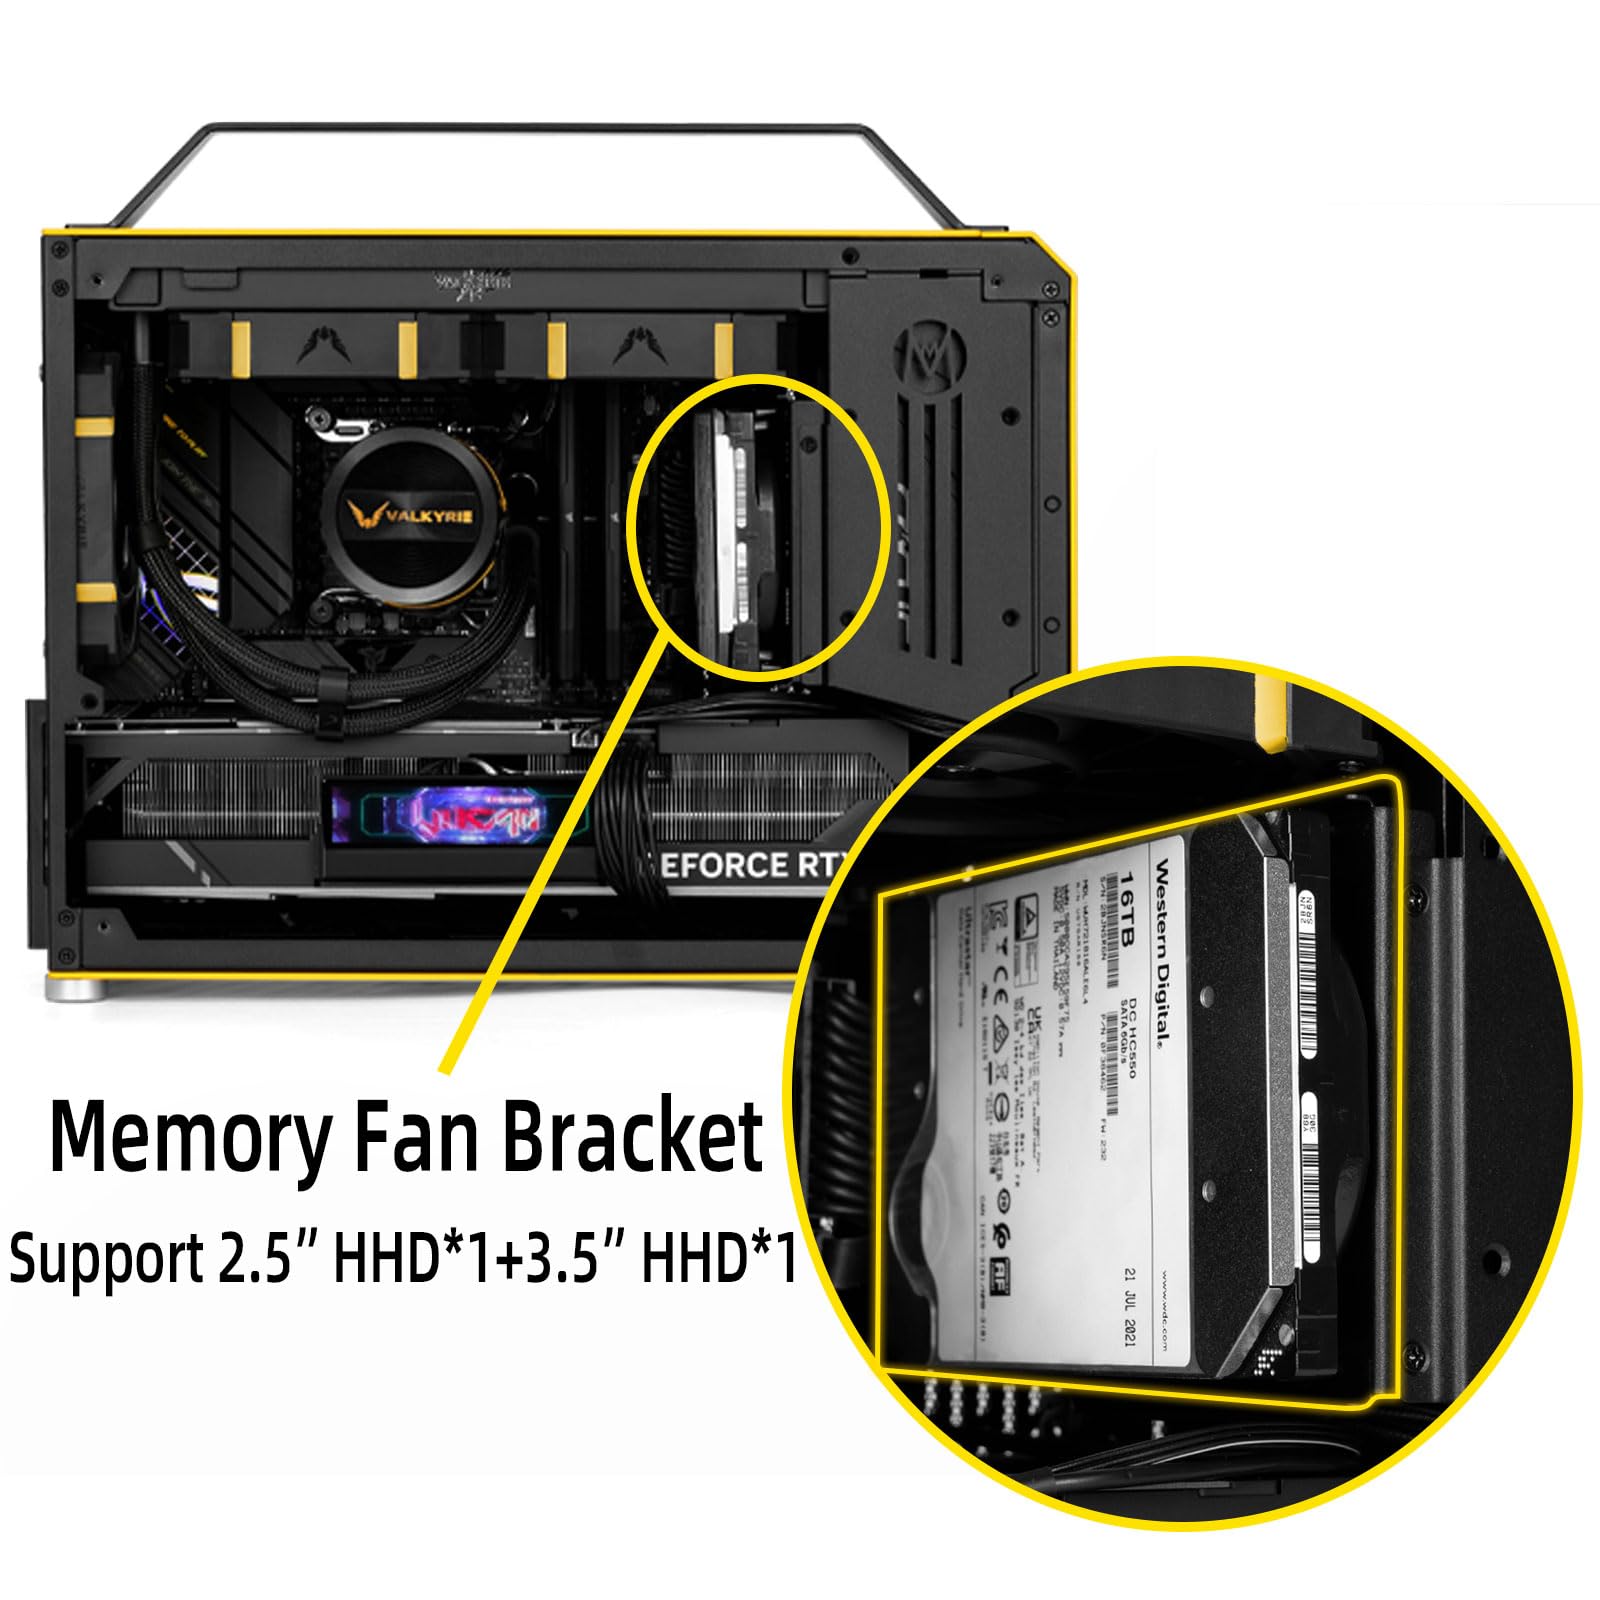
The Mechanical Master C+Max Desktop Compact case is engineered for serious gamers and creators, featuring extended GPU support for 50-Series cards like the RTX 5090, compatibility with 240mm AIO cooling systems, and a versatile HDD/fan bracket. Its space-efficient design balances compact dimensions with high scalability, supporting ATX PSUs and offering smooth upgrades from previous C28 models.


| Number of USB 3.0 Ports | 2 |
| Brand | MECHANIC MASTER |
| Series | C+MAX |
| Item model number | C+MAX |
| Item Weight | 9.24 pounds |
| Product Dimensions | 15.4 x 7.3 x 13.3 inches |
| Item Dimensions LxWxH | 15.4 x 7.3 x 13.3 inches |
| Color | Elegant Black |
| Manufacturer | Mechanic Master |
| ASIN | B0CW5LWL3F |
| Country of Origin | China |
| Date First Available | February 28, 2024 |
D**R
A hot mess, but a very good SFF case overall
I've been assembling my computers for about 25 years, and have easily got a couple dozen builds under my belt. This is the first time I've tried out "Mechanic Master". Bought the case mostly because it can handle a range of motherboard and GPU sizes... and had a handle. This one's a build for LAN party gaming. I built with an MSI MPG B650I Edge (mini-ITX), AMD Ryzen 78003D, AUS ROG 240mm AIO and a shorty (240mm) GeForce RTX 4070 OC edition... pretty cool, eh?... but the most impressive thing stuffed in this case was a Corsair Gold 1200 modular PSU - the fat boy... and that fat boy exposed some of the biggest challenges with the case. I actually didn't plan on using it as I bought a Seasonic SGX 750 (SFX) modular PSU for this build to start with but there was no easy way to mount it. I'm not kidding. The whole case is screwed together to give you a bunch of layout options, but no matter how I moved that SFX PSU around, there was no solid place to screw it in - and no bracket or adapter to fill the need. I gave the manual (very nice color photos!) a couple reads and found nothing helpful. I like the case. It's a nice design on a lot of levels - lots of mesh and ventilation on five sides of the case (strange cutouts in that sheet metal behind the mesh on the front - not sure what they were trying to account for, there) it's got the smoky glass window that suits the blacked-out aesthetic I was going for with the internals. Nice little corners to hide your cable-dressing crimes, plain and simple front panel connectors, illuminated power button (power-led and power-switch) connectors are the only small fiddly ones that hang off the front panel - the other two (USB C & 2) ports use the nice big modular connectors to the board. It's solid and well-finished. Hooboy, though, the power layout is horrendous - and even if I account for the fat boy Corsair Gold 1200 I put in there, the PSU location is up high on the front of the case and the odd cutouts do not allow for free airflow to your PSU - it's blocking about 50% of the intake and there's no room for the PSU's wire fan shroud between the mounted position and the front of the case. In my own build this PSU is not really ever going to get very hot, so I'm not that worried, but if you were sizing your power smaller (600-850) you may want to get a little experimental with positioning. To top that, the power plug is on the back of the case (not so surprising!) but there is NO on-off switch back there next to it (VERY surprising!). There's a short lead (~18in?) that travels the distance from case back to case front and that lead plugs into your PSU. It's well-insulated, but this is also the path along the top of the case where I put my AIO, so you have to get pretty detail-oriented about how you'll traverse that distance. Protip: Once you put your PSU in there, turn the power switch ON because once you screw all the fancy fascia panels onto the case frame, you ain't gonna be able to flip your PSU on or off. This is not a big deal to most people and in practice you may never have to actually power off your PSU at the switch for the whole time you run it, but for me it's about safety. I want to have a way of powering down without having to go through the OS or leaning on the front-panel button. One might say "This is a convenient way that Mechanic Master have dealt with the PSU positioning problem." but I don't agree. Please put a nice fat 240V-rated switch on there, MechMaster people! You can do it. Or, you guys can just find a way to do the PSU mount that fully exposes the connector, switch and fuse. Put a little flip-cover over it, maybe? The additional accessibility cost to the BOM is worth the peace of mind and the safety advantages. Other gripes were 1) the lack of a convenient place to stick a 2.5 in SSD - ended up just screwing it to the empty mount space between my dinky mobo and the PSU - good enough, but not very satisfying. I put a pair of 2TB Samsung 990 M.2 drives on the board, but wanted to slam another 2TB in and was miffed at the lack of tidy options that would get enough airflow. Please put a standard 3.5in drive bay in there somewhere, MechMaster people! Sure, it will add a couple CM in height or length to the case, but the overall design is -=so good=- that it can handle it. For 2) I'd say that there's just too much craziness in the panels that form the case structure - nothing is riveted or welded, so finding your layout means dismantling a lot of stuff off the sides (soooo many fasteners!) and I ended up with two sections for which I had no recollection of how to reattach them - and the pictures in the manual didn't really illustrate very well. Maybe take more pictures or show diagrams with the different layouts or just supply brackets to accommodate different layouts? Not sure what of those ways would be the best, but it's a solid case that people could really get excited about if there were some easy-to-understand suggestions. On the good side: The case is beautifully packed for shipping - lots o' foam and good attention to the corners, the case itself is finished (painted, with no sharp edges) fantastically well. Just plain brilliant. This is the first SFF build I've done where I didn't need a stack of band-aids afterwards. Well done! Case comes with a very good mag-tip screwdriver that fits all the fasteners (soooo many fasteners!) in there. There's a little flip-top plastic compartmented case to hold little screws and they were kind enough to throw a few zip-ties in there, too - a nice touch! There is an L-bracket in there for supporting long graphics cards - very nice - and if I didn't have a fat boy PSU in there I could have easily stuffed a long card in the case, no problem. It woulda been nice to have had the option of skipping the glass in favor of another slotted steel case side, but that's a minor niggle. (I'll have to check and see if I can just buy one, I guess.) Altogether, I'm pleased with the result. It's very smart-looking and the handle is sturdy. I do NOT recommend this case for first-time builders, though. There's just too much fiddly stuff to deal with in a very tight package, and it will demand creativity. If it is your first SFF case, get an experienced buddy to share the fun. The case is worth the effort involved.
S**S
Take on the go or play at home on the big screen!
Cyberpunk 2077 colors, amazing quality! Carry this baby wherever you go!
T**N
Just one thing I don’t like about it
I love the compact dimensions of this case—it’s about as small as you can get while still fitting a mATX motherboard. I’m not a fan of oversized cases loaded with RGB fans that look like a spaceship, so this was a great fit. The material quality is solid, and overall, it’s well-designed. My only real complaint is the power indicator LED—it’s ridiculously bright, and the light bleeds into the case, creating an annoying white glow inside. I eventually got fed up and unplugged it from the front panel header, but it’s frustrating to have to disable a basic feature just to fix this issue.
R**O
Great case
Easy to work with and well constructed
B**N
Good case, but with some minor issues.
It should be called Screw Master instead. There's just a bunch of screws everywhere when you disassemble this thing. Luckily it was fairly easy to reassemble back together. The handle is also held by longer screws. I got the C+Max so that it can fit a 4090 gpu. I only wished that it came with an option for another metal panel instead of the tempered glass panel. Everything is very tightly fitted inside so you have to be very precise with wire organization. This case won't work with motherboards that have the connectors on the backside since everything in this case is very compact. If done well, it will look and function pretty good as a micro atx case that you can carry around. Unfortunately this product was designed in China and won't show in PCPartPicker. I'm using this as a portable workstation when I am on the move. I really like how unique this case is. Unfortunately I picked an all-black case since I didn't want it to stand out and get stolen, but I regret not choosing the yellow/black case as it definitely looks the coolest. I am also a bit concerned with the handle of the case and how well it will hold up as it is held down by small screws especially since the case can be a bit weighty.
K**N
Can support a 5090, but with limitations
Figured I'd share my experience, if someone else tries to stuff a 5090 in this thing.Firstly, this store page doesn't mention that the case supports 3 120mm fans on the bottom. It also can support 92mm fan on the front, below the PSU, but it will only fit if you are using slim fans on the bottom (probably 15mm thick) or not using the front-most fan on the bottom.Second, this page says you can use an ATX PSU of up to 140mm, but do not bother trying for with what little space it will give you for cable management. Go get an SFX PSU, you will have much more clearance for cables.The one major flaw with this case is the PCI-E slots in the back do not have much space. I had to get slim displayport cables in order for the cables to fully connect. Otherwise, the GPU would need to intentionally sag for regular cables to fit.In order to fit a 5090 you will need to measure the thickness of the GPU and your bottom fans. Length is not an issue with this case. If you choose to use standard 25mm thick fans, you can only use the Zotac 5090 Solid or Gigabyte 5090 Windforce. Even still, I had to remove the rubber padding on my bottom fans and remove the bottom of the case. Then I installed the GPU and put rubber padding around the GPU fans to prevent the fans from colliding. When reinstalling the bottom of the case with the fans attached, the entire bottom had to bend less than 1mm in order to fit. If you choose to use something like 15mm thick fans, the installation should be a lot easier and you could use a few different 5090s. Just be sure to check the measurements of the 5090 you want beforehand.Overall, I'm satisfied with the case since I knew going into this build it would take a lot of measuring and patience.
Trustpilot
1 month ago
1 day ago