Desertcart purchases this item on your behalf and handles shipping, customs, and support to Tunisia.
✨ See and be seen: Headlights so clear, you’ll wonder why you waited! 🛻
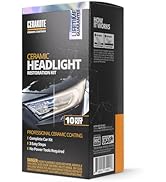
The CERAKOTE® Ceramic Headlight Restoration Kit is a no-power-tool, 3-step system that removes oxidation and yellowing from headlights, then applies a durable ceramic coating that provides UV protection lasting the lifetime of your vehicle. This all-in-one kit includes 8 oxidation remover wipes, a sanding kit, and 2 ceramic coating wipes, enabling a professional-grade restoration in about 30 minutes. Trusted by thousands with a 4.6-star rating, it’s designed for easy, safe use without risking paint damage, delivering like-new clarity and long-lasting protection.


| ASIN | B084RQKLV8 |
| Best Sellers Rank | #13 in Automotive ( See Top 100 in Automotive ) #1 in Automotive Headlight Restoration Kits |
| Brand | CERAKOTE |
| Brand Name | CERAKOTE |
| Customer Reviews | 4.6 out of 5 stars 71,995 Reviews |
| Included Components | CERAKOTE® Ceramic Headlight Restoration Kit – Guaranteed To Last As Long As You Own Your Vehicle – Brings Headlights back to Like New Condition - 3 Easy Steps - No Power Tools Required |
| Item Type Name | CERAKOTE® Ceramic Headlight Restoration Kit – Guaranteed To Last As Long As You Own Your Vehicle – Brings Headlights back to Like New Condition - 3 Easy Steps - No Power Tools Required |
| Item Weight | 4.8 ounces |
| Manufacturer | CERAKOTE |
| Model Number | AH-HLKITV |
| Number of Items | 1 |
| Part Number | AH-HLKITV |
| Recommended Uses For Product | Removes Oxidation, Removes Dirt, For Paint Protection |
| Specific Uses For Product | Brake Lights, Fog Lights, Head Lights, Third Brake Lights |
| UPC | 850014615017 |
| Unit Count | 1 Count |
| Warranty Description | Warranty |
A**R
WOW! I am so impressed!!! You need to get this!
I do have before and after pictures, but I'm too lazy to upload them. Trust me when I say that the difference is DRAMATIC. It's as if I have brand new headlights! I took them from foggy/clouded to crystal clear, without even that much effort. And with the ceramic coating, I expect they will stay that way. Here are some tips from what I learned about using the kit. 1. If you are careful, and you're not doing the lights on a big truck, and the fogging isn't terrible, you can split the supplies in half and have enough left over to do another car! 2. It's not a bad idea to tape off the headlights through steps 1 and 2 (initial chemical cleaning, and especially, sanding). Even though I did this, I still managed to sand off a thin line of paint right next to one of the headlights. That was entirely my fault. 3. You can't really sand too much. I actually did it twice. Instead of going by the clock (they say 3 minutes per pad), I just told myself I would use the applicator twice on each piece of sandpaper, and then take off the sandpaper to sand by hand a third time. In other words, three passes with each grit, for a total of six passes per light. That worked out well, and it wasn't too hard, either. Just be careful you don't sand the paint on your car! 4. Bring a roll of paper towels with you before you start. I spent a lot of time running back and forth to the house. You won't need the whole roll. I used about ten towels, total. So bring a roll, and save yourself some time. 5. Make sure you set aside an hour to do the job, and another hour to let it cure. That's about how long it took me, and I'd never done it before. I believe I can do it again in under 45 minutes, easily. But you'll still need an hour for the final coating to cure. If it's raining, you won't be able to do this work. Also, you should work in the shade. I don't think it would come out very well if you do it in direct sunlight. 6. You will definitely need a spray bottle, filled with water. A 16 oz bottle would be about right. I used a little tiny 2 oz bottle, and had to refill it numerous times. 7. When they say to keep the surface of the headlight WET while you sand, they mean it! Your work will come out much smoother, and go faster, if you do that. If not, you end up with a gunky mess that you will have to clean off anyway, and probably have to sand some more - so why not spray while you go? 8. Be sure to use those paper towels to clean things around the lights very well between each step. It just makes the job easier when you don't have to worry about ruining your paint with the chemicals, and you get all the sanding glop out of the way, so you can see if you are sanding your paint, and not your headlights! 9. Be sure to REMOVE THE TAPE before you begin step 3 (ceramic coating). Then, use a hair dryer to THOROUGHLY dry out the surfaces around the lights (and the lights themselves) before you start coating the headlights. This last step 3 is crucial to performance, and is why this kit is so special. It takes no time at all to do the work, like rubbing alcohol once on the headlight surface. But the chemical isn't alcohol, and it's very strong, so prepare well - you don't want to have to stop in the middle of the application. Dry out those lights and surfaces first (because the chemical coating does not play well with water, at all)! Then know that putting on that coating only takes about 15 seconds per light. You just coat it once, with 50% overlap, wipe off any of the chemical that's dribbled onto your paint, and then DON'T TOUCH THOSE HEADLIGHTS FOR ONE HOUR! Let them cure, and they will be like-new! Again, this kit is marvelous. If I had known the end result would be so amazing, I would have taken it out of the box much sooner. I am going to do my wife's car next. It really is the best thing I've seen to do this job. Somebody put a lot of thought into this product, and you can tell. Not too much work for an absolutely fantastic end result!
G**R
CERAKOTE® Ceramic Headlight Restoration Kit works as advertised.
I used this product on a 2015 Toyota Tacoma. The headlights had become so hazy and opaque they may not have passed state inspection. The kit included oxidation removal wipes, wet sanding discs (2000 + 3000 grit) and holder, and wipes to apply the final oxidation protective coating, along with 2 pairs of gloves. I used my own water bottle mister for the wet sanding and a third pair of gloves that were not included. Additionally, towels are all needed to dry water from the plastic on the wet steps. I poured tap water on the work to do any required rinsing. I spent about an hour working outside in the shade to complete the job. The results are outstanding as shown in the after pictures. No before pics available. I highly recommend this product for its affordability and ease of restoring the headlights to an essentially new-looking condition.
D**G
Excellent Ceramic Protection and Outstanding Clarity
I was honestly surprised by how well this kit worked. My headlights were cloudy, yellow, and making night driving more difficult. The CERAKOTE® Ceramic Headlight Restoration Kit restored them to a crystal-clear finish that looks almost like new. The instructions were easy to follow, and everything I needed was included in the kit. The sanding process took a little time, but the results were absolutely worth the effort. The ceramic coating left a smooth, glossy finish and added a layer of protection. I've used other headlight restoration products before, but they started fading after a few months. This kit feels much more durable, and my headlights still look great after exposure to sun and rain. If your headlights are oxidized or hazy, I highly recommend this product. It saved me hundreds of dollars compared to replacing the headlights and significantly improved both the appearance of my car and nighttime visibility. Definitely a 5-star product!
S**.
Try this kit first... It works and it's very simple to do
Very good product. Possibly the easiest one to use. Very simple instructions. Watch the video that they provide in the QR code. Make sure you have water. Don't be afraid to sand any hazy spots that you don't like twice three times. Not sure it is a lifetime product but you'll get a good 3 to 5 years out of it and that's not bad for $20
V**J
Great Improvement, But Results May Vary Depending on Headlight Condition
used this kit on my 2013 Audi Q5 with moderately oxidized headlights. The instructions were clear and easy to follow, and the kit included everything needed to complete the job. I carefully followed all the steps, including washing the headlights, using the oxidation remover wipes, wet sanding with both the 2000- and 3000-grit discs for more than the recommended time, and applying the ceramic coating exactly as instructed. The results were mixed. One headlight turned out very well and became much clearer. The other improved significantly but still has some noticeable cloudiness over the projector area. It’s possible that part of the remaining haze is inside the headlight assembly rather than on the outer lens, but I can’t confirm that yet. Overall, this is a quality kit that definitely removes oxidation and is much better than many inexpensive restoration products I’ve tried. Just be aware that if your headlight has internal haze or heat-related damage, no exterior restoration kit will completely eliminate it. Pros: * Easy to use * Complete kit with all necessary materials * Significant improvement in clarity * Ceramic coating is a nice finishing touch Cons: * May not fully restore headlights with internal haze * Results can vary between headlights even when following the instructions carefully I would still recommend the product, especially for headlights with surface oxidation.
A**X
⭐️⭐️⭐️⭐️⭐️Headlight Restoration
I was impressed with how well this headlight restoration kit worked. My headlights were cloudy and yellow from years of sun exposure, and this product made a noticeable difference. After following the instructions and taking my time, the headlights became much clearer and brighter. The process was straightforward, and the results were better than I expected. It improved the appearance of my car and helped the headlights shine better at night. The kit included everything I needed, and it was much cheaper than replacing the headlights. Overall, I would recommend this product to anyone with faded or foggy headlights. It saved me money and made my car look much newer.
K**E
Easy DIY Kit That Really Works
Honestly, I didn't expect such an amazing result. My husband was extremely skeptical at first, but after reading the reviews, I decided to give it a try because I loved that it didn't require any special tools or professional skills. I really wanted to do the whole job myself. The results were incredible. Our car is over 20 years old, and the difference is a true wow effect. The headlights are dramatically clearer, and all of the oxidation on the surface came off beautifully. There is still one small white spot, but it's inside the headlight, so no restoration kit could fix that. Everything on the outside cleaned up amazingly well. If you're wondering whether this kit is worth buying—the answer is absolutely yes. It was easy to use, the instructions were clear, and the results exceeded all my expectations. I highly recommend it! P.S. The results were so satisfying that I actually made a before-and-after collage. Trust me, that's something I almost never do 😄
D**S
Best Headlight Restoration Kit
Best Headlight Restoration Kit This is a great Kit, It brings everything you need to prepare and protect the headlight. Best of all no polishing needed. Wipe, remove yellowing, sand with included 3" sanders, then wipe on clear and protection. Very easy and effective. I have already recommended to friends who were also pleased with the results and ease of application. I've tried many products and many methods including Vapor method. This is better.
G**E
Great results if you follow instructions
Great product. I used this on a 2010 Toyota Yaris headlights. The left side headlight had yellowed from sun exposure, as a result of being ungaraged for 16 years. The right side looked ok. I followed the instructions carefully for the left side headlight and found it took less than 30 minutes to prep and apply. The end result was that the light looked almost as clear as new. However it was so good that it made the right side look old by comparison, and so I then treated the other side too! This does also mean both headlights now have UV protection and should have future aging delayed on both sides. The quantity of chemical on the wipes is ample for two headlights, I also had sufficient excess to apply to the Plexiglas screen of my motorcycle. The box contained a QR code for a YouTube tutorial video that is essential to watch. The process isn’t difficult but it identifies where water must be used and where the lights must be meticulously dry. This has made a great improvement to the aesthetics of the car and is cheap and easy.
N**E
Nice and good
Nice and good
P**P
New Like Look
I used this headlight restoration kit and the results were exactly as mentioned in the product description. My car’s headlights were yellow and dull, but after following the steps in the kit, they became clear and bright again. The process was simple, and all the required materials were included. The final finish looks almost like new, and the light output has improved a lot. Definitely worth the money and highly recommended for anyone wanting to restore their headlights without replacing them.
C**N
Praticità d'uso e risultato finale.
Se si esegue il lavoro in modo corretto il risultato è straordinario, basta osservare con estrema attenzione il video e replicare tal quale e I fari tornano come nuovi. Vedremo nel corso del tempo quanto durano.
D**K
Excellent product.
Works.
Trustpilot
2 months ago
2 days ago