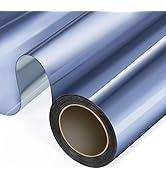
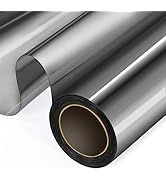
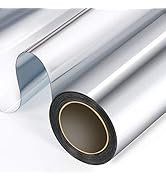
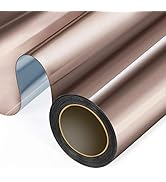
Desertcart purchases this item on your behalf and handles shipping, customs, and support to Tunisia.
🌑 Turn your space into a private sanctuary with zero compromise.
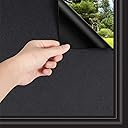
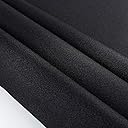
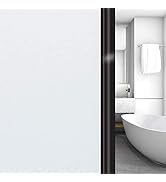
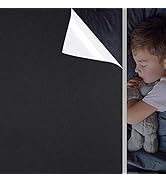
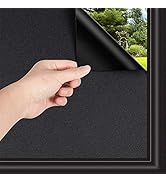
WochiTV Total Blackout Window Film offers 100% light blocking and top-tier privacy with a non-adhesive static cling design that leaves no residue. Made from durable PET and PVC materials, it provides 99% UV protection and energy-saving insulation, while its explosion-proof and moisture-resistant properties enhance safety and durability. Sized at 23.6 inches by 6.56 feet, this easy-to-install film is perfect for bedrooms, nurseries, and any space needing complete darkness and privacy.


| ASIN | B07VXNMXSR |
| Best Sellers Rank | #331,760 in Home & Kitchen ( See Top 100 in Home & Kitchen ) #357 in Window Films |
| Brand | WochiTV |
| Brand Name | WochiTV |
| Color | Black |
| Customer Reviews | 4.1 out of 5 stars 5,352 Reviews |
| Installation Type | Static Cling |
| Item Dimensions L x W | 78.72"L x 23.6"W |
| Item Type Name | One Way Mirror Window Film |
| Manufacturer | WochiTV |
| Manufacturer Part Number | 1 |
| Material | Environmental PVC |
| Material Type | Environmental PVC |
| Model Number | One Way Mirror Window Film |
| Number of Items | 1 |
| Product Dimensions | 78.72"L x 23.6"W |
| Size | 23.6 Inch x 6.56 Feet |
| UPC | 821907065837 |
| Ultraviolet Light Protection | UV Protection |
| Unit Count | 1 Count |
H**P
So happy!
After reading some of the review I was a little worried it wouldn’t lay down well or I wouldn’t be able to peel it apart. I’m so glad I bought some and tried it anyways! I’m a 27yr old girl and I was able to cut and tint each glass pane for our sunroom with ease (please look closely how many panes I had to do - this was no small project! Haha) It feels so nice,cozy, and private in there now. The product is thick and good quality. The instructions that came with it weren’t the best they say to peel it apart twice but you only do that once. All I did was watch a simple YouTube video once and was able to get it done with just a razor blade(exacto knife would be better) and a credit card wrapped in a wet paper towel. No it will not look like a perfect mirror because it is not a glass mirror but it looks really nice and really upgrades the look of our house from the outside. No it is not going to “stick” down necessarily because it is not an adhesive but as long as you don’t bend the product it lays down just as good as the sticky kind. I’m also glad that it won’t damage the glass in any way. One pain I messed up accidentally and was able to peel it off and redo it easily which I really love.
B**Y
Enough for entire sliding glass door
Ordered the blue tint for our sliding glass doors. There is enough to cover both sides with an inch or two excess on all sides. Installation was tricky and is best done with 2 persons. The hardest part was cutting to dimensions as you need a large flat surface and the protective plastic film on the reflective side is thick and wants to re-roll. (Ruler markings on the protective plastic side would have been helpful). The reflective side goes on the glass. We had to spray the glass with water, place the film in position while pulling off the protective film all at the same time. (Be liberal with the water). Use a wet squeegee or rag for bubbles. (Don't sweat the tiny bubbles!) The film can be removed anytime with no damage to the glass. The film adheres well, even at the corners. The blue tint has a cooling effect indoors. The reflective side provides privacy, protection against indirect radiant energy, and reduces glare. We love this product and the effort to install it was worth it.
A**R
Install is tricky
As you can see, it's not "completely" black. Actually more brown. That is sunlight, thru solar screen, before hitting the film. The shade on the right is from a tree. So while it does stop a lot of light, you won't be developing film with this "black out" level. Once you turn the inside lights on, the film appears completely black, with no hint of brown. The inside surface is a textured matte finish. I can certainly agree with other reviewers in that this stuff is very difficult to trim. Find the sharpest exacto blade you can. I think the key may be to wait until the soapy water is pretty much dried up and then try to trim it, but I was always in a rush, so I cut them wet. In this case, the film stretches and bundles up ahead of the blade, making the cut very uneven. You have stringers from the cut which adhere ridiculously well, and want to peel the film back off the window as you pull on them. You really have to cut 100% thru the entire trimmed piece to get it to come off. The backing film is also very difficult to start to separate from the film. I advise you to get a window squeegee and use it to smooth out the bubbles as you go along. That was very helpful. I had one with a thick but very short (so stiff) rubber strip in it which worked well. Be careful not to pull too hard as you install, as you can slide the film away from your edges without realizing it.
A**N
like putting on a giant screen protector
i bought this tint for the sliding glass doors in my bedroom to keep the afternoon sun from turning it into a sauna. like most during this heat wave, my ac seems to have been running nonstop in order to keep the house at a bearable temperature for my 13 year old dog. like most, i am flinching at the mere thought of my electricity bill. also like some, i don’t have a whole lot of loose change to spend on anything besides food and gasoline. i chose this item because the quantity and discount offered seemed to be the most economical. please note, the pictures are taken at 2:30 in the afternoon with no inside lights on. we have almost achieve cave status without blackout curtains. let’s dive into application, shall we. i did this solo because i wanted to see if it could be done. i’m sure, like most things, if you had multiple sets of hands, it would go a lot faster. one side of my sliding glass door took about an hour or so. handmaids tale was playing so i’m using that as a guesstimate. i didn’t have the energy to procure a squeegee so i used a plastic ruler instead. the ruler allowed for the same type of edge as a credit card or small hard card would but with more surface area. there were a few mishaps with fur getting between the sheet and the window surface but if you’re quick enough, you might be able to fish it out. i matched up the factory cut side as well as i could with the corner and left side and used some painters tape to hold the sheet in place up top while i started peeling the tint from the backing. spraying your widow down with the soapy water mix will allow for manipulation during the initial placement. there will be A LOT of bubbles so be patient working them out. i used an arcing motion to gather bubbles together and press them towards the edges. that technique seemed to work best. it’s very much like putting a screen protector on your phone. you’re going to get pissed at least once. i chose to leave the backing on and pulling it down one section at a time to attempt to keep animal hair finding it’s way between. that worked for the most part, although, my cat did decide to hang out right next to the window the entire time so there’s that. as i mentioned before, don’t have a bunch of money to spare on “be prepared to screw up on the first attempt” so i was determined to keep the mistakes to a “i can live with that” level. all of that being said, if you aren’t a “do it yourself with the help of 8 youtube videos before you break down and call for help” person, then you might need additional hands. if you’re determined, cheap, with a ragtag set of skills like me, this could work for you. good luck to you all and stay cool my friends.
A**K
HARD AF!! to install nicely
Welp, all the reviews I read (about this and other brands) is correct... very, very, VERY hard to install. Assuming you want it to look nice, that is. It is very easy to lift and reapply the film. But when you do you have to douse with water again. Then the water droplets drip and pool down and cause streaks and water drops that show up through the other side. But they don't show up as bubbles that can be removed, it literally looks like I sprayed sticky goo instead of water and placed something over it. You can see all over where the water droplets spayed or dripped. And it does NOT remove with squeegeeing. It looks like little bright spots where you;d think perhaps the film may have been scraped off or little flecks of shimmery something stuck there. So, the squeegeeing...that's another story. If you don't press hard enough the bubbles don't move, but if you press too hard you get drag marks that seem to be slight layers of frosting/matting that have been worn down a smidge, so on the other side of course you see the lines of smudges from the squeegee track lines. And there are shadow marks where perhaps the squeegee wore down the film in spots? Or maybe it's from a spot that was damp instead of wet. The edges are hard to cut. The first film I put using the middle which meant I had excess hanging off the sides and bottom. Well, the edges can't adhere of course when there is pull from the film hanging off, but when you go to cut it because it isn't adhered you can't get an even cut because the film shifts as you move the blade down. The second film I put in I lined up with the top edge and a side edge to minimize the number of jaggedy edges I'd have. The film itself is very, very nice looking. A thick milky white, just as I wanted, not too sheer, but the edges look like crap ( I even used some of the excess film to cut tiny pieces to fill in the jaggedy horror all around the edges), and there are the shadow marks everywhere that I don't know what caused that so I wouldn't even know how to adjust for that next time, I have the shimmery droplet marks and streaks from the water sprayed onto the glass that I wouldn't know how to adjust for next time since I can't pour a bucket of water on it vs spraying the water, and I have squeegee track marks from where the squeegee seemed to very slightly rub off a tiny smidge of the the film texture/color These things should come with a small practice square so you can see for yourself the challenges and obstacles you will face so you can figure out how to adjust for that before you apply it for real. I suppose one day I'll reorder, take these off, and redo, but it's too much work to do right away. Took me more than an hour to do two 12.5''x37'' glass cabinet doors. Maybe next time I'll jsut take the doors off so i can pour water instead of spraying to avoid the shimmery droplets shining through
D**D
After 3 months-Do Not Recommend
3 month Update... A) By the end of the first 3 weeks, the film has started to peel back significantly from each of the windows. After reapplying in places where it peeled back, product continued to pull away from window. B) At the end of the 1st month the product from all my windows fell completely off. C) Once again I reapplied product, this time using a blow dryer on cool and then on mild heat settings to try to seal product to window. End result was the same, product peeled back over time. D) Lastly, I purchased double sided 3M window tape to outline the whole window frame prior to reapplying product to window. This time I did not use any liquid as it would have diminished the tackiness of the double sided tape. It turned out "just okay". Not as professional looking as manufacturer originally intended as there was no way to avoid any type of air pockets and it did not provide a smooth look. CONCLUSION: This product is way to thick to remain adhered to window by "cling" alone. It needs to have one side fully tacky, like contact paper, in order to look professional and bonded to window. As a result, there are other products out there that have the "stickiness" on one side which makes them successful over time. Until this product is corrected, I no longer recommend this product. Prior to the end of the 3 weeks, I purchased 2 more giant rolls to complete all the windows in my house. And with the missing the return window, I am stuck with a very inferior product. Again, I do not recommend this product. Consumers...look for a window application that has one side tacky like contact paper. DO NOT RELY ON CLING ALONE! --------- Original headline: "Application helpful tips!" Great product, does as claimed. As a 1st time user of this item here is what I have learned. You will need scissors & Exato Knife, tape measurer, yard stick, gentle window cleaner, water bottle, microfiber towel, squeegee (dollar store kind just fine), sharpee marker. 1) Tape measure window. 2) using permanent marker, mark & draw a cutting line with yard stick on the thick plastic backing of the window cling. Cut to measure. 3) Clean window with cleaner & microfiber cloth. Microfiber cloth will not leave streak and removes lint. 4) Now gently pull off the thick clear plastic from the cling, discard plastic. 5) Mist window & cling with a mild window spray or water.. I used a homemade window cleaner solution. 6) apply to clean window. Use squeegee to remove air bubbles, and excess moisture. Use microfiber cloth to soak up liquid dripping from applied cling. At this time use exacto knife to trim excess cling from window. 7) Re apply mist to window and re-squeegee as needed to promote a good adhesion. Key learning. Once cling applied I found that the corners would start to unpeeled. I suspect this is because the product has been rolled up and packaged like a poster. Consider cutting pieces days in advance and put something heavy on corners to encourage product time to stretch out.. thus reducing chance of corners pulling back from windows once applied.
E**C
Quick and Easy Install
This works very well. From the outside all they see is a mirror. NOTE: at night if your lights are on, it losses its mirror effect and you can see in (never found one that didn't). EASY EASY to install. You do not need all that extra stuff to install. I installed it by myself. To clean the glass: I used a solution of 1/4 cup vinegar and 1 cup water in a spray bottle and paper towels or newspaper to wipe clean. Do NOT use ammonia based cleaners. For the "Application solution" I used a spray bottle with soapy water. (about 1 tsp dish soap to 1 cup water and shake well). Tip: Measure the glass in the window, measure and measure again before cutting the film. Add 1/4-1/2 inch overlap at bottom and side. Use a razor blade to cut off any excess after set in place. Tip: This is a vinyl film. No adhesive needed. It static sticks and you can easily unpeel and reapply to line it up just right. I suggest peeling the backing about 1/4 down from the top. With both hands line up starting a one top corner and top edge and work your way downward. The soapy water allows it to stick yet slide a little as needed. I worked the bubbles out with my hand. Definitely recommend.
J**R
Total blackness
So worth buying totally blackened my room
R**E
It works as advertized
The product works without any adhesive, which is fantastic, cleaning the surface well will help and most importantly: since it comes rolled up, you first need to do some "unrolling" to flatten then sheen, otherwise the sheet will bed away from the glass and end up falling due to gravity. In my case 99% of the sheet adhered to the glass perfectly, and for the flaring edges I aplied a small tape to secure them
A**N
Very good quality
It takes some practice to apply to the windows especially large ones but totally doable. We have add it to all our west facing windows to reduce the afternoon glare. It stays in place securely and does a very good job keeping the strong light out while letting us look outside. Like other similar products, it turns into a mirror in the night so you can not see outside but people outside can see you. Priced in line with similar products.
J**P
It does the job - but you will have bubbles on your windows
So it has definitely kept the morning sun out of 1 room, but it looks pretty lousy with bubbles - I think these are unavoidable. Its easy to fit once you cut it. Instructions are fairly idiot proof .
T**Y
Top notch daytime privacy film but instructions could be better.
Got this to stop a very nosey neighbour from looking into my bedroom whilst I take a nap during the day. Very effective and look great from the outside. Instructions are scarce and it takes patience. Some tips. 1. Don’t worry too much about the size to cut. Just make sure the film is larger that the window you are going to fit it onto. It’s very easy to trim any excess film after it’s fitted to the window. 2. Use a table to measure and cut. Trying to do this on a floor will attract a lot of dust particles etc. 3. Make sure the window is very clean before applying the film. 4. Maybe use distilled water to moisten the window rather than tap water if you live in a limescale area. Also don’t use a sponge to apply the water, use a spray bottle for even water distribution. 5. Use a squeegee to squeeze out the water after fitting but wrap the squeegees rubber blade in a soft cloth to stop the squeegee rubber blade from scratching the surface of the film. 6. Yes, if you make a mistake it can be removed and reapplied. 7. After about a week, the film becomes more clear and less cloudy on the windows giving a nice look from inside also. I’m now looking for other places to use this film. Just love the way it looks on my windows.
D**E
Reflective Tint / Film
Found this easy to apply but keeping it free from airborne particles before getting it on difficult no matter how careful one is...
Trustpilot
2 months ago
2 weeks ago