Desertcart purchases this item on your behalf and handles shipping, customs, and support to Tunisia.
🕰️ Build Time, Build Prestige — Own the Clock That Ticks with Genius
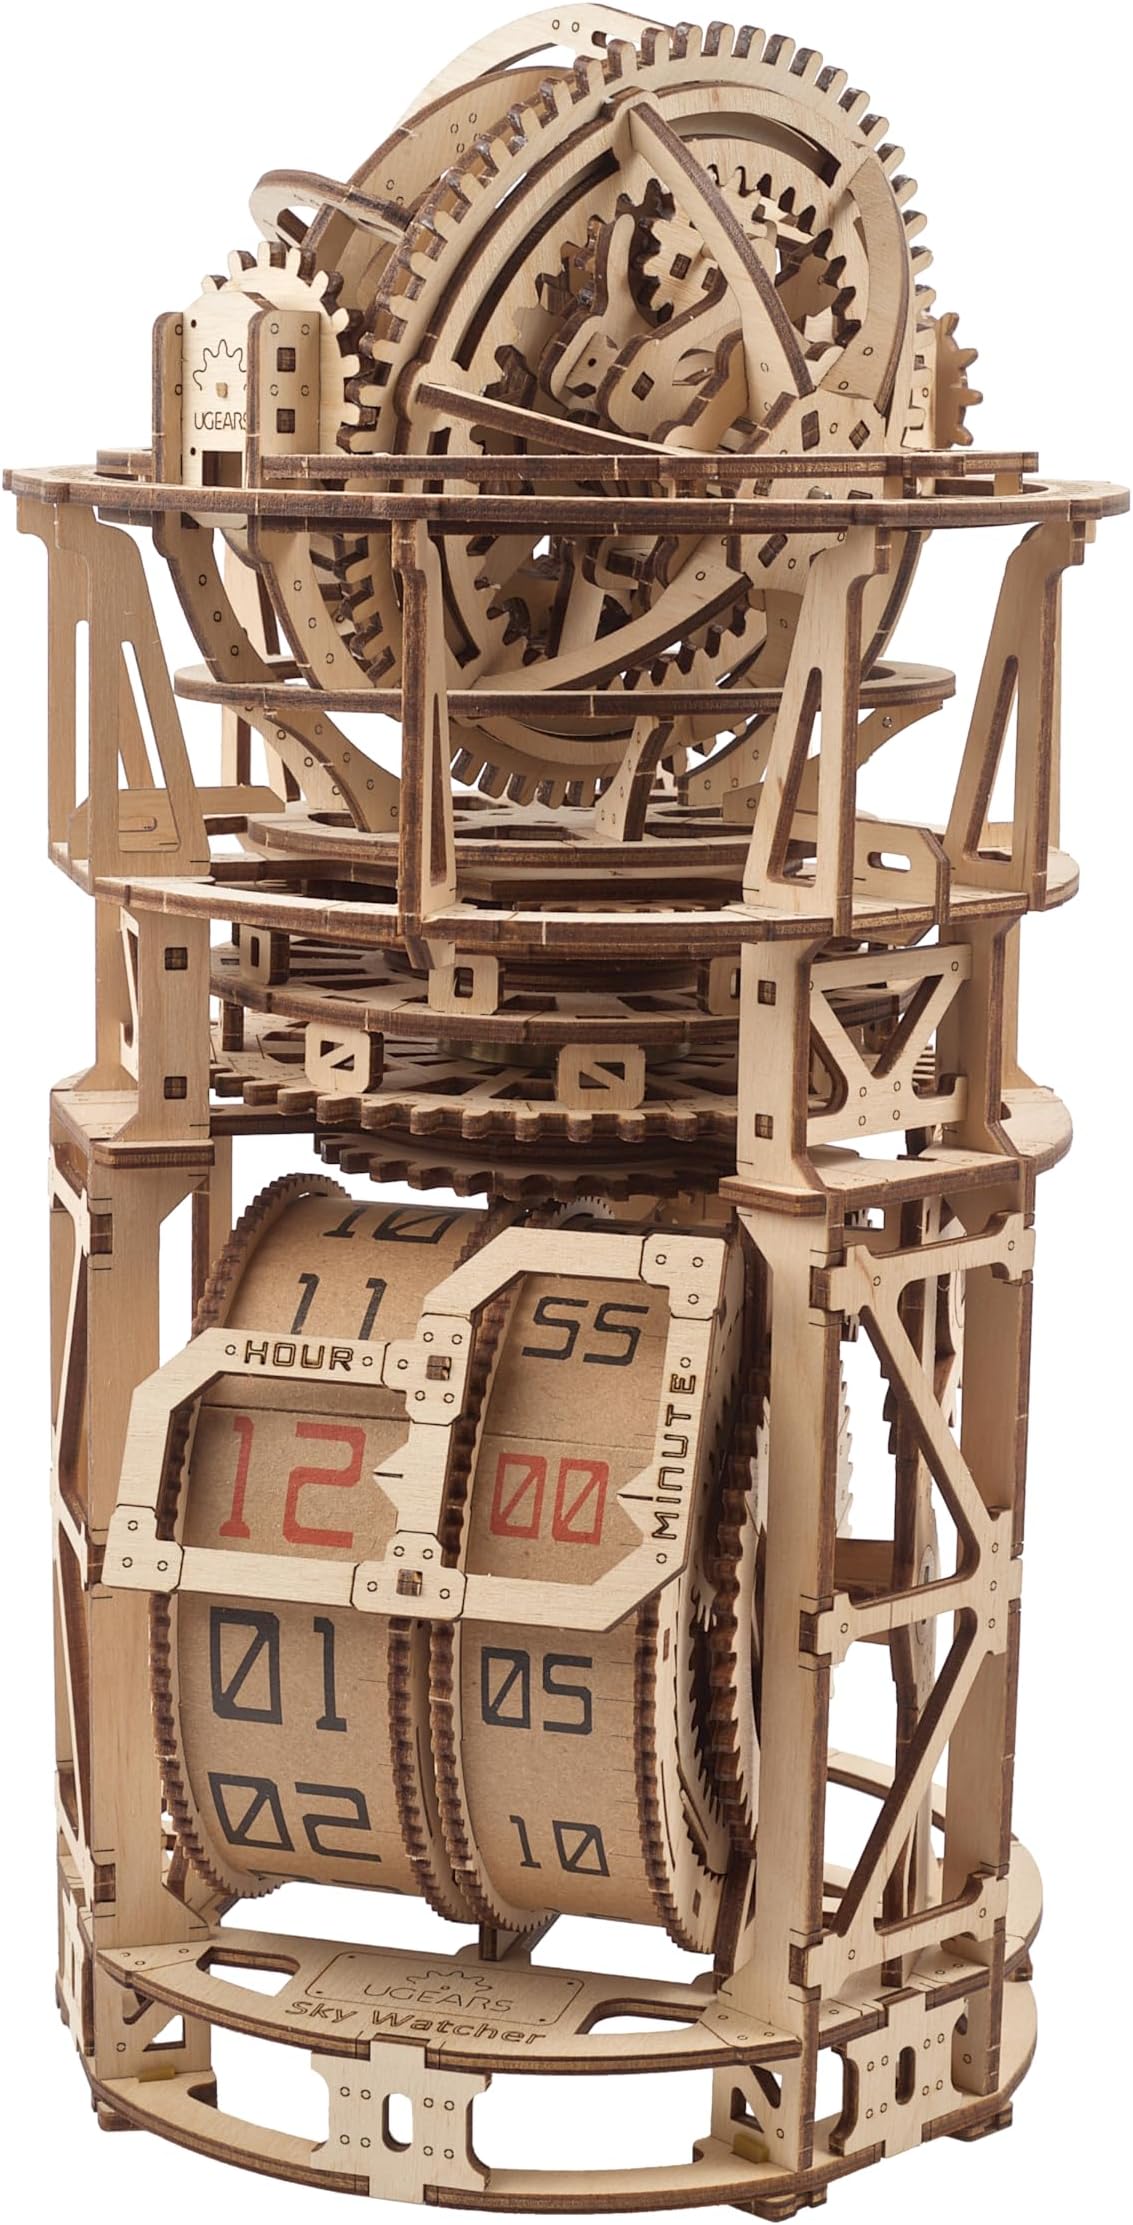
The UGEARS Astronomer Table Clock is a sophisticated 3D wooden puzzle kit featuring 338 precision parts and a gravity-defying tourbillon mechanism. Designed for expert builders, it assembles tool-free into a fully functional mechanical clock that doubles as elegant decor. This kit offers a challenging, educational experience that enhances logical thinking and spatial skills, making it a perfect gift and centerpiece for professionals who appreciate craftsmanship and innovation.


| Additional Features | Portable |
| Age Range Description | Adult |
| Asin | B09LGTWHKF |
| Best Sellers Rank | #116,188 in Toys & Games (See Top 100 in Toys & Games) #640 in 3-D Puzzles |
| Brand Name | UGEARS |
| Color | Wooden |
| Customer Package Type | FFP |
| Customer Reviews | 4.2 4.2 out of 5 stars (4,094) 4.2 out of 5 stars |
| Educational Objective | Logical Thinking, Problem Solving Skill, Spatial Awareness |
| Global Trade Identification Number | 04820184121324 |
| Included Components | 338 wooden parts and instructions |
| Indoor Outdoor Usage | Indoor |
| Item Dimensions | 12 x 7.1 x 0.04 inches |
| Item Dimensions L X W | 7.1"L x 6.5"W |
| Item Shape | Cylinder |
| Item Type Name | 3D Puzzle |
| Manufacturer | UGEARS |
| Manufacturer Maximum Age Months | 168 |
| Manufacturer Minimum Age Months | 168 |
| Manufacturer Part Number | 70162 |
| Material Type | Wood |
| Material Type Free | All materials other than wood |
| Model Number | 70162 |
| Number Of Items | 1 |
| Number Of Pieces | 338 |
| Operation Mode | Mechanical |
| Play Activity Location | Tabletop |
| Power Source | Mechanical |
| Product Style | Astronomer Table Clock |
| Puzzle Type | 3D Puzzle |
| Set Name | Astronomer Table Clock |
| Size | Moderate |
| Skill Level | Expert |
| Subject Character | Tourbillon |
| Supported Battery Types | No battery required |
| Theme | Building |
| Unit Count | 338 Count |
User
Fun build but difficult to get working flawlessly
Background:This is the second UGears model that I have assembled and just like the first one (Steam Locomotive U-460), the plywood quality felt very good and hefty and the engineering put into the model was very impressive.I purchased this clock thinking that all the lessons I learned from building the Steam Train would make getting this clock smoothly functioning in a jiffy. I was extremely wrong in this assumption.Assembly:My kit was missing the cardstock for the clock dials, but I contacted UGears's customer service and they mailed me the parts to me with no charge. Very nice!It took me 3 days to assemble since I spent the time to wax and sand for a soft finish on every surface (it is imperative that a 90 dollar kit should look and feel good). The build was very complex but satisfying to engage with. I however do recommend buying your own set of quality round toothpicks as I found the ones provided to be of quite low quality. Also, consider buying own your supply of paste wax as you will need a lot more wax than what the kit provides.The instructions for installing parts were clear, though I had to look online to understand some of what was happening when it came to the moving/calibration steps - the descriptions there were a bit lacking. Fortunately a QR code in the manual pointed me to videos that I found helpful.Tuning:It was daily process of fiddling with the tourbillon to figure out what needed sanding or further lubrication. After assembly without tuning, the clock would run for a minute at a time before seizing - which wasn't up to my standards.Learning how the mechanism works before fiddling with it and sanding down actual geometries is vital for not bricking this expensive puzzle. I did craft some parts myself, such as a cleaner pallet lever with lower friction gems and a longer guard pin essentially get near perfect performance. It runs as advertised now, keeping up power for 2ish hours before stopping. I am now extremely familiar with the Swiss lever escapement mechanism.If I had some final tips - it would be that friction is the enemy, and always know how things work before deciding to make permanent modifications.Conclusion:This is a very nice kit and the plywood is of good quality. Costumer Service was helpful in proving me with missing parts and had a fast response time. The toothpicks and wax provided are insufficient in quality and amount so it would be best to purchase your own. The Clock is unlikely to work well right after assembly and will require to be taken apart for further tuning. Perfecting the clock is time consuming process and requires a passing level of knowledge or mechanical intuition but doing so will result in a clock that runs as advertised. I recommend this to anyone with a passing interest in these sorts of things and the patience to back it up.
User
5 stars (with a disclaimer)
This was by far the most rewarding uGears model I've assembled (and I've built 10+ of them, including two builds of this one). Why? Well, most of my assemblies make great shelf ornaments, but this one made my wall look awesome for a full year before I had to take it down for reasons I'll get into below.Let's be clear, this is an advanced build, second only to the Endurance Racer in difficulty among those I've assembled. Don't pick this as your first foray into uGears. Follow the instructions carefully, and be sure to painstakingly sand/lubricate the parts called for in the instructions--and ONLY those parts, which I learned the hard way. Wax the wrong part, and you may make it stick instead of spin.A few tips:1. Soft pencil graphite works a lot better to lubricate the gears/sliding parts, compared to the wax shipped with the kit. It doesn't look as good, but the clock will run more reliably, and for longer.2. Use drywall anchors when you mount it to your wall. Be VERY careful about leveling it accurately, and expect to need a little more weight in the bag than the instructions call for.3. It'll take several days of running to figure out the right tuning to keep accurate time. Since almost every part is wood, it's responsive to weather (humidity and temperature) and will run slower a little slower or faster depending on the season. I usually could keep mine accurate to within 1-3 minutes for each time I wound it. It can run for about 12-18 hours on a single wind.4. Yes, it will eventually respond to physics (gravity + torque) and stop working, though with proper upkeep you can keep it running for a year or more. Unfortunately, even with the solid engineering on this model, pine plywood just isn't able to handle 4-5 pounds of constant tension for years on end.You can't keep it running forever, but I give it 5 stars simply because I think the eventual durability issues come with the territory of working with wood. I loved building and admiring this clock and would highly recommend it for both the quality and the fun of the build.
User
Highly complex and well engineered wooden kit, for meticulous people.
This is an amazing, well engineered wooden clock kit.It is NOT for people who don't have patience and a sense of meticulous order. I assembled the kit meticulously, sanding all gears lightly, and waxing with melted wax. Even so, upon assembly, I had to do a fair amount of lubrication (I used sewing machine oil, which I recommend).I spent maybe 15-20 hours assembling the kit and about 5 hours debugging running issues. I had to add an extra roller bearing to the orbital ring, there are two roller bearings, and the are both on one side, due to the force from the lower spring creating side loads on the upper ring to power the clock. I used spare parts (labeled +) which come with the kit. Note : there were only exactly enough tooth picks, no extras, and my kitchen tooth picks were not the same size, so don't mess up a tooth pick cut.Even with all this careful assembly and de-bugging, it does not run consistently. There is a very slight binding at the same point in the orbital cycle of the escapement mechanism, which I have spent hours trying to debug and I cannot solve it.So, take pleasure in the assembly, and marvel at the engineering, and accurate laser cut of the excellent quality plywood, but don't expect it to be a 24 hour clock. Youtube videos say others have gotten it to run 2-3 hours.
User
So much fun to build this clock
This definitely is the most satisfying wooden model I’ve built so far. My clock can now easily run continuously for 12 hours, and the time is only off by less than 5 mins. Pretty impressive for this type of clock!It only took me ~4 evenings to build it, but after that it took me a week to troubleshoot the issues. In this review I’ll mainly talk about my lessons learned. Hopefully they will be useful to some of you.1. I used a thin putty knife to check if the frame is pressing against any gear (I think a long cutter blade will work, too). You want to reduce friction between all moving parts as much as you can. In my case, I had to loose up a couple pieces slightly so that all the gears can turn smoothly.2. When my clock stopped running, I checked the gears one at a time to figure out which one was stuck and how. In my case, at the beginning of each hour, after the hot air balloon descended, sometimes gear #133 stopped at a bad position. A couple minutes later, gear #63 would get stuck with gear #133.- I figured I need to move the fishing line connecting to the hot air balloon a bit to the left, so that gear #133 would stop at a better position after the hot air balloon descended. I added a paper clip wire to two existing holes, and that completely fixed the issue. See the attached picture.3. At the beginning my clock could only run for ~ half an hour. I thought it would be a good idea to add wood lubricant (for drawers) to all the gears. BIG MISTAKE! The lubricant is a little bit sticky, which caused my clock to stopped completely within a few minutes. It took me days to remove most of the lubricant. Use candle wax instead to lubricate gears.4. I filled up the sandbag all the way to the top. A heavier sandbag helps to overcome friction between the moving parts.
User
A Fun project wooden clock kit
Excellent Kit for the advanced builder. Pieces go together easily, however, it can be difficult to make the clock run for any length of time without further finesse. One should expect to take the clock apart numerous times to clearance various parts. Reducing friction at every turn is the order of the day. Further, one must sand parts somewhat. Some parts that snap together may need to be left slightly open rather than pushing home. I did have to add a brace to keep this clock from racking on the wall. It is running on 4 lbs 10 oz... Might take a little more or a little less for your clock. It's a wonderful exercise. Lovely clock when finished. I had to finesse many spots, but now have it running 24-7 with the ballooh dropping on the hour. I pull the driving weight up at 9:00 am and 9:00 pm for non stop round the clock operation. So far it's somewhat problematic trying to adjust the pendulum for accurate timing. I'm running either a little fast or a little slow. Still the clock is a joy to have as a conversation piece. I think more accuracy is obtainable. I now have the clock within 2 to 3 minutes in 24 hours. Patience is required.
User
FAILURE
I over-sanded the escape wheel and the escapement. As a result, it slips or sticks. I've requested replacement parts, but they haven't arrived as of this post. Will update when they arrive and are installed.UPDATE:COMPLETE FAILURE. The spring mechanism exploded and shattered the entire clock. It was unrepairable. A waste of nearly $100. DONT DO IT.UPDATE: 8/23/23I received and installed the replacement escapement and wheel!Now it gets stuck even more than before..the escapement (the rocking lever that catches the teeth on the escape wheel) skips or slips amd locks up. I'm so disappointed.As a result, I've reduced my star rating to one star. While it's fun to assemble, it doesn't run.I'll continue to fiddle with it, but I'm not hopeful.9/1/23 UPDATE:FAILURE. I received the replacement parts finally. After VERY carefully replacing the escape wheel, escapement and associated parts I was finally able to get it to run almost a full revolution. Further tweaking, sanding, waxing and adjusting got it to run, by hand, for half a dozen revolutions. I then installed the tourbillon in the frame, added the hold-down parts and unlocked the mainspring. Something gave and the entire thing spun itself apart and shattered.TOTAL FAILURE.
User
Great way to spend some time, don't expect success
This is about the fourth UGEARS model I've built, and by far the most expensive and complicated. If you've built their models before, you know the routine: go slow, look at the diagrams _very_ carefully, and if something doesn't make sense or seem to work, take a deep breath and look at the diagram(s) again. They do a good job of illustrating the process. But, as I assembled this model I began getting increasingly concerned about the practicality of trying to make a complicated piece of machinery like this work smoothly when everything is made of wood. Wood isn't the most frictionless material around, and not the most accurate when it comes to critical dimensions. And, even though the kit does consist of very well-cut snap-out plywood parts boards, there are some pretty sketchy concepts involved in assembly, like using toothpicks for axles, and very unreliable methods for trapping the ends of the coiled springs that power the model - very easy to have them snap free under tension and render the model useless. If you need detailed written instructions, this isn't the kit for you; almost every step is presented in diagram form and you need to be able to interpret the visual data into usable assembly information. I did have to contact UGEARS' customer support to replace a missing part (I lost it) and to ask a question about assembly. They responded promptly in both cases.Long story short, got the model built, fiddled with it for a while to make sure parts were moving smoothly, cranked the mainspring as directed, something deep in the interior snapped and fell out, and this model will now serve as fireplace kindling when winter arrives.
User
I can't believe it really works!
This was a challenge, but really cool. I honestly did not think it was going to work even though I really worked on the sanding and smoothing the gears and various parts. I used a lot of wax. I read a ton of reviews and the more I got into the build the chances of it actually working got slimmer and slimmer. I figured it looked great just sitting there and if it didn't work that would be fine with me. In the reviews I read about some of the various modifications people were making. I only used one of part 128 instead of two. In some of the reviews they really seemed to know what they were talking about so I tried a few things. I had a heck of a time with the balance spring. I could not get it leveled out for my life. I didn't quite understand how to "reseat" the tourbillon. I played with it for about an hour or so but didn't really know if I did it correctly or not. After reading the comments on the flat spiral spring in regards to pulling the lock out after the initial install. I didn't know if it was going to fall apart or rip one of my fingers off. When I finally cranked it up to see if it worked I would have bet more than I care to admit that there was just no way it was going to go for a few seconds let alone a few minutes...but it really worked! Like the reviews said, it ran longer and longer each time. At this point it runs a little over an hour before it needs a little nudge. I never thought I would hear what it sounds like running in "real life" as opposed to hearing it on the videos. The entire build took about 12 hours(+-). I would work on it an hour or two every day or so. When something didn't feel right I would put it down and come back to it later. I've only done five puzzles total. The first four were the moon buggies and rovers. After that I built the Wood Trick Wooden Marble Run. Watching one of the videos on that is where I saw this. I decided to go ahead and give it a try. Like the reviews said, TAKE YOUR TIME and enjoy the process. I had a great time with the build, that it actually works is a huge bonus for me.This thing is great, however it is not for kids. The laser work is extraordinary and the quality is impressive. All I know is that it works and I have never attached a video to a review...till now. At 66 I never thought I would enjoy a "toy" as much as I did at this point in my life.
User
Super fun project
This is the first time I’ve built one of these wooden models, and I gotta say it was super fun. Instructions were pretty clear for the most part and the end result feels like a solid mechanism. Didn’t break anything and got all the strings set up without too much trouble. It looks great, especially when it’s in operation.All that said, don’t expect it to work smoothly without putting in some extra effort to fine tune it. It’s super important to sand all the places that are indicated in the instructions, as well as any gear faces that may pass against the static supports. Especially important to sand the pendulum and escapement gear. The wax included in the kit is tricky to apply properly to the gears, so I got some candles from the dollar store and applied melted wax with a paint brush. That took a bit of time but overall it was enjoyable.I’ve spent a bit of time trying to break the clock in, and so far I’ve been able to get it to go for about 15 minutes before I need to give it a slight nudge. It’s improving quickly with more use though, so I’m feeling optimistic about it breaking the hour mark by the end of the week. Edit: 1 day later and it’s going for more than an hour now at a time now. Didn’t do anything except keep nudging it along to break in the mechanisms.I’d gladly build more of these models if I had the space for it!
User
Entretenido de montar
Todo bien. No es difícil de hacer y pasas un rato entretenido. La pena es que el reloj no funcione las 24 horas, si fuese así se acabarían desgastando las piezas
User
Formidabele bouwuurtje's uurwerk
Heel mooi. Wel voorzichtig ermee zijn. Ben er druk mee. Fijne tijdsbesteding. Hoge kwaliteit en duidelijke omschrijving. Prima product.
User
Exceptional
I don't do reviews, but in the case of the Ugears aero clock I just had to make an exception.The design and construction of this kit is definitely on another level. You get what you pay for in life. The build quality is of this kit is at the highest level.All I would say to would be buyers is take your time. Yes you could probably have it all together in a far less time than the 11 hours indicated by Ugears, but the result would certainly not be a working clock.Care and attention to detail are required. Sand all rough edges and pay particular attention to those parts with mating surfaces. Anything that rubs against or contacts with another part benefits from more attention when sanding and waxing. The smoother the better.The instructions are excellent, but in my case I had some difficulty in understanding the cord winding. Youtube did however quickly solve my problem.The end result is fantastic. Visually a work of art. A work of art that actually keeps good time and a pleasure to watch as the hour sees the balloon quickly descend from its slow rise over the hour.Personally I would not consider this kit as complex. Not for a child that wants quick results, more suited to teenagers and budding teenage adults who want to spend time creating something to be proud of. If youtake your time and follow the instructions carefully you will love what Ugears have helped you create.Looking foward to my next Ugears kit. Have made many hints to Santa
User
Excellent kit, and works great!
I've built quite a few laser cut wood kits (marble races, clock, toys, etc), and this is the best so far. It was a real pleasure to build. The instructions are excellent. After a bit of fine tuning the clock keeps pretty accurate time, with run times of about 19 hours before I need to reset the weight. The wax stick that comes with the kit is not great (and is very small). Instead of hard wax, I used soft furniture wax, which was great for waxing the teeth of all the gears.The one small drawback with the clock is the setup of the faces. They're not easily read from a distance. I've set up 15 minute markers behind the balloon, which makes a fun (but not very accurate) way to read the time from further away.Further note: I have modified the string for the weight, and am now getting run times of 21 hours.
Trustpilot
1 week ago
4 days ago