Desertcart purchases this item on your behalf and handles shipping, customs, and support to Tunisia.
๐ช Elevate your space: privacy, protection, and style in one sleek film!
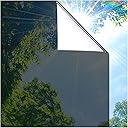
Coavas One Way Privacy Window Film offers a cutting-edge static cling design that blocks 92% of UV rays and rejects 95% of heat, turning your windows into daytime one-way mirrors for ultimate privacy without sacrificing your view. Easy to install and remove without damage, itโs ideal for renters and homeowners alike, reducing glare and cooling costs while protecting furniture and pets from sun damage.


| Asin | B0BN88M7K5 |
| Best Sellers Rank | #5,289 in Home & Kitchen (See Top 100 in Home & Kitchen) #19 in Window Films |
| Brand Name | Coavas |
| Color | Black-silver |
| Customer Reviews | 4.2 4.2 out of 5 stars (12,835) 4.2 out of 5 stars |
| Installation Type | Static Cling |
| Item Dimensions L X W | 78.7"L x 17.5"W |
| Manufacturer | Coavas |
| Manufacturer Part Number | 151-45200 |
| Material Type | Vinyl |
| Model Number | 151-45200 |
| Number Of Items | 1 |
| Number Of Packs | 1 |
| Size | 17.5 x 78.7 Inch |
| Ultraviolet Light Protection | UV protection 92% |
| Unit Count | 6.5 Square Feet |
User
Great film, a few tips
Great window film for day time privacy, room darkening (mild to moderate) and energy savings! I bought this film for a west facing bedroom that gets a ton of sunlight and heat in the summer. It is great! When the sun is shining it is like a mirror finish with total privacy. Be aware that the way this particular film works is based on the light, so if the room has more light than outside it does not offer privacy. I knew that going in so I was okay with this. Also, different reflective films block the sun more or less, I have ones that block less on my west facing doors, but I wanted darker (while still being able to see out) for this bedroom window, so I chose this tint.The application is easy, but a few tips will help a lot. First, make sure your window is completely clean. Then use a lot of soapy warm water. I apply it with a rag. I find it is better to deal with a little water mess than not have good adhesion. I use a utility knife to trim and a squeegee to help get air bubbles out. Small areas (like half a double hung window) will be easier to get the air bubbles out than large areas (like a picture window). Be patient. Also, if you are using a large film, it can be helpful to have someone else position it, but not impossible.Use tape to pull off the clear film (or cut off the edge if you bend it to get the film off). Make sure you apply the film to the inside of the window. Make sure the reflective side faces outside.This brand worked very well ( I have used many) and had just the right thickness. There is customer support and videos if this is your first time doing this sort of thing. I love that there is no adhesive, it works with static cling (I do recommend using soapy water) so there is no commitment. Great purchase!
User
So happy with this privacy film! Easy to install!
I was a bit skeptical about these when I read some of the reviews that said this was hard to apply, but I figured for $10 bucks a pop, I would give it a try. The quality of this vinyl is very good. The vinyl is much thicker than I expected, and the pattern is actually textured onto the vinyl. I have two large windows on my back doors, and I have had a neighbor snooping around behind my house, so it was time do to something. This was easier to install and more affordable than blinds or curtains. I followed the directions carefully, which included removing the protective plastic sheet from the inside of the film, cleaning the window very well beforehand, and using water spray on both the vinyl and the window before applying. This process was very easy, but do it when you have time to be patient.My tips for installation.* I had also purchased a special felt squeegee kit (HTVRONT brand) for about $9 with sprayer bottle and exacto knives to help with the installation, and that made it much easier--worth the money to get that. I know some others have mentioned using a credit card as a squeegee, but I think it would be more difficult considering the textured pattern on the vinyl.*Measure the window to determine the size you need and then cut the vinyl before removing the protective film. My only complaint about this product is that there are no gridlines on the back to facilitate straight line cutting.*If the vinyl isn't where you want it to be, you can reposition if you have used a lot of water, and if not, remove it, add more water, and reapply.*Use a lot of water spray on the window and on the decal. If you have a decent squeegee, and I found this worked great with a felt squeegee, you will remove all the excess water. Once the vinyl was positioned where I wanted it on the glass, I spent a lot of time squeegeeing from the center of the vinyl to the outside, and then I would use a towel to wipe away the water that came out from the sides. In this way, I was able to remove ALL bubbles under the vinyl. It takes a bit of time but it totally worth it.*Before you finish squeegeeing, try looking at the vinyl in different lights and angles so you can find any bubbles you didn't see initially. Then squeegee them out.From start to finish, including measuring and cutting, it took me about 45 minutes to install these on the two windows. Several days later, even with crazy temperature variations outside, it is stuck fast with no peeling or bubbling and looks fantastic.What I like the most about this privacy solution is that if I change my mind about having that window covered at another time, I could easily remove the film.Highly recommended.
User
Privacy!!!
I bought this film to cover up a window for a little privacy and it was absolutely perfect, easy to install, no residue. The room instantly felt much cooler.I was so happy with my purchase that I ordered 2 more rolls of window film to cover up a bedroom window, the second roll was even easier, took me less than 15 minutes to measure & install but the 3rd roll was a challenge it had a small crease I didnโt think it was a problem but when placed on the window I could not remove what seemed like water bubbles, I kept trying to smooth it out with no avail, I removed the film thinking it was my window but quickly realized the film had dried water spots all over, both sides were done only minutes apart, the right side looks perfect and smooth, the left side looks wet but it has a dried on soapy water spots. Mind you I didnโt use soap to clean my windows only water, Maybe it was a faulty film. It was hard to take pictures of how it looks in person, the second picture shows how cloudy it looks. I will be requesting an exchange, that is the only reason why I removed 1 star.
User
Makes Huge Difference!
This window film is very effective. i was looking for something to cut the morning sun and heat in my east-facing window and WOW - it made a noticeable difference and it looks really good. I like that it is static cling and can be easily removed this winter if I want. The film is thick and easy to work with. You do have to remove the clear lining, which can be awkward but it is simple enough to handle. It is silver on the outside and completely private. (In my photo this was my first try and i was able to make it better after this photo)One photo shows the difference with and without the film, looking out the window. I recommend getting the installation kit or using a fresh exacto blade to cut the thick film. I actually purchased this again for a second window!
User
Works as advertised
Privacy and helped reflect direct sunlight and heat. Need it for apartment that has no AC. Easy installation, you just need a spray bottle, pen knife and window film squeegee.
User
Buyer beware , not for double pane windows.
Buyer beware. This product is not recommended for use on double pane windows. ๐ชI did not know this. It wasnโt stated in any description or instructions here . It was however noted on the instructions that came with the product. I had trimmed a sample piece to practice applying it. I read the instructions and it said it will not work on double pane windows, or frosted glass.I went ahead and applied the sample piece.The product is as described. Was very easy to apply . Yes it was a small strip , but I could tell it wasnโt going to be complicated to apply full size.Definitely would suggest two people for smoother application.It looked so cool on my window. I stepped outside and it had the mirror look.I def recommend this product as long as your windows are not double paned or frosted.I returned it with no problems, which I am most grateful for.Very easy to use. Simple instructions. Easy to trim.
User
great when it works...aggravating when it doesn't
First off, I bought this product in 2 sizes. The smaller size worked perfectly, and was beautiful once applied. The larger size deserved 2 stars because of the struggle with it.The problem with the larger version of this product was ENTIRELY in its packaging. The product itself worked fine once I took it off the roll, and wrapped it back on the roll on the reverse side, and spent a week waiting for the vinyl to reshape itself around the roll.This product has 2 side. As smooth slick side and a textured side. You absolutely CAN NOT stick it to the window on the textured side. It must be stuck to the window on the smooth side (makes sense, since it clings to the window surface without adhesive). You will experience problems with this product if it comes to you wrapped on the roll the wrong way. If you unwrap it, and the first thing your fingers feel is the smooth surface, you need to take it off and wrap it back on the roll such that the smooth surface is tucked into the roll and the textured surface is on the outside. If you get the roll with the smooth on the outside, when you try to put it on the window, it will curl off and away from the surface of the window (because of how it's packaged, if the textured side is in, the textured side is shaped to "hug" the roll. You want smooth side hugging the roll so that smooth side will hug the window, not curl away from it).I'm rating this a 3 because when it works, it works beautifully. It lost points because of the struggle I went through to discover this, and the fact that I had to repackage the product and wait a week for it to work. I'm honestly still pretty agitated about this, so they're lucky they get a 3 star review from me. I hope these tips save some aggravation for anyone else having trouble with the window film peeling away after a day or three. The stuff that came to us properly packaged had absolutely ZERO problems. So if you notice peeling, try wrapping it back on the roll and leaving it for a week to re-train the vinyl on which way it should roll.
User
Thicker product, but easy to work with
I used this product on one side of a sliding door. This product is thicker, much like a tarp, which may translate into better insulation and ray deflection. I had recently worked with two competing products, one thinner and one thicker, and this is superior to the competing thicker product and on par with the thinner product. Both thicker products darkened the incoming light, it's a matter of your preference (I had not thought about that ahead of time, but would recommend doing so). Surprisingly, this product had no problem with curling (pic 1), making it easy to work with, no wrestling or having to roll it the opposite way and using office clips to keep it that way, at least overnight, like its competitor!There are no tools included in this one as the thinner option offers, but it helped for me to have done three pairs of windows before this one in terms of the amount of time it took.My modified instructions are: (1) Decide a large smooth surface where youโre going to measure the material, and sweep its dirt off first. I used a laminated wood living room floor near the target window. (2) Measure the window, ideally with a long straight edge (pic 2, I forgot about that straight edge before!) that's as long as one of your dimensions; (3) Clean the window(s) youโre using this product on; (4) Gently lay out the product. You will only need one or two heavy things to weigh down the edges due to this product's minimal curling. A floor lamp or overhead light will help you see your marker marks. Using an erasable marker, with measurements a marker width wider than what you came up with in step 2, mark the product for the shorter length cut (typically to the length of the slider in my case). It's easier and thus a good morale builder. Cut that side, I used scissors. (5) For the longer edge, assuming that your window is narrower than this product, pick which side (left or right) you're going to remove the excess off of based on which has the most defects (pic 3). You may need a soft sofa, chair, or person to help you do the longer cut, for laying the product on as you cut your way through it. (6) Optional: wipe off your marker marks. (7) Hold what you cut on the window (dry) that youโll be putting it on for checking your accuracy. If itโs slightly off, use that on the top of the window (have the โoffโ part where it would be least noticed). With this product, due to its thickness, it's best to cut the extra, it's best to use scissors. (8) Clear out the area in front of the window. Fill a spray bottle with water and lotion (not detergent), mix well so that itโs relatively clear. Place a towel in front of the receiving window, and generously spray the receiving window. (9) Peel off the back of the product- they include tape, fingernails worked fine for me, whatever works! This will be challenging for a sliding door window due to its length. (10) Hold the film over the towel thatโs near the window and generously spray the side you just exposed. (11) Apply the product to the top of a sliding window and let it hang down. (12) Wrap a squeegee with a washcloth/hand towel to avoid scratching the product and work your way down to first remove the bubbles and water and second to apply the product. Don't let striving for perfection get in the way of very good, there's usually no significant difference (pic 4, after I tried it a second time). With this type of product, as long as you cover 99% of the window, you're good! (13) Press around the edges to force the curl away from the window. (14) Due to this product's thickness, getting as close to size is preferable. Scissors worked better for me than a utility knife, for you can easily make a mistake with the latter, including on the frame if it's made of vinyl. (15) Relax, you did it! Okay, one!Darkness: noticeable difference. That was my primary motivation for doing this work.Heat gain: the thicker material seems to make a difference. I put this product on the westernmost sliding door window due to it getting the stronger afternoon rays.Big suggestion: don't order more than one of these products, especially if they're the same width, at the same time OR label them when they come in. I did not, and this product ended up on a different window than it was intended, but on the other hand was much, much easier to work with and install than the other one, which ended up in, fortunately, a more obscure location.

User
Bonito decorado
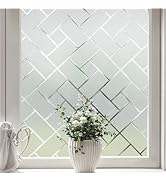
Relativamente facil de instalar, la pelรญcula es un poco gruesa por lo que cuesta cortar los pequeรฑos detalles, drnn tener cuidado cuando ya le sacaron los residuos de agua pues aรบn se puede mover. El decorado es muy bonito no se transparenta mucho por lo que si la van a instalar en lugares con poca iluminaciรณn deben tener en cuenta eso.
User
Great, fairly easy to use product with a nice pattern.
Great product, fairly easy to use but can become a bit fiddly to get the backing plastic off. I've used it in the front room with about 1cm left of the window framing the frosted area (so we can still kind of see what's going on LOL) and the only thing that would make it even better would be to have a white backing paper with straight lines every 0.5cm (a bit like the sticky plastic for schoolbooks) so lines would be very easily cut straight. But with the nice geometric pattern even the wobbly lines are barely noticeable. I would definitely recommend this!
User
Great Product
Looks great and super easy to install. Just cut to size, apply some water on your window, stick the film on and trim edges with a craft knife. Took the best part of 10mins and completely transformed my kitchen window.
User
Like the design as a lot of poor designs out ...
Just the privacy we need in the bathroom. Like the design as a lot of poor designs out there.
User
Excelente
Muy buen producto cumple con lo especificado
Trustpilot
1 month ago
5 days ago