Desertcart purchases this item on your behalf and handles shipping, customs, and support to Tunisia.
🔥 Seal your seams like a pro — stay dry, stay unstoppable! 💧
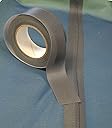
The T-2000X Seam Sealing Tape is a 5-meter, 22mm wide hot melt tape designed for professional-grade waterproof seam sealing on 3-layer breathable fabrics including Goretex. Featuring a nylon 66 tricot backer and a specially formulated adhesive, it delivers reliable, durable waterproof protection with easy iron-on application—perfect for repairs, patching, and small-scale production.
| ASIN | B00YP68U84 |
| Adhesive Format | hot melt |
| Adhesive Location | on_tape |
| Adhesive Side Count | 3 |
| Best Sellers Rank | 26,083 in DIY & Tools ( See Top 100 in DIY & Tools ) 116 in Duct Tape |
| Brand | WBM Seam Tapes |
| Colour | Navy Blue |
| Compatible Material | 3-layer waterproof breathable coated / laminated textiles (PU & PTFE - compatible with Goretex and virtually all fabric brands) |
| Country Of Origin | United Kingdom |
| Customer Reviews | 4.4 out of 5 stars 336 Reviews |
| Item Resistance | waterproof |
| Lower Temperature Rating | 135 Degrees Celsius |
| Manufacturer | WBM Seam Tapes |
| Manufacturer Part Number | T-2000X-22-NB |
| Material | Nylon |
| Model Number | T-2000X-22-NB |
| Number of Items | 1 |
| Number of items | 1 |
| Other Special Features of the Product | Strong, Waterproof |
| Recommended Uses For Product | Repairs, Patching, Sewing |
| Recommended uses for product | Repairs, Patching, Sewing |
| Size Name | 22mm Width |
| Special feature | Strong, Waterproof |
| Surface Recommendation | Multi Surface |
| UPC | 642968094211 |
| Unit Count | 5.0 meter |
| Upper Temperature Rating | 150 Degrees Celsius |
| Water Resistance Level | Waterproof |
N**S
The tape was easy to put on and sealed well but time will tell if it stays
The tape was much easier to put on than I thought it was going to be. The tip I read about putting a strip of wood under your garment to raise it and get a solid base to iron in worked a treat. I put the iron on no-steam medium hot 2.5 with 3 as max. Place the strip on seam. Hold in place and use the front of the iron to seal it in place. Then go back over the tape to stick it on properly, making sure you put the iron right to edges until you see the glue coming out to make sure it's properly stuck down. I used greaseproof paper to protect my waterproofs but not sure it's needed. The tapes seems solid enough and sealed well but time will tell, especially after a wash.
H**O
Very good quality
I bought this to repair the damaged (10 years old) seam sealing tape at my Dynesse Gore Tex motorbike jacket and trousers . The quality of the product is very good. I made the repair twice. The 1st time I applied it using the iron at a medium temperature by pressing it for about 5 sec but it didn't stick well. The 2nd time I applied it using the iron at a medium to high temperature (at the point where the iron starts to steam) by pressing it for 10 seconds until a little amount of the glue showed at the edges of the tape. By doing this, tape stuck very well and no water passed through during a rainy day I tested it. Unfortunately, because of the material feeling of the Gore Tex fabric (it has a silicon feel at touching) and the position of the fixed area ( inside of the arm where it folds) the tape after 10 days of everyday use, started to unstick lightly at specific areas, without loosing its waterproof abilities. Maybe it unstuck only at the edges. In my opinion, if the repair was at an another area of the jacket that doesn't fold all the time, it would probably had been stuck better, because at the Gore tex trousers it stuck very strong and until now it has no problem. Here and some photos of the repair. 1st photo is from the jacket arm, 2nd is from the trousers and the 3rd is from jacket after several days. So I will surely try again until I succeed the better result. I 'll give to this product a rate of 5 stars ( I was thinking to give 4), only because I think that maybe I didn't make a proper application.
J**R
Good quality
Good quality
D**Y
Fiddly but seemingly effective
Seems to work, I’ll let you know when I’m chest deep in the River Spey.
M**R
Does the job well
Bought this to repair an older jacket. It has been easy to apply and appears well stuck, sealing the seams as expected. The only snag is I need more. So ordered another roll as this is so much less expensive than a new jacket.
S**N
Worked really well
I had to replace all the taped seams in a Goretex bivy bag at short notice. Ordered this product not knowing if it was going to work but fortunately it was easy to use and I ended up buying another roll to finish the job. Very easy to use and applied with a normal household iron. Use it on a hot setting but don’t use steam and the beauty of this tape is you don’t need to use a cloth over the top so you can see exactly where it’s going. The tip of the iron is precise enough to apply heat to the tape and you only need to apply heat long enough to activate the adhesive. If it’s not on long enough it’s easy to see where you need to re do it and if there are little bits that need redoing you just run the iron over it again till it’s done. So far the adhesive looks to have worked a treat and no signs of peeling off. Not had chance to test waterproofing in a real setting or in very cold temperatures but have no reason so far to doubt it’s effectiveness.
A**T
Straightforward but Worth Taking Your Time.
I have a 23 year old SprayWay jacket that is still in great condition, no tears or anything like that, but the seam tapes are completely shot. I needed to re-tape the entire jacket and the standard 5 meter length is not enough so I will buy another roll. What I managed to re-tape was pretty straightforward, even if it was time-consuming. Here's what I did: 1. Washed the jacket, which also loosened some tape I hadn't spotted, so I recommend this before you start. 2. Waited for the jacket to dray and cleanly cut any loose tape to thoroughly prepare the jacket and ensure the new tape would stick completely. 3. Started with short stretches of tape until I was used to how it would stick. I also started with straight seams before tackling the collar and curved seams in the arms. 4. I used a travel iron so I could get into the nooks & crannies, curves etc. I also placed a hard mat between the ironing board and the jacket so I could put some pressure down on the tape to make it stick quicker and avoid any creases. 5. I 'tacked' the tape in place before sealing completely. I held the iron for about 10 seconds in each spot. 6. I squeezed the tape to the edges in the same way I would squeeze air bubbles out of a mobile phone screen protector. This ensured the glue evenly spread and sealed the edges. 7. I could see I was running out of tape so I made sure the areas of the jacket that would get wetter than others were sealed first, e.g. shoulders, collar, arms. 8. Once I'd finished, I re-checked the seams and sealed any bubbles or loose edges, fortunately not many. 9. The whole process took about 90 minutes. It was worth taking the time to get it right. I'm going to leave it a day before I re-proof the jacket, and assuming the tape holds, I'll buy some more and finish the job off. All in all, I had no problem cutting the tape to size and ironing it in place.
T**D
Fiddly job but well Worth the £15 cost.
I used this on a 30 (yes 30!) year old three layer Goretex Sprayway mountain shell jacket where the original seam taping across the collar had lifted and edges of original taping had lifted in places. Very successful. It’s a bit of a slow fiddly job and patience needed but results very good indeed. Tip - get a foot long piece of 2”x1” wood to put on the ironing board under garment and the length of seam being repaired. You can adjust position of garment and wood strip as you go.This lifts the seam above the rest of the garment giving you a clear run with the iron, a hard base to iron on and helps avoid touching the rest of the garment with the iron. I set the iron a little over the two dot medium heat setting which wororked for me. You can cut the new seam tape to make a narrower width if required. Cut its length to a bit more than the length of seam being repaired. You can trim later if it’s a bit too long. You’ll find that you miss little bits with the iron so inspect the repaired areas carefully especially edges and go over any unstuck edges carefully with the edge of the iron. In places Where the original seam tape was only lifting slightly at edges I cut the new taoe into narrower strips, about 1cm wide, and used these just to seal over the edges of the original tape. The jacket is now good for another 30 years?! So the £15 was well spent to get what is now equivalent to a £300 jacket fit for purpose again. An amateur repair but this tape enables results probably not far off a more costly professional repair.
Trustpilot
4 days ago
2 weeks ago