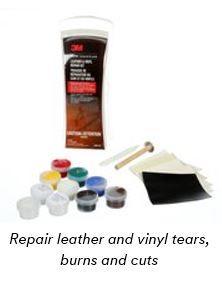
The flat blade screwdriver in my back pocket ripped my grey leather car seat when I sat down. Listen to your Mom when she says don’t put tools in your back pocket. I practiced this repair on an old leather ottoman with a couple of long rips. Was very pleased. The repair on my leather car seat was very good, and is better than the rip. It’s not perfect, but this is a repair kit, not a magic kit, and results were very good. Practice brings good luck. MY EXPERENCE and RESULTS follow: TIPS from my experience: The mystery repair compound is heat curing. It will not cure properly without substantial heat. Also, if left in the open air, it will start to solidify. After 24 hours it will start to become a sticky, clumpy, lumpy mess, so don’t leave the compound out in the open air. The compound is not paint or “color”- it is a heat curing “polymer”. It had the consistency of really thick honey out of the container. It is very prone to stringing, so be careful not to drag strings of compound over the good part of your repair piece. The uncured compound can be wiped off with a paper towel. I suspect that if left on long enough, the wet compound will permanently stain due to the color in it, so be careful. If there are voids/ pits, crevices after the first repair, you can add more compound and heat cure it right over cured compound. THE HEAT DISK: The heat disk will hold heat but will rapidly cool if you are using it outside with a breeze. If you wait too long to apply the heat disk, the disk will cool to the point of not being hot enough to cure the compound. So, have your heat source next to your repair. Pictures and reviews from unsuccessful repairs clearly showed that the material was not sufficiently heated with the heat disk. A hair dryer is not sufficient! The compound needs some concentrated heat to cure. I heated with the disk several times before removing the graining paper with great results. COLOR MIXING: The most challenging part. I placed a piece of clear box tape over the good part of my repair piece. I then applied my color-mixed candidates onto the clear tape to evaluate the color match. Both repairs I made (light grey and dark brown) had a pretty close color match in the end. GRAINING: To get a proper grain, the graining paper has to be LIGHTLY PRESSED into the WET compound before applying the heat. If disk is too hot when placed on vinyl, it will iron out the vinyl grain of your item and it will appear smooth. Practice with small spots of wet compound on the vinyl sample supplied! MIXING THE COMPOUND for REPAIR: I mixed my compound on a paper plate. The paper plate provided a nice surface where I could mix different color palates (different shades) on. I could easily pull a small amount aside and lighten or darken it, or tint it with other colors. I could then put a dab of several candidates onto the clear tape, placed over the good part, to see how good the match was. APPLYING the HEAT WITH THE DISK I applied heat to the disk and then applied the hot disk to the graining paper, constantly moving the disk over the repair area for about a minute. My best result was with applying the heat several times, letting the paper cool then removing the paper. Use a light moderate pressure to get a good feathered edge around the compound. Too much pressure and you’ll squish the material out past the repair. Too little pressure and too much heat and you will get a lump of cured material without graining: not too hot, not too light, not too heavy: PRACTICE A COUPLE OF TIMES TO NAIL THE HEAT AND PRESSURE. I used a propane torch to heat the disk. I got best results with heating the disk a COUPLE OF TIMES for maybe 5 seconds each, allowing the heat to distribute for 10 seconds in between, before applying to the graining fabric (first try, disk was way too hot and burned the graining paper and the material cured in a lump). To gauge the heat, I used a clean paper plate, with my heat-sensing-thumb under it, and quickly pressed the disk on the paper plate, over my thumb. If the disk is too hot, it will burn your thumb, and the paper plate/ graining paper. If the paper plate turns brown, it’s too hot: wait a couple of seconds and apply it again, then place onto the repair. Too hot and you’ll iron out the graining from your vinyl. Not hot enough and the compound will be sticky. If the heat wasn’t suffient, just apply heat again. Practice on the sample! VOIDS AFTER CURING? On the brown leather ottoman with rips, the ends of the torn leather were curled, and would not lay perfectly flat. After my first heating session, there were voids. I re-applied wet compound to the voids and re-applied the heat disk. I had to fill voids in the cured compound several times because I couldn’t get the leather flat. It worked like a charm, you can’t tell I applied compound multiple times. The repair built up very well (I didn’t use the adhesive to fill the voids). SHEEN: If the finished, fully cured repair is too shiny, use a pencil eraser to dull the shine. If it is not shiny enough, apply a tiny amount of paste wax or clear shoe polish and buff. Practice on the sample and you will see exactly what I described, and you’ll be able to nail your actual repair. I would highly recommend this kit to my rowdy back-pocket-tool-toting friends. Good luck….