Desertcart purchases this item on your behalf and handles shipping, customs, and support to Tunisia.
๐ Elevate your lash gameโbecause your eyes deserve the spotlight!
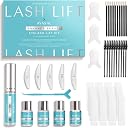
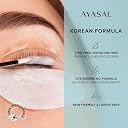
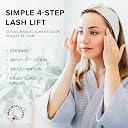
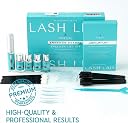
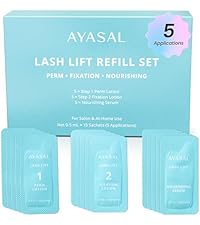
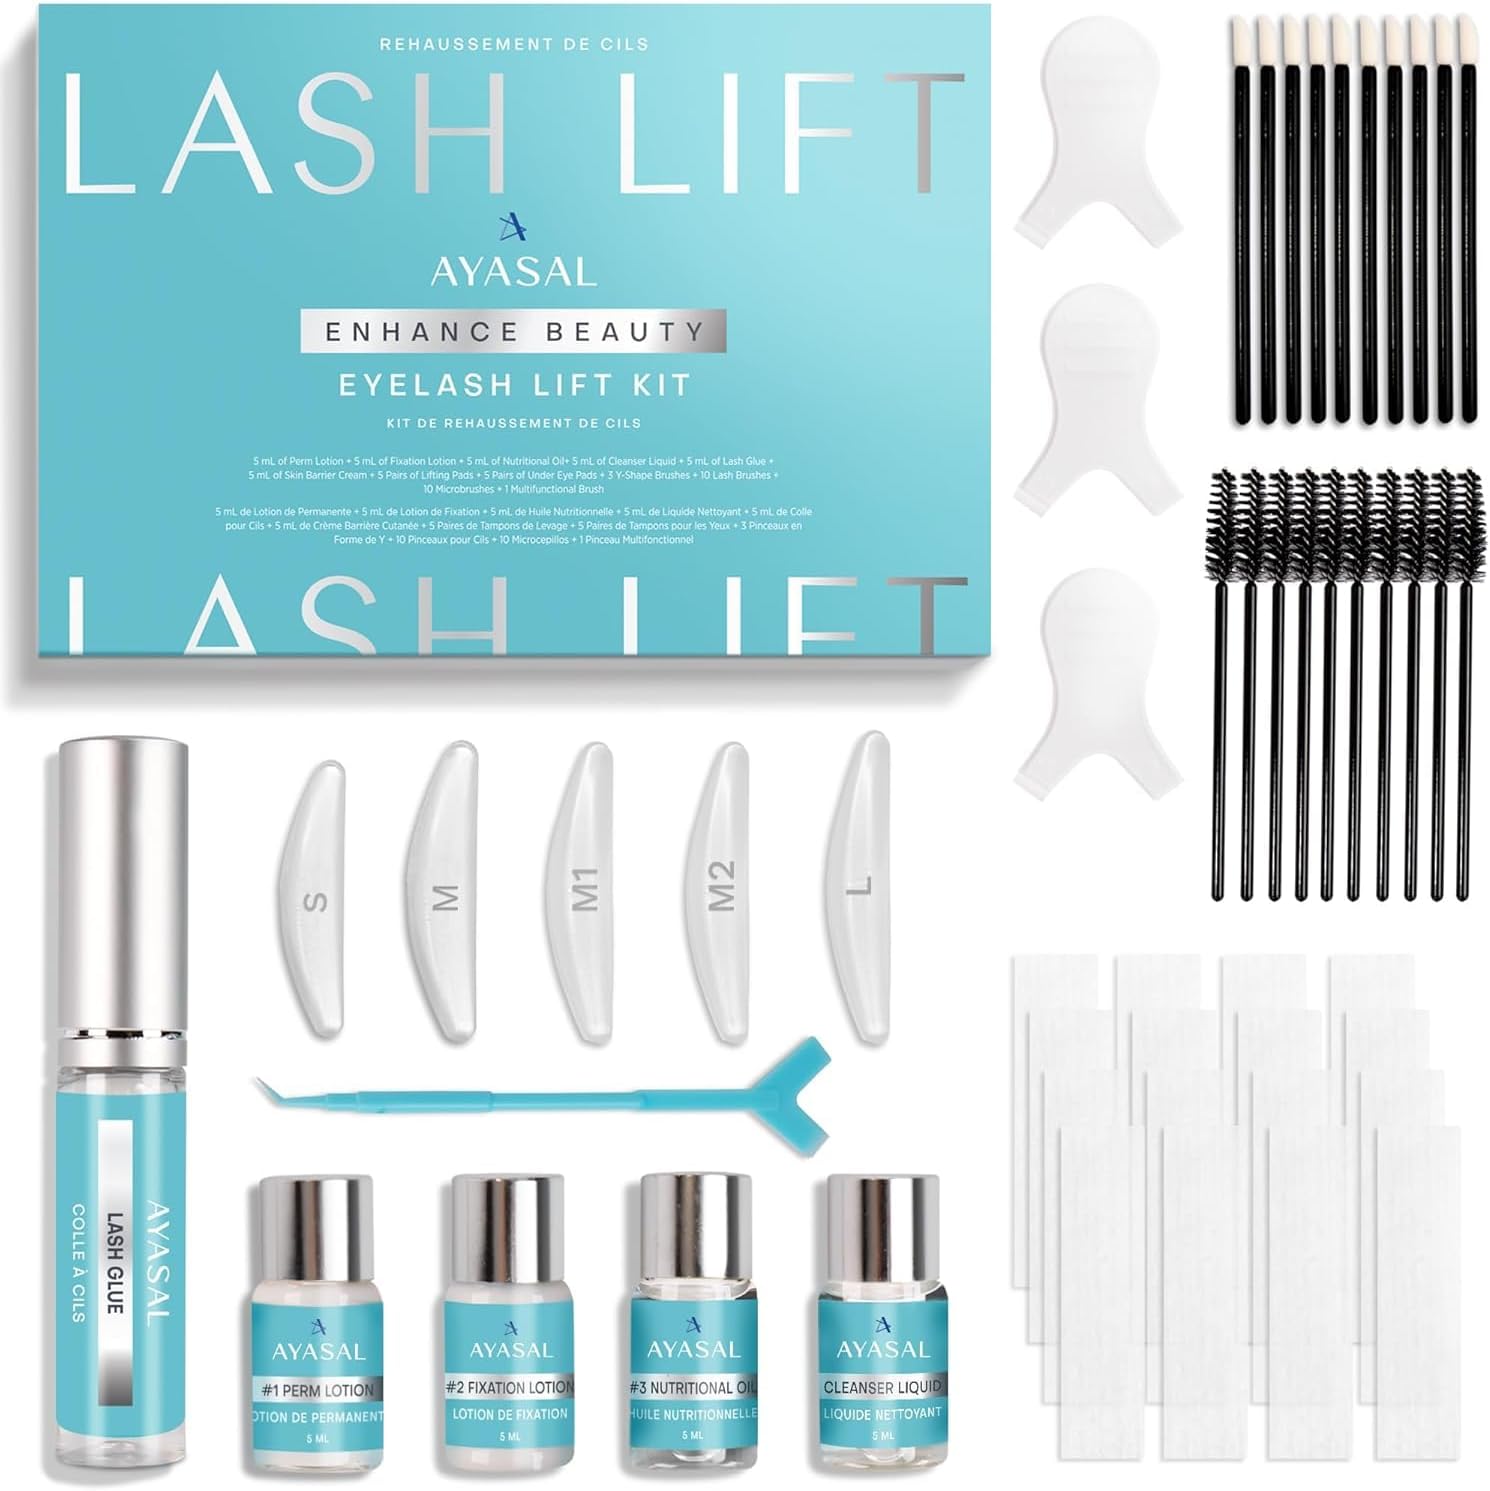
The AYASAL Lash Lift Kit offers a beginner-friendly, Korean Thio-free eyelash perm formula designed for safe, gentle, and long-lasting at-home lash lifts. With a clear step-by-step process, it delivers salon-style curls lasting 6-8 weeks and includes enough solution for 5-6 applications, making it a cost-effective beauty essential for millennials seeking effortless, professional results.


| ASIN | B0FPDLB2JB |
| Best Sellers Rank | #13,470 in Beauty & Personal Care ( See Top 100 in Beauty & Personal Care ) #11 in False Eyelash & Adhesive Sets |
| Brand | AYASAL |
| Brand Name | AYASAL |
| Color | Blue |
| Customer Reviews | 3.8 out of 5 stars 15,135 Reviews |
| Finish Types | Natural |
| Item Form | Serum, Solution |
| Manufacturer | AYASAL |
| Manufacturer Part Number | AYA-01 |
| Material Type Free | PVC & Lead Free, Thio-Free |
| Product Benefits | Creates lifted, naturally curled lashes | Designed for first-time at-home lash lifts | Thio-free formula to help reduce the risk of lash damage | Step-by-step process helps reduce beginner mistakes | Multiple applications per kit Product Benefits Creates lifted, naturally curled lashes | Designed for first-time at-home lash lifts | Thio-free formula to help reduce the risk of lash damage | Step-by-step process helps reduce beginner mistakes | Multiple applications per kit See more |
| Set Name | 6 Applications |
| Skin Tone | All |
| Skin Type | All |
| UPC | 860014353215 |
| Unit Count | 1 Count |
G**K
Great kit and amazing customer service!!!Please read reviews before use!
I will start with most important thing - itโs a great kit, seriously. But OMG, itโs tricky and I did so many mistakes ๐ญ and it took me 2 hours to finish two eyes 1. First I did my brows - it was easy and just perfect. So if you wondering if you can use it for brows - I can assure that itโs really good for it 2. Then I opened instructions and started to follow it. As it was stated - I used regular pads that required a glue - and of course it was just a mess. It didnโt stick, I canโt brush my lash with perm solution coz pad was constantly peeling off. I washed my eyes, used adhesive pads, it were better, but my eyes were already like a mess with leftovers of glue and perm solution (it burns, be careful). Then somehow I attached a pads, apply the perm solution and add plastic. And this is a HUGE mistake, my lashes were slipped down together with plastic and it was just a mess. I was trying to put it back, then it goes to my eyes, it were burning my eye, I washed it with cleaning solution. Somehow apply fixing solution, and finish all this mess. Itโs ended up with some result (tooo curly), but I was so disappointed - coz there were a lot of good reviews and I really wanna make it work 3. I decided to finish my second eye, coz it was a big difference already. And it was soo much easier with better results. I was using adhesive pads right away ( they still didnโt stay 100%, but I assume itโs because they were not completely clean after first eye - I tried them all during my first eye ๐), then I didnโt apply a plastic, I was just brushing my lash for 10 minutes with perm and then with fixing solution. And it was much earlier, 90% leads stress and better result. So I learn my mistakes, hopefully next time it will be much easier. And Iโm wondering how you guys use it for 10 times. My cleaning solution is almost empty, not sure if adhesive pads will work next time. The customer service is just amazing! I will definitely buy more in a future
E**A
My lashes are CURLED now, bby!
Let me start off by saying, the results from this were well worth the process and learning curve. That said, it was a process and forced a learning curve. The glue that comes with the kit isn't great. Getting my lashes to stick to the pad wasn't easy. I started by putting glue on the whole pad and sticking my lashes to it, but most of them wouldn't stick. I shifted gears and did small sections of my lashes at a time, gluing them down slowly, and that helped a lot. I did this one eye at a time, and it took at least an hour altogether. That was almost a month ago, and my lashes still look great and are nicely curled. I have fairly long lashes, but they stick straight out and NEED to be curled in order to look like I've got anything going on from the front. Using the smallest pad, I was able to get a good curl - my lashes touch my eyelid now, but in a good way! I also find that I'd rather not wear mascara now, when I was wearing it daily. I feel as though the mascara isn't needed and almost looks like too much. That might just be me, but either way, it's made my life a lot easier. For what it's worth, I think just tinting them would give me the results I want a touch of mascara to add without the actual bulk of mascara, coupled with the curl. Also, this kit will likely last 9 months?? At least? It says to curl them only every 4-6 weeks, but it's been about 4, and I think I'll be able to wait 8 weeks total, at least. The next time I'm due to curl them by that schedule it just before Thanksgiving, and if I only need to curl my lashes every 2ish months with virtually no maintenance in between for the low, low price of $~30?? It's girl math, bbs!
M**Y
DONโT BUY!!!
DONT BUY. Iโve been perming my lashes for over 5 years and wowโฆ The glue sucks and will rip eyelashes when trying to comb through. The tool makes it hard to stick lashes and is sharp. The pad is a weird jelly texture that also makes trying to fix lashes difficult. If you wear contacts this product isnโt for you. The perm solution started to shrink my contacts and I had to take it off. The โcleanserโ also sucks, I had to use multiple Qtips to detach my lashes from the pad because the cleanser SUCKS. It also burns your eyes and youโd be better off using micellar water. The nutrient โoilโ is thick and will also burn your eyes. There are definitely better kits out there and I wouldnโt recommend this one. Tips: the reason why you need to comb your lashes is because the way they sit on the pad is how they will be when dry/ grow out. eg: one lash crooked means it will grow the way it was laid. This is the reason why many people will say it makes their lashes look weird. The perm solution will also burn your skin on contact and is important you only apply it to root of your lashes a little bit away from the waterline. Something not included in the instructions. It is stated to test the perm and setting solution on your skin behind your ear. This is incredibly dangerous and WILL cause skin irritation. After reading the one star reviews I wanted to give some tips to people who are less experienced in perming their lashes.
S**E
Asian Chicks Read This..it works!
Finally, freedom from the eyelash curler and lashes poking your eyes. Not going to lie, it was a complete pain to do my left eye. My lashes on the left are extremely short, so much so that the tiny lashes could not fully wrap around the pads. Also because of the shape and size of my eye, the pad kept lifting at the inner and outside corner of my eye. Here's what I did and what I recommend: 1. Cut the strip so it's a bit shorter to fit your eye. 2. Use surgical tape/first aid tape to help keep the pad in place and pull your eye lid up or pull your lower lid down, particularly if you have hooded eyes. I used a strip to pull my lower lid down and some to keep the pad on my eye lid. 3. Use duo eyelash glue under the pad to help it stick (you have to put it on and wait a few seconds for it to be tacky). I didn't do this bit will next time since the pads are essentially single use and no longer sticky. 4. Use a pad that works with your lashes. I could not get my lashes to stick to the M pad. So I ended up using M2. 5. The lash glue is VERY sticky. People say it isn't tacky and lashes won't stick. Well, it took 2 layers of glue but it was very tacky. (An initial layer and another after some lashes didn't stick). I spot checked throughout the perm process and added more glue for specific lashes that stopped sticking, pushing it back on the pad using the pokey part of the blue "y" stick. Don't wait the 30 seconds for it to get sticky. You should just start pushing your lashes up right away otherwise it's like super glue on the pad and you can't fix any lashes if they are in the wrong direction. Pushing lashes up immediately gives you just enough time to reposition lashes before they are super stuck. 6. I screwed up and used the nutrition instead of the fixation. (I can't see well without glasses). When I realized, I just put the fixation lotion over it and waited the 10 min. It was totally fine. 7. I didn't use the skin protector. I think it was just Vaseline. It was too slimy and harder for me to keep face tape in place. 8. Because my lashes were so short on the left, I really had to hold the corners of the pad in place with 2 fingers (for 10 min) to keep my tiny inner lashes from lifting off the pad. They were just too short to stick to the pad 9. My right eye was so easy because I have long lashes. The corners of the pad still lifted, but lashes were long enough to firmly stick to pad even with the lifting. 10. It doesn't have to be perfect. Even with the pad not completely stick on my lid, I still got good results. You just have to keep spot checking to make sure the lashes are positioned in an acceptable way and not weird direction. There's enough lotion to do many more applications. I won't be getting my lashes anywhere near water for the next couple days. Overall highly satisfied, will just need to see what happens over the next 4-6 weeks.
T**S
It worked!
I bought this to use on my lashes and brows. This product was easy (although time consuming) to use. Clear directions that you literally cannot mess up. Follow the directions to a T. Donโt add time because you think it will have a better effect. Lol. I have thin eyebrows and lashes, and pretty sensitive, fair skin. I followed the times in the directions with perfect results. I do have to say, my hairs feel a bit โfriedโ (for lack of a better word) after use. They felt this way for several days afterward, but none fell out or broke off. So thatโs the good news!! It does not come with a dye, but I did purchase my own with 20 volume developer and used the dye after the 3rd step, then followed it with the 4th step. For anyone that is curious how to do that, you can apply the dye at that time. I feel like I got a good 3 weeks out of one use per area (brows and lashes). I wash my face with cleanser and water twice a day, religiously. So I feel like that is well worth the money. There is probably 10 more uses left after I have used it twice. It goes a long way and saves a ton of money going to a salon for sure. I do suggest when doing your lashes, do one eye at a time if you are a beginner. It sounds tedious, but I had a bit of trouble sticking my lashes to the lash pads, so I felt it was better to give attention to one area at a time. Oh yes, and when you apply the product to your lashes, do your best to avoid the ends. Apply from roots to about two thirds up your lashes. The ends of your lashes are thinner and more prone to breakage. I canโt quite remember if the directions suggest this or not. Overall, awesome product, and I will definitely be re-purchasing!
K**L
Itโs good. Just okay.
Hi all. So I used to be a beauty tech and I am certified to perform lash lifts. I personally prefer Elleebana lash lift kits, but theyโre very pricey so I decided to give this a try when I ran out of my go to. I have tried Amazon kits in the past. I wonโt be doing that again lol. It works, donโt get me wrong. But from experience, itโs definitely weaker than more professional brands. Truly, this is one of those things where you pay for what you get. The glue, the solutions, everything overall just isnโt as high quality (and lashes are fragile, tbh, you do want to pay more for something healthier.) The consistency of the steps isnโt ideal for easy application of the steps on the lashes. Theyโre a little too thick and clumpy. So finishing just one eye step by step, took a very long time. Because itโs weaker quality and didnโt perform the best lift, Iโm expecting it not to last as long. I typically get mine to last 6-8weeks. Iโm expecting to probably only get 3-4 out of this one max. Also keep in mind I have lash tint handy at home that I used. It probably wouldnโt look as good as I was able to get it to look, without my black tint. Final opinion: will probably go back to Elleebana and just purchase refills since I have all the other supplies I need. It takes half the time of this kit as well. This is just my honest review. Nothing โwrongโ with it. Just has its cons and I have my experience, and preference. Itโs good enough to get the job done on a budget! But I will not be repurchasing. Pro: aside from the solutions, it does come with good instructions and tools. And I liked the pads and will be keeping them. And I like the lash tool provided. Additional note: from my training, you are usually only supposed to keep these perming lotions on for about 6-7mins max for professional kits (and only leave it on the tips of your lashes for max 2 mins, then remove from the tips to avoid over processing.) I guess it depends on the brand but, 15 minutes per step, doesnโt seem healthy to me.
T**E
My lashes can curl on their own now! Woot!
It's more than a yes from me. ๐ฏ (the last picture is a "before", the 2 first ones are the "after") I have been waking up with flat, but long, lashes my entire life. I have always been an avid "tweezerman" eyelash curler user, but no more. These babies are flying up and out of my face from the moment I wake up now- and i don't even feel the need to put makeup on, i love it! โค๏ธ even though they look great with mascara on, I thought this is a picture of me after washing me face would serve better. Considering my life routine of curling my own lashes every morning, curled lashes just make me feel more bright and ready, so my get ready time has been cut down to nothing as long as i take an hour or 2 to do self care like this every 2 weeks. It'll be frustrating to learn for some, but You can't fake the results! Its very encouraging when you can see afterwords how well you did. I even like the fact that the eyelash glue you use to hold your eyelashes in the curl position while you're treating them isn't too strong. I just sit in front of the mirror and constantly push them up the eyelid pad with my finger tip until they stay and it dries good. I add lash glue in between #1perm & #2fixate so i can make sure my lashes are exactly where i want them at all times and sticking up. If you mess up and you get some individuals going in hairy unruly directions this also means you can put more lash glue on and it'll let you re-work separating your lashes and getting the nice uniform swoop you want. Im very happy with this product! If you do it every 2 instead of 3 weeks, you give your new lashes time to grow out while gradually getting a more decent curl like the rest. There are plenty of little eyelash tools already included; you can choose to use whichever ones you like the most, and wash them with regular soap. i love that there is comfort and variety in your product! Thank you so much! Ive been using the same kit for multiple uses now, and am definitely going to be a return buyer ๐๐ฅฐ๐คฉ
W**A
Great product
I am happy to report the results are great (the picture is after the operation, sorry I do not have a closeup before picture). I got the kit with self-adhesive eyelash pads. They are really easy to use: just peel them off and place on the eyelids and hold for 60 seconds, and they stay. I have used other brand eyelash perm kit before. To me, the most difficult part is to get the pad to stick to my eyelids, which is the most important step, in my opinion. Then it comes the step to paste the eyelashes to the pads. This step is not hard but requires patience. I applied the glue on the pad then waited for more than 30 seconds, then I carefully pasted my eyelashes to the pad using the tool provided in the kit. This is an important step so don't rush it. Wait until eyelashes are securely pasted on the pad then you can start the next step. The rest of the steps are pretty straightforward. As a reviewer mentioned, when you apply perm solution#2, your eyelash might come loose. Some of mine did, I just gently put it back on the pad, it generally stayed. And be careful not to get the solutions in your eyes because it will sting. Have some cotton swabs ready in case you need to use them. I both used and did not use plastic film to cover the eyelashes after perm solution was applied when I previously permed my lashes. I personally did not think it mattered too much. Overall I am very pleased with the results, of course this is not the first time I permed my eyelashes so I had a little experience. If this is your first time, just make sure to read the instruction carefully, and be patient.
B**E
Doesn't last long
Glue doesn't really hold. Curl doesn't lasts about just less than a month.
J**N
AMAZING
I don't usually write such extensive reviews but this one deserved it. I naturally have very straight lashes (thanks mum) so straight that some would curl under. I have permed my eyelashes for years. In the last couple years I have been using LVL. The first year or so they were great. I have had the done professionally and also at home. Recently I have noticed they just don't curl the way they used to. So I though hmm let me go to a salon to see if it works any better. Unfortunately it didn't. There was a slight more lift than when I do it at home but not much that I was happy. Baring in mind I buy all the proper LVL stuff from trusted sellers, so I wasn't using anything dodgy. As its our eyes after all. Any whoooo... After looking at loads of reviews etc all over Google I came across this kit. I thought well it's worth a shot. It got delivered and tonight I tried it. I'm over the moon. They haven't curled like this in as long as I can remember. The kit is brilliant and you get lots of stuff for your moneys worth. The only thing I will say is the glue is crap. I would defo recommend getting a different glue in future as it was a nightmare trying to get them to stick securely on the pads. I was persistent and kept going with a lot of glue. I defo recommend leaving the glue for 1-2 minutes if not longer for it to go tacky. Fab kit though for actual perming purposes.!! Thank you. X
K**Y
Excellent results!
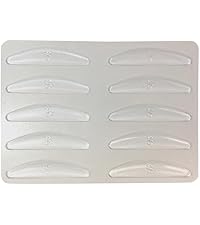
Great little kit with clear instructions that include pictures. The kit came with the original lift pads as well as an additional pack of improved pads which was a nice touch, I myself used the original because I liked the smaller size and had no issues, but definitely noticed how much easier it was to stick down the improved ones. Unfortunately the glue was hopeless for me as it dried too quickly and my lashes are thick and stubborn so I had to buy another glue (I highly recommend eye.do balm). The whole process was fun though, and despite this being my first time I had high expectations, Iโm thrilled to say I was not disappointed! Now I have family and friends forming a line so I can do their lashes next!
M**F
ู ู ุชุงุฒ
ู ู ุชุงุฒ
S**R
Super easy to use with some modifications!
I have absolutely zero patience for fiddly processes like this so if I can do it anyone can! Took me approx 1 hour to do both eyes and the results are amazing considering it was my first go! I did make a few changes to the process and changed things on the 2nd eye (left on photo) too which have made a difference. It's not perfect but for my first try I am super impressed. 1. Different lash glue and lots of it. To stick the pad down I put the glue directly on my eyelid on the 2nd eye and this worked much better. I did use the adhesive pads but did use extra glue to be sure it would stay. I may cut the corners off the pads next time. 2. Didn't find any of the tools helpful in sticking up the lashes to the lift pad so just used my fingers which worked great. I then combed the lashes in place using the cleaning tool. 3. Didn't use clingfilm and it still worked. I did make sure to have cotton swabs and rounds on hand which helped if I got any solution too close to my eye. 4. I used the middle sized new style pad but think I may size up the next time I try for more of a curl. Still really happy with the results. I also kept eac solution on for 15 minutes with no adverse affects so far. Overall great kit, easy to use, does not sting eyes and would buy again.
Trustpilot
3 weeks ago
1 month ago