
🚽 Flush Away Your Worries with Kohler's Best!
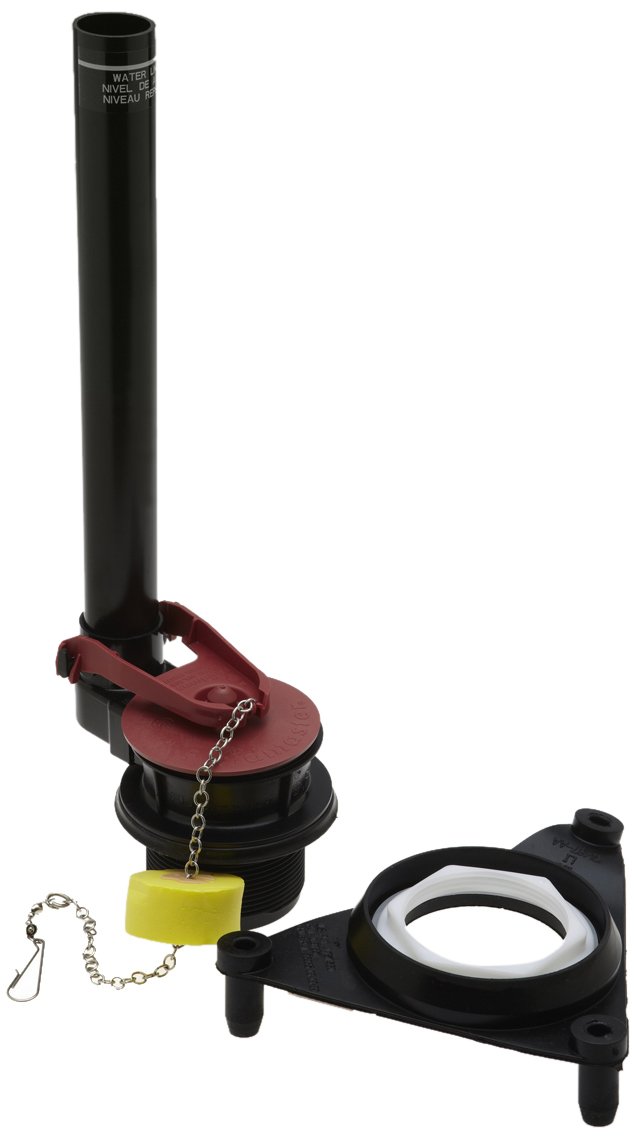
The Kohler 1003068 Flush Valve Kit is a high-quality replacement part designed specifically for Kohler Iron Works toilets. Weighing just 408 grams and made from durable iron, this kit ensures a reliable flush every time. With its frustration-free certification, installation is a breeze, and you won't need any batteries to keep it running smoothly.
| Manufacturer | KOHLER |
| Part number | K-1003068 |
| Item Weight | 408 g |
| Item model number | 1003068 |
| Material | Iron |
| Item Package Quantity | 1 |
| Specification met | certified frustration-free |
| Batteries Included? | No |
| Batteries Required? | No |
B**E
works good
work great a little tricky get the three plugs in the bottom bowl
-**-
Does the job. Do-able for a DIYer.
OK, this is not an exciting product but it does the job it was designed to do. I got tired of NOT getting a call back from the plumber so I decided to fix my Kohler Wellworth toilet myself.Online research told me that some Kohlers use this annoying proprietary triangle shaped gasket design. Double check yours before you order. Does it use three brass bolts? Odds are it uses the Kohler triangle gasket.Okay, the kit comes with the flush valve assembly and all its parts EXCEPT the three required brass tank-to-bowl bolts. You'll need three (with washers and nuts). Get them at a plumbing supply place pros use. Do NOT get them at home depot because the "brass" bolts HD tries to sell you are not brass at all. They are brass coated steel. Take a magnet with you to the store and make sure you are getting 100% brass bolts and nuts and non-magnetic (aluminum) washers. This is to keep any of those parts from rusting up on you.First turn off the water and empty and disconnect the tank and bowl. Put the tank down on a soft rug or towel. Make a note of the orientation of the old flush valve stack. Take the old flush valve assembly out.OK, there are no instructions in the new kit but the order of assembly is:1) the flush valve stack goes in the tank and through the hole2) the triangle gasket goes on the outside of the tank with the three rubber "feet" poking through the bolt holes.3) the big plastic washer goes next,4) and THEN the big plastic nutOrient the flush valve stack in the same way the old one was. It is a pain to tighten the nut because the gasket gets in the way, but do your best not to mar up the threads. Use the biggest pair of slip jaw pliers you can find or borrow.Then the brass bolts slide in from the top. You do NOT need extra rubber washers. The only good thing about the triangle gasket design is that the rubber "feet" on the gasket compress under the bolt heads to form their own washers.Put the tank back on the bowl, bolts through the holes, washers, then nuts. Slowly and evenly tighten all three brass bolts until snug. Don't overtighten or you might crack the porcelain. How do you know how tight is too tight? You don't really. Snug all three down until the rubber feet are smushed into the tank like washers and keep your fingers crossed that you don't hear a crack.Put the water line back on the tank. Pour some water in the bowl using a bucket and see if you get any leaks. Leave it for awhile just to be sure. Once you are sure it doesn't leak turn the water line back on.Mine worked on the first try.
C**Y
Works and fits perfect
It is more expensive than the universal type kits but worth the extra money because it built better and fits better with the original Kohler toilet. Adjustments for water level and flush volume also easy to set. Rebuilt toilet works much better with the original Kohler parts.
A**R
Exact fit
Fit perfectly and solved the problem
D**Y
Easy to install.
Works good, but took two stars away because the chain came apart due to one link was not completely closed. I went thru all the links with pliers and made sure they were all closed.
Trustpilot
1 month ago
1 month ago