


🎥 Turn your vintage reels into digital gold—before your memories fade!
The Wolverine MovieMaker Pro MM100PRO is a standalone, fully automated film scanner that digitizes 8mm and Super 8 reels into high-quality 1080P MP4 videos. It requires no computer or software, saving footage directly to SD/SDHC cards (up to 32GB). Compatible with all major OS platforms and includes a TV cable for immediate playback, it’s the perfect tool for millennials eager to preserve and share nostalgic home movies with effortless, professional-grade results.


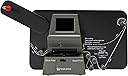
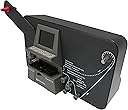


| ASIN | B0785H3FGN |
| Best Sellers Rank | #837 in Video Converters |
| Brand | Wolverine |
| Built-In Media | 5" reel, MovieMaker-PRO, Power Adapter, TV cable, USB Cable, dust blower, user manual |
| Color Depth | 24 bits |
| Connection Type | cable |
| Connectivity Technology | cable |
| Customer Reviews | 4.2 out of 5 stars 2,059 Reviews |
| Global Trade Identification Number | 00852652008008 |
| Item Dimensions D x W x H | 2.99"D x 12.01"W x 7.01"H |
| Item Type Name | Wolverine 8mm & super 8 reels to digital moviemaker pro film digitizer, film scanner, 8mm film scanner, black (mm100pro). |
| Item Weight | 3 pounds |
| Light Source Type | LED |
| Manufacturer | Wolverine Data |
| Media Type | Photo |
| Minimum System Requirements | Windows 7 |
| Model Name | Wolverine 8mm and Super 8 Reels to Digital MovieMaker PRO |
| Optical Sensor Technology | CCD or CMOS |
| Product Dimensions | 2.99"D x 12.01"W x 7.01"H |
| Resolution | 1080P |
| Scanner Type | Film |
| Standard Sheet Capacity | 8 |
| UPC | 852652008008 040074432000 |
M**Y
Worth every Penny
This thing is fantastic. The "Movie Maker Pro" works as flawlessly as I would expect any similar product this affordable. I was going to take my old films to a local converting store-counter, when I realized I couldn't order and prioritize the reels and the content to my preference, and would spend a small fortune doing them all, and I have no way to review them. The "MMP" lets you review in the viewing screen as the recording is being done; letting you stop and adjust frame size and position when needed. It can hang-up on splices (extra thickness on film) and this should be expected in a close-tolerance process. Sometimes you can muscle the film through with a pull by hand without stopping the recording; and you do need a software editing program like Windows Movie Maker which came with my Dell PC, if anything at all goes wrong and you have to put two or more segments of movies "back together again;" because MMP will start a new recording file each time you stop and restart recording. Besides, sometimes there are lengths of unexposed or underexposed film you want to edit out to make the film better. The fact it increments the recording/file numbers is a GOOD thing, because it eliminates later confusion about sequencing and possibility of same file no.'s overwriting on your computer, losing a good predecessor file, and having to scan over again, or worse, not realizing it until much later... where did it go? It can increment files to 9,999. I disagree with an earlier reviewer that the take-up reel motor should be "stronger," in fact I wouldn't be surprised if it has a belt or slip-clutch system to NOT tear apart your precious old films. The take-up reel does NOT pull your film through; it merely takes up the slack, if any, and winds the scanned film onto a temporary reel until you want to rewind onto your storage reel. Rather, the sprockets in the scanning bed area turn and move the film through the scanner without need for a take-up reel at all. It would be nice to have a higher megapixel recording camera/chip, but this one is adequate and affordable. I DO agree with earlier reviews that said the guide posts should rotate freely on bearings, again, a cost issue; and that bypassing several of these posts can help with more continuous flow of the film... I do bypass several. Experimentation will guide you. Keep the scan bed clean with the provided brush... the old films do deposit dust. How considerate of Wolverine to include the little air brush. My tips: if the reels do rub on the backing arm/surface you can pull them slightly outward or add some scotch tape to the backing to protect it (some reels have become crooked and wobble); it's very helpful to move the film freely in the bed to where you want it, as to start or restart a recording by clicking open the bed's hold-down cover, and the film will then slide while still under the three white tabs; I stopped recording the white leader tape, blank of images, and instead moved the film as described above to the first few frames of actual image; then I do the frame adjust command next, and use the easy X,Y,W axis provided on-screen to center my frames; only then do I enter record mode, and adjustment is usually right-on. Do "baby-sit" your valuable old films to watch for hang-ups and frame out-of-centering, this is the fault of the film's worn and spliced condition, not of the MMP. You'll enjoy the frame by frame viewing during the process and see many things in your film that you won't notice at ten-times the playback speed later (reading advertising on Christmas gift box-lids, scanning the old furniture in your childhood home, etc.); lastly, I don't thread the leader or sometimes leader-less films directly onto the take-up reel at the beginning, rather I start at frame 1-4, do the frame-adjust, start recording, and as the scanned film lengthens I then insert it into the take-up wheel's slot, hand-wind the wheel off-spindle to almost caught-up with the scanned slack film and only then press the wheel onto the rotating take-up shaft; this allows all but the first 1-4 frames to be scanned and avoids leader/splice hang-up at the very start; the more you eliminate hand-pulling hung up film through, the less likely to break it or the splices. You acquire a skill of gently pressing the reel onto the rotating shaft until the lock-in fin on the shaft inserts into the reel's fin-slot and let your hands rotate with the counter-clockwise movement so stress on the motor or clutch is minimal... this is less resistance than a hung-up film that stops take-up completely until powered off or hand-pulled through the bed. You can either do that, or resign to not scanning the length of film you thread into the mounted reel; or else always use and replace missing leader. When an old film breaks during scanning, and a few did, I don't worry about splicing or adding leader, I simply wind the broken end on top of the already taken-up film on the right-side reel, when the newly scanned section becomes long enough to give it several wraps over the reel to where it will not slip, but will continue winding. I don't expect to ever have to get these old films out of storage to work with again, but can deal with breaks later if I decide to re-scan in the future. I was thrilled to see for the first time my parents' wedding movie, over 71 years-old color film, and a few of the reels are up to 78 years old. The internet said films can last "several decades," imagine color film over seven decades old!
K**R
Does what its designed to do. Good quality results with a little patience and care.
I am giving this five stars because it does what its designed to do. If you want to digitize 8mm or super 8mm films this will give you good quality results with a little patience and care. Its not going to give you the very high quality of a high-end telecine scanner costing 10x as much. But if you’re like me and can’t bring yourself to put your irreplaceable family memories into a box and trust them to the mail or shipping then this is the answer that will get you most of the way there while leaving you in control of the process. I scanned 30 8mm film reels that averaged 50 years old and was very pleased with the results. The total run took me only a few sessions to complete. It’s hard to describe finally seeing film that hadn’t been seen in 40+ years – priceless. Here are a few tips that I learned in the process. 1. This is not a set it and forget process. You need to baby-sit it to get good results. You can’t just plug it in push the button and walk away. You’re asking for headaches if you do. If you want a push button result, then you’re best off sending your film to a quality commercial scanner to get good results. 2. I was surprised at the color retention on some 55 year old Kodachrome film. It was absolutely amazing. On the other hand, some other brands of film at 50 years had most of the color faded to blue. I’ll see if anything can be recovered in post-processing. So, if you’re like me and had been putting this off waiting for a better solution, don’t wait any longer. That color film is fading by the year. 3. I won’t cover film preparation like cleaning or fixing bad splices. A simple search will yield enough guides. 4. Scan settings: I found that setting the sharpness to Low rather than Medium gave me better results as others noted. The Frame Adjustment was set to scan a larger area including parts of the sprocket holes to allow for smoothing out the film jitter and frame movement in post processing prior to cropping for the final film image. The higher resolution of this scanner gives you more flexibility to scan a larger area while still having sufficient resolution on the image that counts. 5. Blow off the image plate with a hand blower or canned air to get dust clear between reels or when you stop it. The dust will collect and show on your final scan. 6. If you hit any rough splices or chewed up sprocket holes, the film will hang up. No problem, just stop the capture and release the pressure plate while advancing the film past the rough spot by hand and then restart the capture. This will give you an additional capture file. I used the free program MP4Joiner to rejoin the multiple mp4 files for later editing. 7. I had different brands of film to scan and shortly found that the default pressure plate clamping was too tight for some film and was hanging up and skipping at points. I found that folding up a small piece of paper to about 1/8 inch wide by 3 inches long and putting it under the outside edge of the plate before clamping down allowed me to make it slightly looser on the film and it fed fine. I started out with four folds (four sheets thick) and ultimately ended up with a tri-fold (three sheets thick) worked perfectly. The last 20 rolls fed flawlessly with this modification. So if you have some jamming and skipping, play with the pressure plate clamping to get just enough to hold the film flat while allowing it to feed.
G**O
Great and versatile film digitizer
I have more than 60 reels (3 minutes each) of Super 8 movies as well as some larger reels of older 8 mm film. I've been wanting to digitize it forever and have not had great experiences with commercial services. I am now about 2/3 complete with my 60 reels and have had a chance to look at the digitized results on multiple screens. Bottom line: it's relatively easy to use and produces a high quality MP4 file. As a note, each Super 8 3-minute reel winds up at around a 225 MB MP4 file. Here are a few specific likes and dislikes: Likes: Pretty easy to use--a little tricky your first few times getting the film properly into the clips, but settings out of the box produced a fine movie file. Reasonably fast considering it's creating a digital image of each frame. Color balance and lighting are pretty true to original Super 8 view Adjusting settings (magnification, frame center, lighting) provides additional controls, but these can take a few tries to get them where you want them. The memory card feature works great--just pop it in and your movies are there as you record them. Makes it easy to transfer to other devices for long term storage or viewing/editing. Dislikes: The machine occasionally gets stuck on a splice or near the end of the reel. This requires manual intervention and restarting the film recording. If the end of the film sticks in the reel or at the digitizing center, the machine just keeps snapping frames. This can create an extra long movie of a blank frame (or whatever it's stuck on). Since the process is relatively slow (15-20 minutes for a 3-minute film), it's not always easy to be standing there waiting to fix a potential stoppage. If the splice happens to be in the middle of a film reel and it gets stuck, you will wind up with two (or more) MP4 files that have to be combined using video editing software (not included with Wolverine). The movie "counter" increments every time you start/stop recording. If you are adjusting settings and recording short segments to test what you want, you can ramp up the counter pretty quickly. This wouldn't be a problem except the warranty (I think) is tied to the movie counter. All in all I am very happy with this machine and it is producing excellent quality digital versions of my 30+ year old films. Way better than anything else I've come across.
Z**D
Transfer Quality Far Exceeded My Expectations!
I rarely write reviews, but I feel I must write this one. Over the last few months, I transferred about fifty reels of 8mm home movies from the 60s, 70s and 80s. I have to say, I was astonished at the quality of the transfers from the Wolverine 1080 machine. I attached some images for reference. The images were bright, very color accurate, and included far more detail than I expected. From films of the sixties, you can see sharply defined details of clothing, hair, trees, rocks, etc. Of course there are grains, scratches, etc - but we expect that. If it's on the film, it will be on the transfer. What amazed me even more was this: I used film editing software to help enhance the images a bit more. Some of the shots were underexposed when they were filmed and were simply too dark to see much. With the software I was able to brighten the images and bring out details that had literally never been seen - even when projecting the original film. For the first time since 1962, I was able to see my parents' faces at the moment of their wedding vows in an interior church shot that was far too dark on the original film. As others have noted, you need to babysit the machine - but I don't see this as a negative. We are transferring an old, mechanical format to digital. The challenges come from the original media (bad splices, broken sprocket holes, etc) - not from the scanner. There is one small defect that I would comment on: there is a small felt pad that the film runs over before entering the scanner. After many reels had gone over this pad, it began to shred and release fibers onto the film. I solved this issue by taping a small square of lint-free cloth over the pad. This would be a product improvement suggestion for the manufacturer - and probably a simple thing to upgrade. If you are going to buy this, I strongly recommend two things: 1) Clean your films with alcohol and lint-free cloth before scanning (you can find YouTube videos on how to do this). 2) Buy compressed air and blow any dust out of the scanning surface between each reel. One final comment: I have had these films professionally transferred several times over the years. The most recent was this year (2023). My thinking was, if the Wolverine scanner is this good, then a professional service must be even better. Unfortunately that was not the case. I don't know what kind of black magic the Wolverine device is uses in its scans - but for sharp detail, color accuracy and overall image quality, the Wolverine blows away anything I've ever seen from professional services. If you thinking about transferring your films and trying to decide - take my word for it: this is the way to go.
P**R
An improvement from the first version, quite good if your expectations are moderate
I am a hobbyist 8mm and super 8 film collector, and like many, I have more film in my study than is good for me (that's what she said, anyway). After reading all the discussions about the Wolverine first generation MovieMaker, I took the plunge and bought this when the Pro became available on Amazon. To recap, the internet consensus was that the version 1 (a) was OK at conversions, not great, (b) could only handle 5" reels, (c) did not do too well with old splices, (d) earlier versions were prone to overheating, (e) were not recommended for rewinding, due to a small motor, (e) took video in only 720p, (f) converted everything to 30fps. After about 5 days to evaluate the Moviemaker Pro, here are my thoughts (a) Resolution- Better: Yes, it takes 1080p video. That is probably more than enough for most of the footage I have. There is some charm to having non-perfect video. (b) Exposure and sharpness- Adequate: It has an exposure compensation option. However, at each setting there is still an auto-exposure that you can see "adjust" the darker frames up, or the lighter frames down. Thus, the end result is a lot of compression artifacts in dark frames, and sometimes back-and-forth exposure hunting in scenes with an intermediate level of brightness. But overall, I like it. Most of the video I have does not justify 1080p, and it is easy enough to crunch the artefacts out in dark scenes (which will leave them rather dark, but then, that is the nature of the source object). An additional item is automatic white balance, which seemed to change the color tone if the footage zoomed in on an object. I had a "golden hour" evening scene, where a building was orange from the setting sun as long as the sky covered half the frame, but as the scene zoomed in, it became less orangy. This is not how film behaves. (c) File Size- Good: My calculations showed a consistent 9.47-9.48 Mbits/sec, which comes to about 71.00 MBytes/min. This does quite well in the well-light daytime outdoor scenes. (d) Film path- Good: The source side has one knob for the film to go under, and then there is the light bed with a slide-off cover (which is where thick splices get stuck), after which there is a single claw mechanism to advance the film. After that there are four knobs for the film to zig-zag around. The two bottom ones have a different texture. This is where my old splices broke (sometimes). However, this is needed to make sure that the take-up reel tension is killed to minimal levels to ensure that frames are positioned consistently. I tried different combinations of the knobs, and they all make the video shudder to different degrees. (f) Frame rate (acceptable): A frame rate of 20fps is clearly better than 30 fps, and I can see the logic of picking a value between 18 and 24, closer to 18. about 10% faster changes the action, but moderately, and if you are post processing, that is easy to handle. It would have been marginally better if they had gone with 18, but as I mentioned, 20 is acceptable, particularly if you are not too keen on learning how to use a video editing app. Finally, a couple of points 1. In addition to the inevitable splice-stuck and splice-broke, there were a couple of instances where the processor froze, but the film advancer kept working till the machine was switched off. My guess is that the electronics is sensitive to small surges, possibly caused by the heat pump turning on (winter). I moved the MovieMaker to the Uninterrupted Power Supply I have, and so far it has not happenned. 2. As others have said, keep the sharpness to low- this helps prevent unnatural edges, and this is something that can be done in post processing if you need it. 3. I have had a few more issues with 8mm film than super 8, which I attribute mostly to the greater age of 8mm. In fact, some of the Super 8 footage I have from the mid-80s is quite gorgeous, probably due to better cameras and technique. 4. I prefer zooming out to capture the sprocket holes, as well as have adjoining frames in the top and bottom of the picture. This captures the rest of the image outside the "standard" area, particularly for 8mm. This also helps in case the position of the frames drifts from reel to reel in a long session. I keep the "W" parameter at 1 (0 is the most zoomed out). Again, my workflow includes post processing for the footage I am interested in, and in casual viewing is a great aesthetic to remind us of the actual nature of the source material. Cheers, and enjoy your footage. This are the things that someone at some time thought was important for them to capture, and put in a lot of time, effort, learning and money to create. Birthdays, Weddings, Vacations, Christmas, Thanksgiving, family visits, road trips, service deployments, drag races, cruises, backyard picnics-- it is all there. I love it, and thank Wolverine for creating this machine.
W**N
I Always Look At 1-Star Reviews First
I'm the type of person who always looks at the 1-star reviews first to get the real story on a product--so although I would actually rate this digitizer at 4 or 5 stars, I've hidden my review here for those of you who are like me and want to know a legit assessment of this product. I purchased a similar product for $100 less, that only took 5" reels, and after only digitizing six 3" reels, it bellied up. This Wolverine unit offered same day delivery, so I was elated because I had rented a hand rewind and was under a deadline. I've digitized 63 8mm reels ranging from 3" to 7" so far of 50-year-old film. Here is the process I would recommend: - Rent or buy a hand crank rewind. It is necessary to initially clean the film before digitizing and is a faster method of rewinding the film. - Use a product called Film Renew with lint-free cotton cleaning pads (a cut-up t-shirt into 3"x3" squares will work too--professional pads are really expensive), to clean the film before processing. Film Renew is a solvent, so don't breath too much! lol It does a good job of cleaning, as well as conditioning the film. The downside is that it also dissolves adhesive, so any tape splices you may have, especially if they're older, will fail, either during the cleaning or in the machine when digitizing. - For failed spices, I used scotch tape and made it work. If I had to do it over again, I would have purchased a splice box to ensure the sprocket holes aligned properly (this will ensure the film doesn't hang up when digitizing), and either pre-made spice tape, or film glue. The film glue might work better as the tape splice sometimes hangs up due to a slight increase in the width of the film at the splice since I wrap the tape around the non-sprocket-hole end. My film had a few glued spices, and they never failed. - I made one pass with the Film Renew, and then a rewind pass with a clean, dry pad to remove excess solvent, which actually cleaned the film both ways. I folded the 3" pads down to a quarter square and then soaked it almost to the point of dripping with Film Renew before folding it around the film to clean. I would continually check the pad, maybe every 10ft. to see if it was getting dirty, then used a clean fold to continue. I noticed that not only dirt and grime came off the film, but sometimes color too, as I'm guessing oxidation occurred. This will, of course, affect the brightness of colors with the finished product, but I'm figuring I can enhance the color in Premiere when I get to post production--and I'd much rather have it clean to get the best image I can up front. - After letting the film sit out and "breath" (either a few hours, or maybe overnight would be better) so the remaining fumes dissipated, I loaded the film to the digitizer. THIS IS VERY IMPORTANT: You must use the Frame Adjust feature to properly align each reel. I noticed what was aligned to and what I ended up with was a few stops off. In other words, for my unit, the alignment was a little high and to the right. What I would suggest is to align it, digitize for 5 or 10 seconds, then look at what was digitized. If the alignment is off, you can easily make the necessary adjustments before digitizing the entire reel, and if you still need that test clip, you can add it in post, or pull the film back and re-digitize. - The other custom settings I used were EXPOSURE: -.5 to -1, SHARPNESS: High - Most failed spices continued to digitize, and if I wasn't paying attention, a big pile of film ended up on the floor! No worries though; I fixed the splice on the fly making sure a twist hadn't happened in the film, then with the machine still running, put the take-up reel back on which wound the film up nicely. - ALSO VERY IMPORTANT, AND TOOK ME A WHILE TO FIGURE OUT: I started noticing on some of the digitized clips, a brown spot appeared, like someone had put their fingerprint on the lens. Thinking this was something I had done, with much effort, I cleaned the digitizer camera lens with Windex and a modified Q-tip. I then thought maybe it was on the original film, but no. I finally figured out that the film was rubbing off on the illumination plate. Don't know if it was due to the film not being totally dry or what, but I got in the habit of not only cleaning the digitizing tray with compressed air, but also with Windex and a Q-tip, especially the light plate. That fixed it! - The first competitor unit I'd purchased made binding noises, and I saw a post about adding lubricant which worked well until it died. So I decided to add a little WD-40 gel to the sprocket opening of this unit as well. It purrs like a kitten, HOWEVER, when I added a little more, I started experiencing the same problems with the new unit--namely when it turned on, it would just start running the film without recording. Apparently, there are some electronic connections that can get screwed up if you add too much lubricant, so be careful! I know we can all get "lemons" at times, but I'm really happy with my unit, and it is performing as advertised. It is MUCH cheaper than paying someone else to do it and the quality is very good (I know there's another post where the purchaser thought it wasn't very good quality, but if you look closely, the image he provides shows it's due to the original footage, not the performance of the machine. I would suggest getting a progam plug-in like Neat Video to clean up any graininess, film scratches, etc.). One note on the counter--the product is warranted for 1 year or 200 reels digitized. The counter counts how many times the process is started, NOT how many reels are digitized. I've done 63 reels, BUT the counter says 162 because of all the stops and starts. This was mainly due to failed spices. If you plan on starting the unit and walking away for the up to 3 or 4 hours it takes to digitize a 7" reel, unless you want to come back to a pile of film on the floor, or only 25% of your reel getting digitized before it hung up, then FIX ALL THE SPLICES BEFORE YOU START. UNEXPECTED, PLEASANT SURPRISES: At the end of the reel, the unit will eventually stop on its own, I guess it has a sensor that when the frame doesn't change, it will stop, HOWEVER, I've also noticed that if the film is very dark or too light, it will trip the sensor too. No worries, you just have to start it back up again. Also, when your SD card gets full, the unit will stop automatically. One last bit of advice: The film will drift slightly over time, but not by much. If you don't want to see frame lines come into view, I would suggest on the Frame Adjust feature, moving the W function (zooms in or out) to zoom in 1 or 2 more stops--it cuts a little bit of the picture, but it gives the frame a little wiggle room too. Another nice feature is that you can zoom out all the way and digitize the entire frame with sprocket holes, which is a cool effect. What you could also do in post is use a black framed matte to ensure you're seeing as much of the frame as possible. Good luck! One thing I learned is that taking pictures of people really is the only thing that holds up over time. I have a pile of footage on scenery and landscape that were taken by my father and grandfather, and with the exception of seeing downtown Las Vegas back in the day, or a brief clip of a house I used to live in as a boy, the real value is seeing friends and family in their moments in time (especially those who are no longer with us--but remember, Jesus, the ONLY savior of all, promises to those that confess/admit their sins and believe and have put their trust in him for their salvation, that we will see fellow believers again in heaven! Read his God-breathed love letter to you (the Bible) to find out more.) Oceans of blessings to you.
S**S
Easy to use and great results with a little tweaking
I've had this machine for about 2 weeks now and transferred almost 20 reels so far. I actually found out about this machine because they had one at my local library. After using it there and seeing how long it takes for a single transfer, I decided to just buy one to use at home. It's still cheaper than sending out your reels for professional conversion, and less risky! The one downside is the time you'll spend babysitting the film as it passes through. For reference, in my experience a 200ft/5in reel takes about 2.5 hours to transfer. And you won't want to leave it alone for too long in case it gets stuck (due to a bad splice, broken sprocket hole, etc.). Even with that in mind, using this machine is super easy and there is basically no learning curve. The instructions are also printed right on it so you don't have to keep looking in the manual. Important to note that the resulting MP4 files are 20fps so you'll need to adjust the frame rate in post for accurate speed. My recommendation for best results is to set Sharpness to Low and adjust the frame so you have enough room to compensate for the frame moving around mid-transfer. After the files are on the computer I put them into Davinci Resolve (it's free!) to adjust speed (Davinci has a feature called Optical Flow that does incredible interpolation), stabilize, and crop as necessary. You can also do color correction in Davinci but I think it's fun to just leave the footage how you found it. I've had excellent results using this workflow and I highly recommend it! My family has been amazed by how good it looks, and it's been very entertaining for me as well (one of the first reels I transferred was my grandparents' wedding in 1950!). I definitely think there could be some improvements to make this machine even better, but for a beginner-level machine it's still great. April 2024 Update: I've now had this scanner for several months and it is still going strong after 80+ scans. It scans at about 118 frames per minute (or about a foot of film every 47 seconds), so a 3 inch reel will take approximately 39-40 minutes to scan. Hope this is helpful to anyone looking to purchase!
H**M
Good solution with some limitations
We bought this to scan in 24x8", 1x5" and 3x7" reels of 8mm file from the mid 1960's and it did the job pretty well but are a few things I wish I'd known when I started. First, if all goes smoothly, a 3" reel takes about 30 minutes to scan and yields about 3 minutes of video. The 7" reels take a bit over 4 hours to scan in and yield about 30 minutes of footage. So we spent a lot of time listening to the click-click-click of it scanning while we mostly were able to do other things. But it's definitely not a set-it-and-forget-it sort of operation. The mechanism is basically a digital camera over a light box with gears to advance the film, taking a picture of each frame. Pros: * The picture quality is about as good as you're going to get from old 8mm film. There are some settings to adjust picture quality but I didn't really mess with them. * The fact that it joins all the pictures it takes together in a MP4 is very nice and convenient. * It works without a computer attached (stores onto a SD card directly) * It's super easy to use (though I would watch a video on how to most quickly set it up at the start of the scan) * Displaying the scans on the little screen is nice so you have an idea what the subject material is (but it's a tiny screen) Cons: * Despite the big selling feature of the "pro" model being the ability to handle the larger 7" reels, it does NOT include a 7" take-up reel (just a 5" one). They're not expensive but it was some time lost sourcing one (for some reason they're not making a lot of them any more...) * The mechanism hung up on almost every splice in the film (despite these all looking like professional splices). It's fairly quick to fix but means you need to keep an eye (or ear) on it * The rewind feature is OMG slow. I ended up doing it mostly by hand. One time I let it do a 7" reel without keeping watch and it dumped about half of it on the floor which was a lot of fun to detangle (including some damage to the film unfortunately). * The machine appears to overheat after about 2-3 hours of operation (so about half way through a 7" reel or after 8-10 3" reels). In the best case this results in the film not advancing so you notice (same symptom as being hung up on a splice but there is no splice or torn sprocket holes and it keeps happening). In the worst case you end up scanning hundreds more feet of film, only to find it all jerky once you view it on a computer and needs to be rescanned. Neutral/features I'd want to see: * It can't take SD cards bigger than 32gb. Not that it's necessary, I just got stung because I had a 64gb card handy * It would be super nice if the machine alerted you when it wasn't advancing the film and shut down (lots of edits to make in post-processing to remove that junk) * It would be nice if there were a way to change the folder name it scans to. I ended up taking the SD card to a computer between reels and renaming the folder to match the reel number * A small cooling fan (or a bigger one as there might be one in there already, it is a bit noisy) might help with the overheating.
G**S
Fácil de usar. Resultados muy satisfactorios
Este digitalizador cumple muy bien con la función para la que fue diseñado. La calidad del archivo de video dependerá de la calidad de la película original. Se pueden hacer algunos ajustes como encuadre (casi todas las películas lo requieren) y otros antes de digitalizar pero también se puede usar algún software de edición como Adobe Premier para mejorar colores, saturación o iluminación sobre todo. Su uso es bastante sencillo aunque es necesario estar pendiente de cuando termine de digitalizar la película ya que no se detiene automáticamente. Una película de 3 minutos se digitaliza en aproximadamente 30 minutos. Es una muy buena inversión si se cuenta con muchas películas 8 o super 8.
G**.
Lo consiglio
Sto usando questo apparecchio ormai da un paio di anni (quasi un centinaio di bobine riversate) e mi sono trovato bene. Se uno ha molti film da riversare è senz'altro molto più conveniente rispetto a far fare il lavoro da un professionista. La qualità è buona anche se non a livello super professionale, ma per i vecchi film di mio nonno, di mio padre e miei va benissimo e mi riporta indietro nel tempo. Ovviamente il processo è lento e bisogna armarsi di santa pazienza, ma il risultato è buono.
C**R
great pictures
very pleased,the detail on my 8mm films are best ever .my memories live again.thank you cliff
キ**ー
日本語の取説が欲しい
大きなリールが使用可能なこと。 性能の割にコンパクトなことがあけられます。ただ惜しむらくは 日本語の取説が付属してないこと。設定の際に困り果ててしまいました。どうやったかは別として、快適に使用しています。
J**A
Calidad de imagen
La única pega que puedo ponerle es que el manual solo está en Inglés, pero a baso de enredar voy aprendiendo
Trustpilot
2 weeks ago
2 weeks ago