


🎮 Level Up Your Gaming Experience!
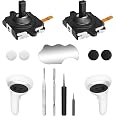
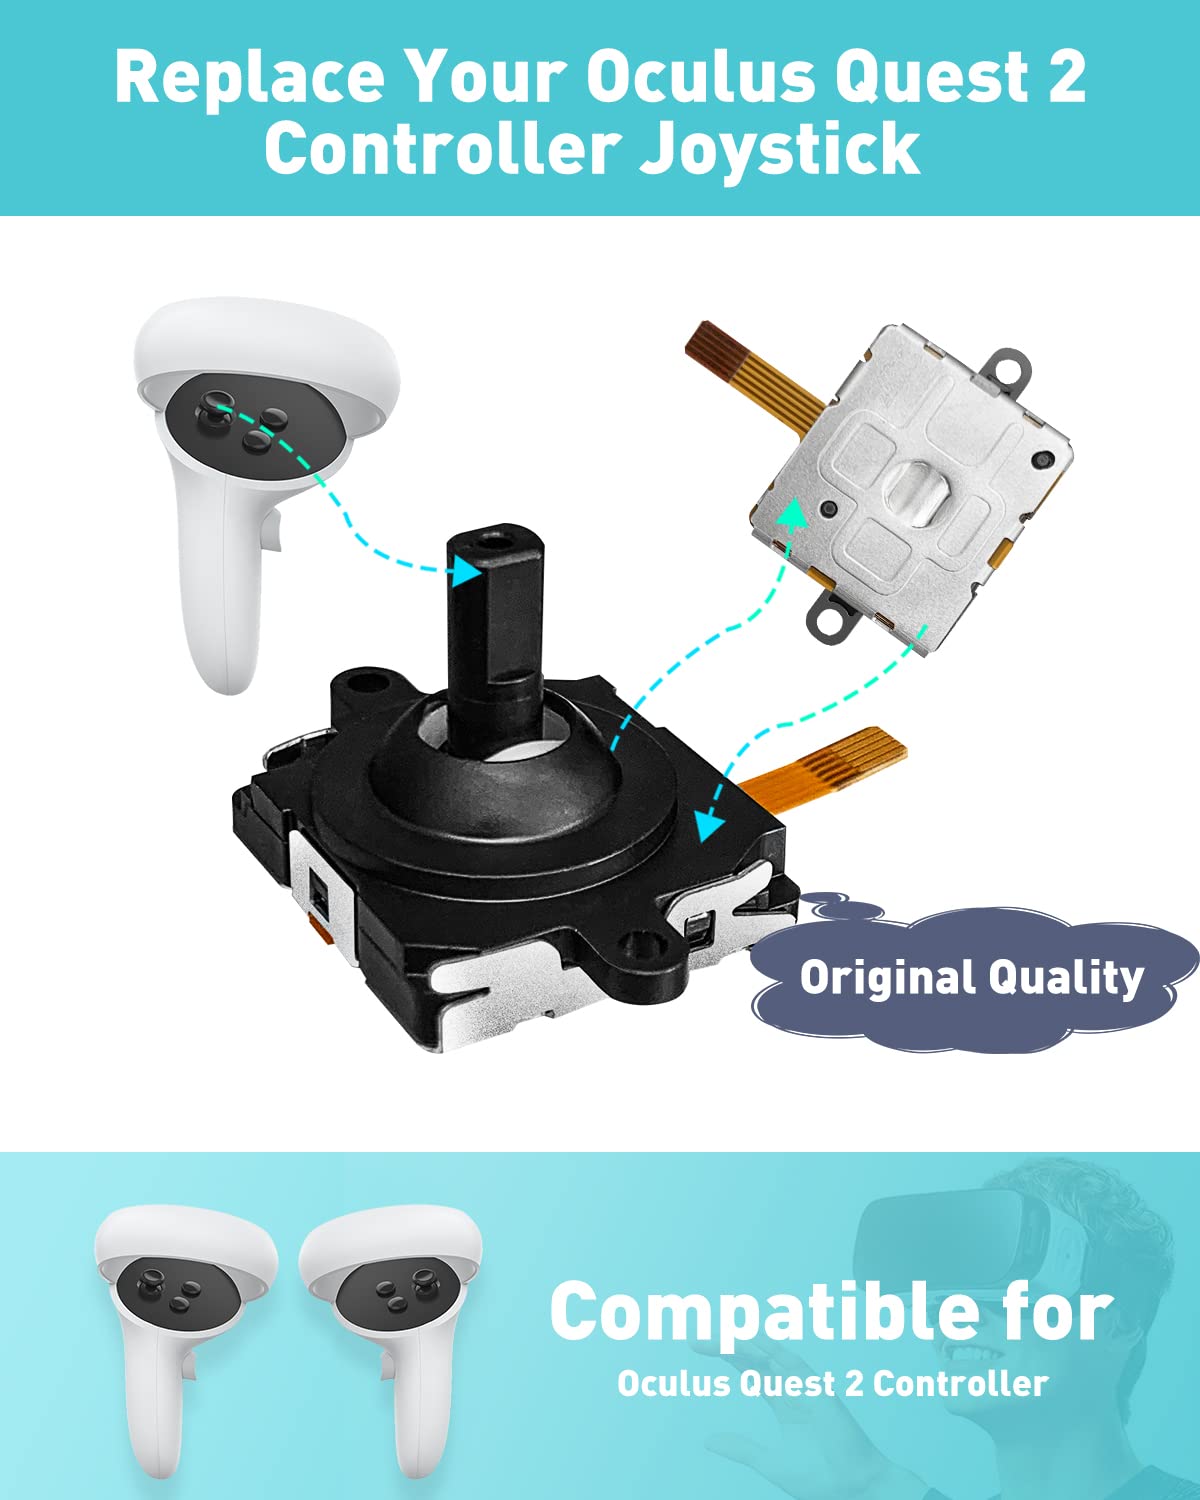
The OLCLSS Joystick Replacement Kit is a comprehensive solution for Oculus Quest 2 controller repairs, featuring 2 high-quality 3D thumb sticks, protective caps, and essential tools for easy installation. Designed for durability and comfort, this kit ensures your gaming experience remains uninterrupted, backed by a lifetime quality warranty.
| Brand | OLCLSS |
| Manufacturer | OLCLSS |
| Model | meta quest 2 controller repair kit |
| Package Dimensions | 14.81 x 9.7 x 3.4 cm; 41 g |
| Item model number | meta quest 2 controller repair kit |
| Hardware Platform | xbox one |
| Hardware Interface | Media Card |
| Compatible Devices | For meta quest 2 controller |
| Mounting Hardware | For meta quest 2 controller |
| Number of items | 1 |
| Batteries Included | No |
| Batteries Required | No |
| Data Link Protocol | For meta quest 2 controller |
| Material | Silicone |
| Manufacturer | OLCLSS |
| Item Weight | 41 g |
B**B
Amazing sensors, poor packaging
The package I got had a hole at the bottom through which someone stole the screw driver and prybar that came with it. Great.Thankfully I had those tools myself so I got to work replacing the thumb sticks on my Oculus. I must say, it breathed new life into my device.The thumb sticks are absolutely phenomenal and make my controllers feel brand new again.Please do note that the replacement procedure takes a solid hour’s work and a steady hand. If you’re feeling stuck at any point look at other tutorials online and make sure you dismantle the controller as much as you can to ensure the ribbon cables fit into the right slots.Giving four stars only cause of the screwdriver theft.
K**R
Does not work with aftermarket spring
Overall the product is good quality and worked perfectly in the right controller.The spring in the right controller is OEM.I had to change out the spring for my left controller and unfortunately the aftermarket spring does not fit on this aftermarket transducer (joystick), it did however fit on the OEM joystick and so I used the OEM right joystick with the aftermarket spring for the left controller and that works.
H**B
Solo uno funciona
Un repuesto no funcionó y el otro si
L**E
Small parts but doable
The kit gives you everything you need, but you need to have a lot of patience. I had to take it apart fully twice because I seated the joystick wrong the first attempt. It took a good hour to take apart and put together the first time. Mainly because I was trying to be super careful and not break any of the plastic. The second attempt I had it apart and back together in roughly 20 minutes. Just make a layout of where all the screws go, especially the ones under the black cover that covers the buttons, because the length on them varies.I actually got two joysticks and accidentally damaged the ribbon on one on the first attempt but luckily the kit I got comes with two replacements. If you have it seated right though they pop right in. When taking it apart make sure you don't pop any of the other ribbons out of place. One of the ends of the ribbons on the ring popped out on one side and I had to reseat that, but it wasn't too difficult. Just be mindful of those, you'll see the ends connect to the board on each side under the trigger button. It's easy to jar that one loose just a little bit.I'm not sure what the metal pad tool is used for other than sitting there looking shiny on your work area. I really only needed the pry tool to help pop things apart, the large t5 screwdriver, and the tweezers. The tweezers help placing the screws in place and can be used to very carefully line up the end of the ribbon. Don't damage the ribbon out of frustration with the tweezers like I did! When putting the ribbon in, there's a really tiny black retainer clip on the top of the ribbon housing where it connects. It's super tiny and really hard to see if you don't have quite 20/20 vision. I flipped that up to insert the ribbon then flipped it back down to lock the ribbon in.The new joystick seems to work really well and the kiddo is happy there's no longer any drift.
J**Y
Great product! Fixed my controller drift.
Awesome bit of kit. Left controller had very bad drift and this fixed it. Install was fairly easy. Saved myself from buying a new controller.
J**2
Saved me soooo much money 🤘🏻
My son blasts through controllers. This would be the third replacement and I said nfw. I found a drift tutorial and this item and had it repaired within 24 hours of it breaking. It’s not difficult to do, it took me about 15 minutes and the controller works perfectly. It also taught my kids a valuable lesson of DIY and try new things. New skill unlocked 🫡
Trustpilot
1 day ago
1 month ago