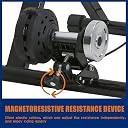
After checking out lots of reviews on both merchandise sites as well as biking sites (including one of my favorite sport equipment reviewers – DC Rainmaker), price checking, asking advice from bicycling acquaintances, and checking out some used equipment on Craigslist and on a local Triathlon training group I decided to go with this fairly bargain-price model to start out with. The title on Amazon.com is “Magnet Steel Bike Bicycle Indoor Exercise Trainer Stand“, sold by Cavalier Wholesale and it is listed as ‘#1 Best Seller” in Amazon’s Bike Resistance Trainers category. “#1” of course doesn’t mean exactly the best – just the #1 best selling. So I expected it to be a basic beginner sort of bike trainer, not the highest quality but able to give me my money’s worth. With cheaper items, even ones that sell well, I think there is going to be a certain lack of quality control so I just hoped that I got one that didn’t have parts missing or other issues. This trainer, like many, uses magnets to provide resistance when pedaling, there’s a number of methods that other bike trainers employ to provide resistance but magnetic ones seem to be a good compromise among factors like durability, resistance levels, loudness/quietness, and price. It didn’t take long for the shipping box to get here, well-packed but smaller than I imagined. A quick cut of the packing tape and I had the parts out of their styrofoam and cardboard packing. There’s not a lot to assemble, but what does need to be assembled must be put together correctly of course, and the instructions aren’t the best. On the other hand they aren’t the worse I’ve ever had to read either. A little common sense and knowledge along with the instructions are all that is needed. A few basic tools came with it, which worked fine. There’s a bit of hardware that goes with it, though some reviewers on Amazon complained about missing pieces, missing hardware, and missing instructions. I found out later that I indeed was missing a piece of hardware, but one that I didn’t feel that I would ever use for the most part. More about this later. With this assembly I didn’t even bother to get my own tools out – the tensioner mounts, via four screws, to the frame and the roller and the magnetic assembly attaches to the frame with a bolt. That’s about it. The instructions do the job, neither complicated nor too simple, there are illustrations and pictures to refer to, some cautions and warnings, a list of parts, and more instructions on attaching bike onto it and taking and it off as well as how to adjust the tension. Putting the bike on seems to be where you just have to use some common sense – whether you need the black caps that come with it or not will have to depend on your bike. If it just has a nut on one or both sides of the hub you will need the cap on one or both of them. But most modern bikes are probably going to have a quick release skewer on one side as well as a plastic cap already on the other side so you won’t need these caps that are included, the hub will go right into the plastic inner part of the part that clamps on the bike (you can also buy special bike trainer QR skewers if your existing ones don’t fit correctly). You can also convert an older style bolt-on hub with a quick release skewer axle set but it is a bit involved (if you’re not good with mechanical things you’d want to take it to your local LBS (Local Bike Shop). Make sure the trainer frame is unfolded, by the way. The whole thing folds up nicely into a small fairly flat space, so make sure it is completely unfolded fully so that it is as stable as possible. It’s simple to line the bike up, lift it up a bit and hold it temporarily (if you have something heavy maybe you might need someone to give you a hand, but it’s only a short distance off the ground that you need to lift it) and screw the two handles on either side down onto either side of the hub – keeping the wheel aligned as much as possible in the middle above the roller (the roller won’t be touching at this point until you tighten the tensioner). One side has a square slot for the quick release skewer, with plastic inside, and it does a fine job of holding it securely as does the deep concave part on the other side, also lined with plastic. Your wheel will fit into this quite well, and a quick spin of the large handles on either side will tighten the whole thing, and there is a ring that locks down on both sides. As I said above – if you have an older or cheaper bike with just a nut on either side of the hub you can use the included plastic caps. I tighten both clamps just enough to keep the wheel from moving between the brackets on either side, taking turns on either side tightening each one a little at a time to keep the wheel in the center. I have read a few reviews from some people who have had the clamps loosen. I did not experienced this at first; but over time it seemed that, while they did not seem to be lose, the back wheel acquired some play. This was completely remedied with a front wheel riser/block. More about this below. One reason why it seems to stay tight otherwise may be because I take the bike off after each use, so it is always tightened fresh the next time that I use it. Perhaps for those who leave it attached to the bike it would be a good thing to check to make sure it is tight before using it each time, as just maybe it can work loose. You also don’t want to really put a huge amount of tightening on the clamps, as you could break something. Just enough to secure it well, and there are rings on either side that slide down to lock the clamp on either side into place. Again, it seems to work well, doesn’t open up or disengage in any way, especially if there’s no way for the bike to move forward using a riser block. The feet on the trainer are also adjustable in case your floor surface is not level or it is going to be straddling two different surfaces. The rubber feet are turned one way or another to raise or lower that particular foot, each foot can be adjusted individually. Once the clamp things are tightened and locked the tensioner can be tightened. This consists of a bolt that presses against the roller assembly and pushes it against the bike tire, with a knob on the end. You want a little indentation on your tire when this is tightened, otherwise you may find it skipping. Tighten it enough so that when you ride there is no skip, but you don’t need to go crazy with tightening. A rule of thumb I have been using is to tighten it enough so that there is a comparable indentation to what the tire would look like if you were sitting on the bike outside on the road surface, and looked down at the tire where it meets the road. It seems to work for me, you don’t need to overtighten it, which may cause wear and extra heat. There is also a nut that holds the handle of the tensioner in place, make sure this is tight against the knob. Do the occasional tire pressure check, just like you do when riding outside. Just because you’re riding on a small metal roller inside doesn’t mean that your tire isn’t going to lose a bit of air over time. If you leave the trainer assembled I would recommend releasing the tension in between training sessions, especially if you don’t use it every day or every few days, for the good of your tire. Just as riding on the road; there probably is going to be a bit of wear on the tire over time. But unlike the road your tire is going to be against a very smooth, even surface (the roller) so there should be significantly less wear than riding out on the road or trails. But remember – you are putting miles on some of the major components of your bike, whether you are riding outside or inside on a trainer. You can buy a “trainer tire” also. This is smooth and made for use on a trainer, saving your regular tire from the many hours of use that you will probably put on it. I just used an older tire that I had previously replaced that still had a bit of tread on it but wasn’t quite suitable for outside. The other part I haven’t mentioned is the resistance adjustment that can be attached to the handlebars. I thought I would really want one with a resistance that I could change from the handlebars, it turns out I don’t need it and don’t use it, preferring instead to set the resistance at it’s highest amount and changing resistance on-the-fly with the gearing on the bike. I crank this resistance knob up all of the way, lay it on the ground beside the trainer and there it sits. Which is good because the one piece of hardware missing when my bike trainer shipped was part of the bracket to attach this hand control to my handlebars. I probably should have contacted the company – FDW, but since I have no interest in using the resistance knob I decided to not bother. If I did decide to use it at some point it’s likely the piece is just a few cents at the local Lowes. For higher end bike trainers I think this resistance control would be of more use but for this trainer the maximum resistance is moderate at best, so if you are a racer or someone else who really pushes the watts you would want to look for a trainer that has a higher maximum resistance for your training. By adjusting the bike gearing I can go from ‘easy’ cardio-oriented spinning up to something almost like riding up a moderate hill. At the latter gearing it’s not more than I can pedal, but it’s more than I could sustain for very long. On a more restful day I can spin for an hour, on a more serious training day I can get some good resistance while still maintaining a respectable cadence. As I mentioned, this does not have a lot of resistance at the highest resistance setting – having to increase the gearing to get the high resistance means lower cadence, maybe more stress on the knees, etc. More capable bicyclists will likely find the highest resistance level too low for the amount of gearing needed to be put into it to get to that resistance level. For me – an amateur, it works okay, on average I use it as something equivalent to a nice level road with no head wind. The resistance, at any range, seems to be consistent as far as I can tell. But not getting the tension tight enough can allow a bit of slipping. For my first experience with a bike trainer so far it has been favorable, I really like using the bike trainer versus the exercise bike. A lot more than I thought I would in fact. Previously I didn’t in any way look forward to using the exercise bike, but now I enjoy and – while not exactly as thrilled as riding outside – don’t mind getting some biking in inside. Even standing up on it for high resistance hill practice works great, which is something that was a bit awkward on the somewhat ‘unnatural’ exercise bike. You can even coast a bit to recover (but let’s face it – who does that?). And it’s nice that the trainer can be set up anywhere in the house. Unfold it, stick the bike on, and you’re ready to go. The only downside, for me, is that if you do not have a bike computer that has a rear wheel sensor there’s not a real good way to tell how far or how fast you have gone while using it without getting something extra. My wife found this out when she asked to try her bike on the trainer and I told her that her bike computer would work perfectly fine. Duh on my part – it has a sensor on the front wheel; so nothing. I did some estimating using how I felt while riding it compared to non-stationary riding but after I noticed that the Scosche Rhythm Speed/Cadence Sensor (for my review of the Scosche Rhythm Speed/Cadence Sensor click here) was on sale across the Internet for a ridiculously low price I decided to go with that. Once I got a few idiosyncrasies with the cheap sensor itself, it worked real well on the bike, definitely recommend something like this. Remember though, whether you bought a cheapo bike computer from Walmart or something or a nicer one you want to make sure the wheel sensor goes on the rear wheel. The Scosche works fine, it just takes a little messing around, I used the Wahoo app with it, which worked great. Just have to pedal, pedal, pedal until the phone or tablet finds it the first time the app is run and then you have to find or calculate your tire circumference (pi, or 3.14 times your tire radius approximately, though it’s better to use a chart like this one from Sheldon Brown’s excellent everything-about-bikes website or like this one). But to further tweak it for exactness you can take the bike outside, and compare it to another device like a GPS watch or biking app with GPS on your phone or other mobile device. More expensive trainers may have sensors that can tell you, via Bluetooth or ANT+, your speed, distance, cadence, and even power. One of the nice things about this trainer, and many others, is that they fold up into a very small space. Between that ability and the fact that you can set it and your bike up anywhere, any time, might be enough to convince a person to get one instead of an exercise bike. Especially those with limited space. Sure, the bike takes a bit of space but you have a bike anyway – stored somewhere in your home or on your property. Something I want to mention here before I go any farther – while I enjoy using this and consider it a really great purchase for a bicyclist; it is something that COULD be dangerous to pets, maybe kids. Pedals spinning, chain moving, spinning wheel, roller rolling at high-speed… all recipes for disaster with a brave overly curious pet (or child). I haven’t seen any mentions of this aspect of using a bike trainer so I assume (and hope) that it hadn’t been an issue for anyone. The sound it makes likely is enough to keep most pets away, it has been with our’s. A few times when I was setting the bike and trainer up one of the cats or the dogs came over to investigate, but as soon as I climbed on and started pedaling they were far away. But it is also something to keep in mind and watch out for. Perhaps with children too. The noise level is something that a lot people seem to be concerned about, as was I. Some people seem to think bike trainers are quite loud but I found this to be relatively good in the sound department. It is a regular, even sound and not loud enough where the TV has to be turned up more than a bit more than normal, if that. I can carry on a conversation easily enough, listen to music or watch tv, etc. It’s NOT quiet, but it’s not loud either. If you want one that is more quiet you might want to look into the (somewhat more expensive) trainers with fluid as the resistance instead of magnetism. It’s not very loud to me. But I imagine some people who find this kind of sound unappealing might be bothered by it. One thing that this trainer does not come with is a front wheel riser. Even though the height on the rear wheel is pretty low, it was enough to make me feel like I was riding downhill all the time. A simple piece of scrap 2×4 was enough to level it out perfectly, but not to stabilize the front wheel from forward movement or side movement. I did notice that after a couple weeks a bit of movement crept into the rear, and I really didn’t want to tighten the handles down any more than I had normally for fear of damaging the trainer or the bike wheel itself. The plastic inside the nubs that go over the quick release had a bit of wear, from the bike moving forward a bit as I biked hard. So I built my own riser/block for the front wheel, consisting of a scrap piece of treated lumber, some stabilizer rails along the bottom, tire guides along the top, and an angled pieces of surplus molding at the front for the tire to push against. Though at some point I may just ‘splurge’ and buy a $7 cheap riser block. Or maybe not – mine works damn good! The riser block did it’s job and everything is steady and solid together. Some of the comments by reviewers mentioned some wear and even having the bike come off – I think perhaps this may have been the reason as well as not enough tightening (though not too much!). I thought perhaps the magnets and the assembly they are in would get real hot but while they do get warm they’re not real warm or hot – like the hydraulic cylinders on my rowing machine. The rear tire gets slightly warm too, but not a lot. Right before I bought this trainer I read an article about bike trainers and how the heat that the rider generates kind of just sits and stays right around the person, and it recommended lots of towels, water, and a couple of fans. I wasn’t sure about this but after a couple of sessions on the trainer I’d have to agree, wholeheartedly. I sweat tremendously while using it, and I still need a towel on the floor, another draped over the top bar to dry off with once in a while. Even my hands sweat! I haven’t tried regular fans of any type but a ceiling fan, right over me when I am biking, does a great job. Though I found the ceiling fan almost TOO much air during this time of year. Someday I may invest in a “bike thong“/bike sweat net – which is a stretchy bit of absorbent cloth that looks like, well, a thong stretched out over the top bar of your bike from the seat to the handlebars to catch and absorb any sweat. A towel works okay, but do you really want it to fall off onto your pedals when you are spinning like hell, perhaps? And you probably want something like a tv tray beside you – for remotes, phone, tablet, water (yea, I know – your bike has a couple water bottle holders, but you’re going to want lots!), whatever. So on to my conclusions about the Magnet Steel Bike Bicycle Indoor Exercise Trainer. I’ve yet to find any real problems with using this trainer and enjoy it quite a lot. A heck of a lot more than the exercise bike, it’s so much more natural. Not to mention it can be moved anywhere in the house. Even if you train casually for biking and don’t think that you need one specifically for more intense bike training it might be worth it for the ability to unfold the trainer where ever you need it, stick the bike on, and go. I guess the two important things I have found is that having a wheel block or riser is important in making sure I am not having to put way too much pressure on the handles when locking the hub into place (both for the health of the bike as well as for the durability of the arms of the bike trainer), and making sure the tires are pumped up to full pressure; otherwise you can get some slippage. I’ve found that it has made it easy to slightly increase my cadence and speed over time, exactly the sort of things I got it for in addition to maintaining my ‘biking muscles’. And, a welcome and unanticipated benefit; because I can more easily balance on the bike while riding the trainer it seems to have also improved my balance on my bike while riding outdoors. As of so far I would say this is a great purchase for a reasonable price. Will it hold up to the test of time (and use)? I’m not sure but the lack of very many moving parts and it’s seeming fairly good quality is probably going to go a long way in its durability and longevity. It works great for me, and I think I am going to get plenty of use out of this Magnet Steel Bike Bicycle Indoor Exercise Trainer. Update - After one thousand two hundred miles it is still going strong, no problems.