Desertcart purchases this item on your behalf and handles shipping, customs, and support to Tunisia.
🌿 Elevate your outdoor sanctuary with natural charm and lasting strength!
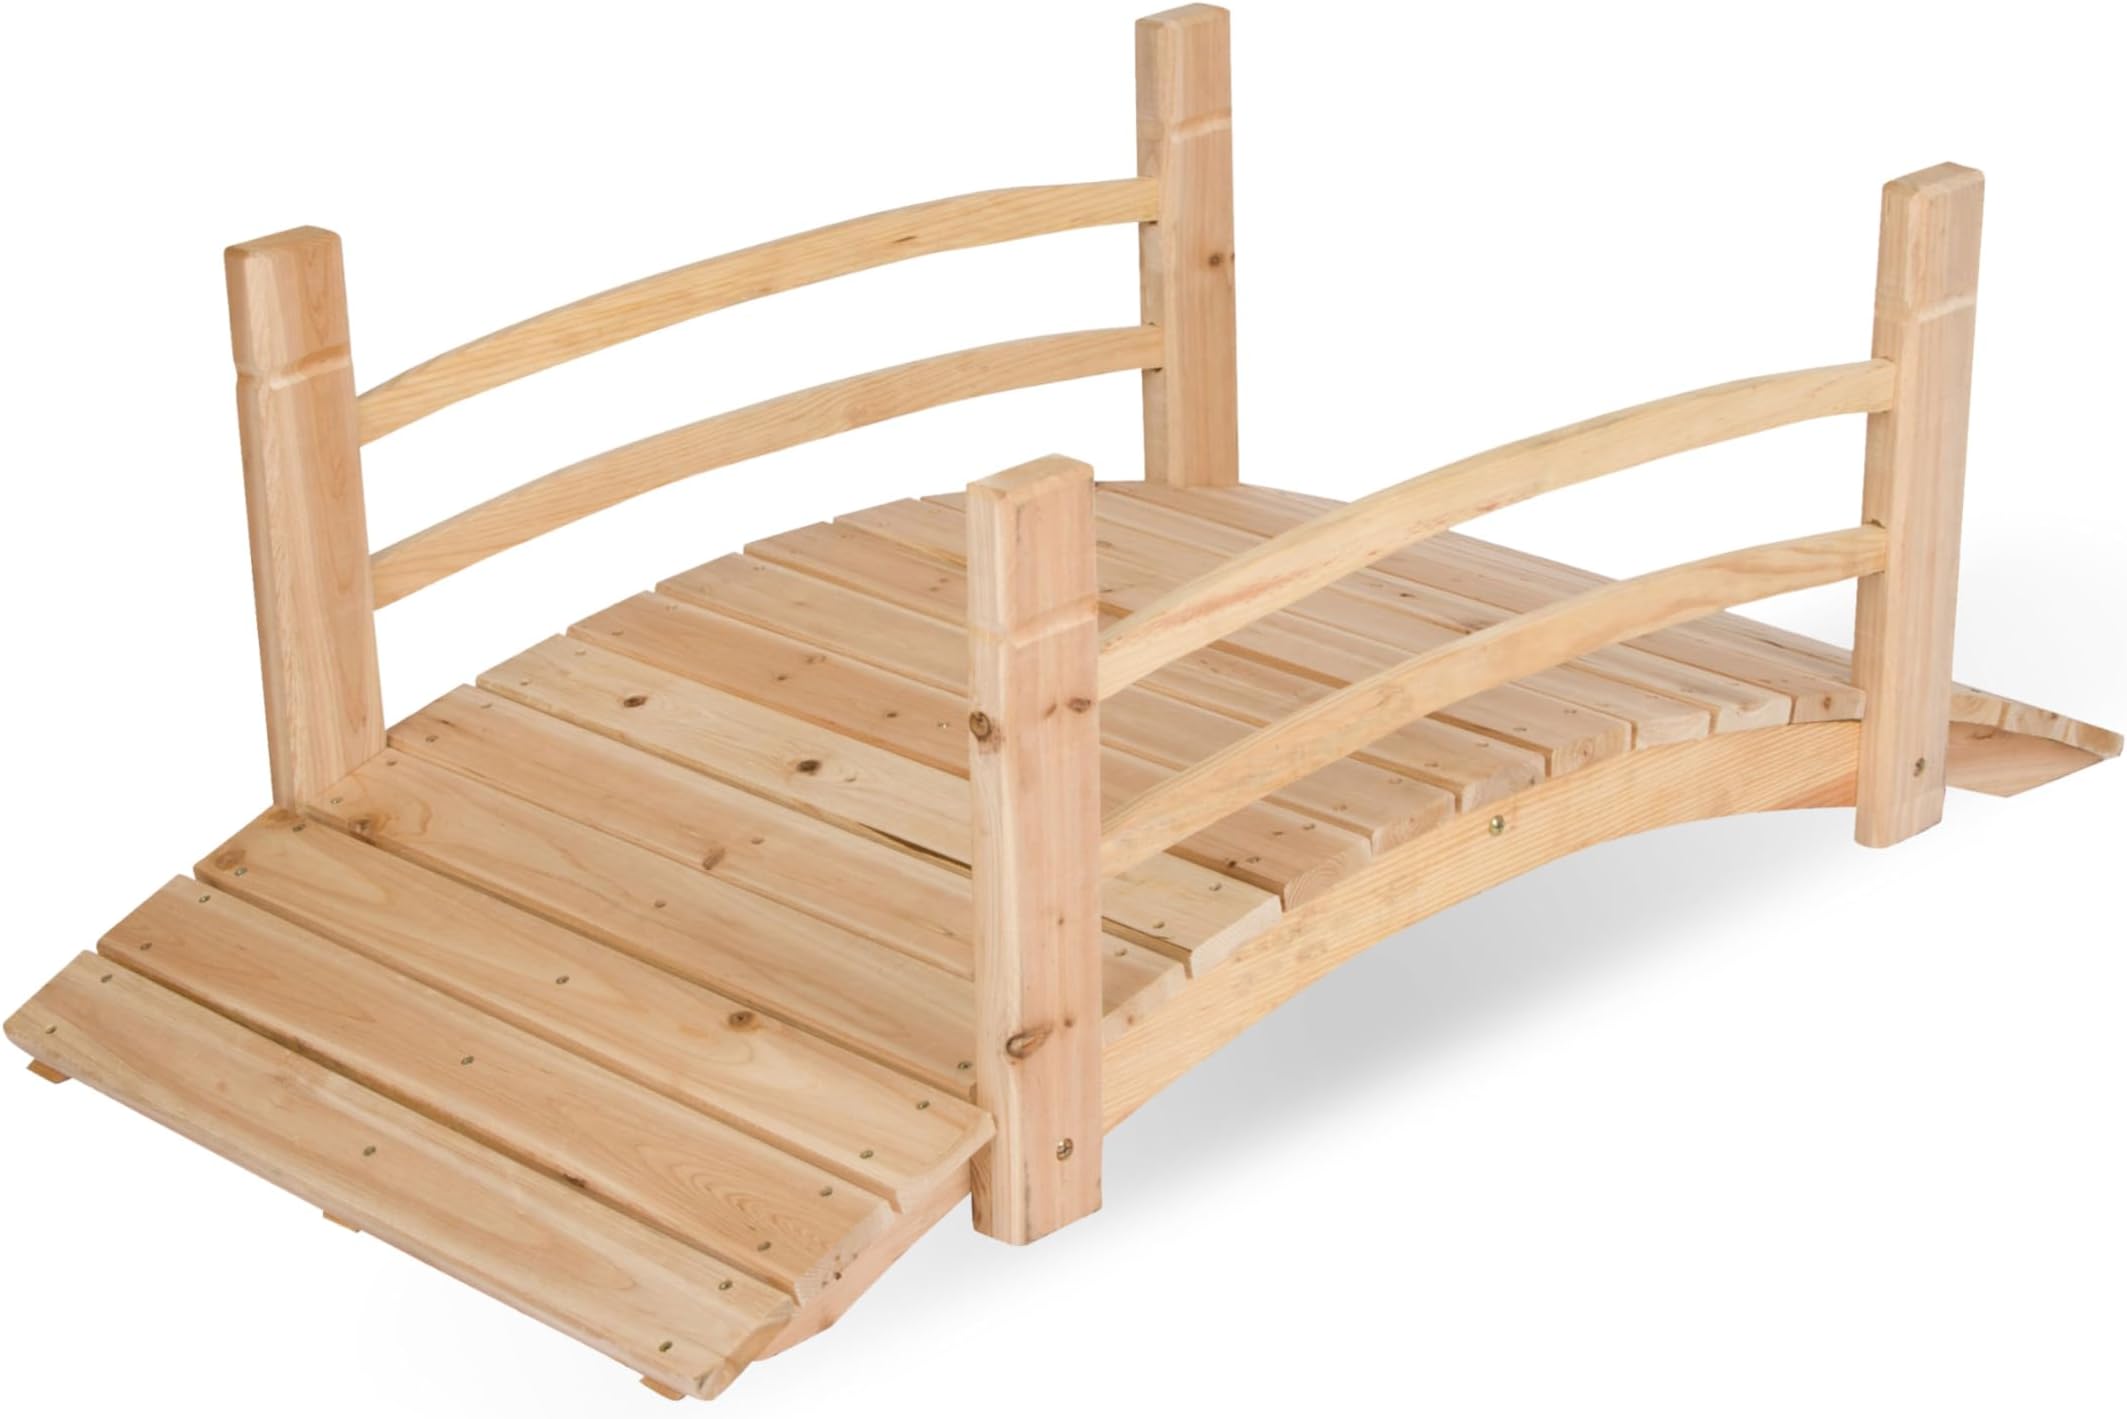
The Shine Company 4980N 4 Ft. Cedar Wood Garden Bridge is a sustainably sourced, kiln-dried cedar structure designed for durability and aesthetic appeal. Its smooth, unfinished surface allows for easy customization, while partial pre-assembly ensures quick installation. Ideal for enhancing garden landscapes, this bridge combines functional design with natural elegance, backed by a one-year warranty for residential and commercial use.


| ASIN | B00BQGQ4A2 |
| Additional Features | Customizable |
| Best Sellers Rank | #58,665 in Patio, Lawn & Garden ( See Top 100 in Patio, Lawn & Garden ) #4 in Garden Bridges |
| Brand | Shine Company |
| Brand Name | Shine Company |
| Collection Name | All |
| Color | Natural |
| Customer Reviews | 4.3 out of 5 stars 1,027 Reviews |
| Finish Types | Unfinished |
| Global Trade Identification Number | 00725786498000 |
| Included Components | Cedar Garden Bridge |
| Item Depth | 48.5 inches |
| Item Dimensions D x W x H | 48.5"D x 26.25"W x 18.25"H |
| Item Type Name | Garden Bridge |
| Manufacturer | Shine Company Inc. |
| Manufacturer Part Number | 4980N |
| Manufacturer Warranty Description | Shine company warranties to the original purchaser for a period of one year of residential and commercial use starting from the date of purchase. This warranty covers any defects in the manufacturing and workmanship of the furniture components. Specifically excluded from this warranty shall not be liable for neglect of necessary care; improper assembly or handling products, abnormal use of product… |
| Material | Cedar |
| Material Type | Cedar |
| Model Number | 4980N |
| Mounting Type | Floor Mount |
| Number of Items | 1 |
| Number of Packs | 1 |
| Occasion | Birthday |
| Product Care Instructions | Wipe Clean |
| Product Dimensions | 48.5"D x 26.25"W x 18.25"H |
| Seasons | All Seasons |
| Size | 4 Ft. |
| Style | outdoor living |
| Theme | Architectural |
| UPC | 725786498000 |
| Unit Count | 1 Count |
C**L
Very Satisfied - pictures to tell the story
I needed a functional footbridge for my dry creek bed but also wanted something attractive. I looked at options ranging up to $1,000 but gambled that I could reinforce this one to make it just as strong as more expensive ones. The gamble paid off and I am very satisfied. The box arrived in good shape with no broken pieces. All parts were present. A few have small cracks but with proper sealing and regular maintenance (like a wood deck) as well as the reinforcing I did I don’t think they will open with time. The quality of the millwork is excellent for the price. If you read other reviews you will wonder if it is sturdy or somewhat weak. I think the truth is somewhere in between. Mine felt fairly sturdy once fully assembled and I did carefully and lightly walk across it to test. Since I needed mine to be functional and crossed regularly I had already decided to reinforce it. Hopefully you can see in the photos how I did it and there is another reviewer's pics that show a great approach. I braced each footboard on the underside of the bridge with 1” x 2” struts cut from pressure treated lumber. They are pegged in from the sides with wood dowels and also screwed to the footboards from underneath. You can also see I added a baseboard at each end of the bridge using 3/4” x 6” pressure treated lumber. Before assembly I stained and sealed every part with Olympic brand Elite Stain Sealant - Cedar Mountain color. All-in it was probably another $100.00 of extra supplies and with the effort I’m confident this garden bridge will hold up to regular crossing of people, lawn more, and weather. Assembly – the instructions are only one page. If you’ve put together a good number of things you should find them fairly easy to follow – but if not take your time and look at other customer photos for better visuals of how it goes together. Without all the extras I did I could have assembled it in 2-3 hours. With all the extras I spent about 12 hours. Last - the lights are NOT included. They also came from Amazon: “Greluna Solar Wall Lights”
G**S
As well made and easy to put together
It’s really nice as a ornamental piece for your pond
D**E
Good Overall, But Poor Quality Control
I love the design of this bridge and it’s perfect fit for my pond, however I had to do some repairs in order to get it there. After opening the box and taking everything out one of the side rails fell into two pieces with a clean break (see pics). I used some good wood glue and clamped it together to cure for a few days. It appears strong, but for someone unable to do repairs they would be out of luck with no real support available. It was also missing about a dozen screws, but finding replacements at the home improvement store was simple. I recommend using some finishing sand paper to take away rough edges of the braces and side rails in preparation for staining/painting. I used three full cans of Olympic Stain & Seal, saturating each piece then immediately brushing it in for uniformity. I 3D printed some dividers to make sure the slats were the same distance apart, otherwise you’re eyeballing them. As you can see it looks really nice when complete, however I wish there was better quality control in place to make sure the wood was all in good condition and all the parts were all there.
S**A
Great purchase!!!
Love this bridge! ❤️ Easy to put together, it took me a couple of hours, by myself. I stained the wood. Great price. I used every day.
L**F
Easy to assemble—looks great!
It didn’t take too long to put this bridge together and it now sits across our dry creek bed in our perennial garden. Looks pretty darn cute!
T**N
Easy to build and sturdy
Easy to build. Ready to stain (we stained ours). Much sturdier than we thought it would be.
G**N
This bridge is not for amateurs
I had to adjust all of the holes and glue some split items with Gorilla Glue. It is important that you Gorilla Glue the floor strut halves in addition the bolting them together as per the instructions. Note: The instructions were a copy of a copy of a copy, etc. They were so bad the pictures were blank and a portions of the written instruction were illegible. After getting the deck half assembled it became evident the screw holes on the deck floor slats were drilled in the wrong positions. Many screws were missing the underlying side floor struts or so close to the edge they were splitting the strut on the inside. I completely disassembled the deck and started over. First I had to trim 1/4" from each end of the three floor slats that are positioned between the upright posts. If you want to maintain the design and not have the remaining floor slats extend beyond the outer edge of the upright posts, you will need to trim all the additional floor slats by an equal amount. Now all the screws hit the floor struts in the center. The screws that came with the kit are cheap. Just trying to install one with a hand Philips screwdriver caused the head to snap off. This was only the second screw I tried to install. I doubt that these would hold up long in weather. I quickly switched to 1 1/2" Deck Mate weather proof screws. This item is far from precision but with some skill it can look ok if you have the tools.
Z**T
Very cute little garden bridge
Nice looking garden bridge. Hopefully the picture of the finished product attests to that :). The instructions are straightforward so I'm surprised by the reviews that found them confusing. The shipment I received was missing a few screws, but when I emailed the email address noted in the instructions, providing them with my proof of purchase, they promptly sent me a full set of screws at no charge :). I didn't use a power drill to screw in the screws, but did drill pilot holes to make turning the screws easier. Like some of the other reviews noted, I glued and used wood filler to seal the gaps where the 2 horizontal pieces of wood attach to the vertical rails. Otherwise, I can see water getting into the wood in those areas and causing wood rot. I had wood rot problems with my previous bridge. In addition to painting the posts, I also applied a couple of coats of a good quality polyurethane on top of all wood surfaces. Hopefully that will also minimize water damage. Only slight minus is that the horizontal pieces of wood in the rails are on the flimsy side. So you will need to keep this bridge away from heavy falling debris. I was able to stand on the bridge, but it doesn't feel as sturdy as my prior bridge. I may end up putting supporting braces underneath as another reviewer had done.
L**I
needs two people to assemble
needs lots of screws to be assembles once assembled beautiful little addition to the garden
P**O
Lovely and easy to assemble
Perfect for my small under-the-deck area. Easy to assemble without an electric drill - I used a regular screwdriver.
A**R
Little bridge for your pond/ garden
Great bridge . Well designed, including all the nuts & bolts. You will need to stain / clear coat the wood.
Z**.
Decent product for the price; easy to upgrade if needed.
Overall a decent product for the price. I had to make some modifications to suit my needs. As others have mentioned, you should use wood glue during assembly to avoid creaks and things loosening up over time. I also had to instal some of the slats upside down because of the way they were curved - not an issue as the wood is soft enough for the screws to countersink on the back side as well (or it would be easy to bore some pilot holes as needed). I mainly needed this mini-bridge for the winter fat biking trail I like to build in my yard. There is a swale / small creek through the back of the property that almost never freezes, and that’s where I tend to sink and make a mess. I often hit this spot at speed and it’s in a slight turn as well. Because of that, I could not have the railings installed as I would most likely crash through them. The way the bridge is designed, the railing providing some structural support to the deck by reinforcing the outer two spans. It also means that crashing through the railings would most likely destroy the bridge completely by ripping the outer spans that are made of two pieces bolted together. To reinforce all 3 support spans, I installed some leftover lumber on the underside in a letter H pattern as seen in my photos. The hardware was more than long enough to do that. With this reinforcement, and glue on all contact surfaces, the bridge is rock solid and I have no issues hitting it at speed on the fat bike and bouncing the back tire off it for hours on end. For my application, you would definitely need to reinforce this bridge, as it’s not meant to be used with no railings and/or to withstand the dynamic loads of a bicycle at speed. Overall I am happy with it; it serves its purpose with the minor upgrades I made. I intend to seal it when the weather gets warmer and hope to get many years of use out of it.
C**M
Easy build!
I’m quite satisfied with the final product. I was feeling a little skeptical about buying a wood backyard/garden bridge online, but it’s going to look great in my yard! It took myself 40 minutes to build, not bad for a lady!
Trustpilot
3 weeks ago
3 weeks ago