Desertcart purchases this item on your behalf and handles shipping, customs, and support to Tunisia.
🔥 Elevate your backyard BBQ game with Weber’s iconic 22" Smokey Mountain Cooker!
The Weber 22-inch Smokey Mountain Cooker is a premium charcoal smoker featuring a durable porcelain-enameled body, dual cooking grates for versatile smoking, and precise temperature control via a silicone grommet and adjustable dampers. Designed for both novice and experienced grill masters, it offers easy charcoal access through a large aluminum fuel door and is supported by a 10-year limited warranty. This smoker is celebrated for its consistent heat retention, rust resistance, and ability to smoke multiple large cuts simultaneously, making it a top choice for serious outdoor cooking enthusiasts.


| ASIN | B001I8ZTJA |
| Best Sellers Rank | #28,272 in Patio, Lawn & Garden ( See Top 100 in Patio, Lawn & Garden ) #27 in Outdoor Smokers |
| Brand | Weber |
| Brand Name | Weber |
| Color | Black |
| Customer Reviews | 4.7 out of 5 stars 5,504 Reviews |
| Fuel Type | Charcoal |
| Global Trade Identification Number | 00077924081484, 10077924081481 |
| Included Components | Weber Smokey Mountain Cooker 22-Inch Charcoal Smoker - 731001 |
| Inner Material | stainless_steel |
| Item Dimensions D x W x H | 24"D x 23"W x 48.5"H |
| Item Weight | 68 pounds |
| Manufacturer | WEBER |
| Model Name | Weber 22-inch Smokey Mountain Cooker Charcoal Smoker |
| Model Number | 731001 |
| Number of Items | 1 |
| Outer Material | Aluminum |
| Part Number | 731001 |
| Power Source | charcoal |
| UPC | 779240814844 077924081484 |
| Unit Count | 1 Count |
| Warranty Description | 10 year limited |
T**D
5 Stars because I love it
This is the first smoker I've used/owned. I chose Weber because of my years of experience with their charcoal and propane grills. I decided to get into the realm of smoking after cooking chicken low-and-slow on my Weber kettle with fantastic results. I chose the WSM after reading so many wonderful reviews from novices and experienced users. I honestly didn't compare any other brands so take this review how you will but so far I think this thing is fantastic. I chose the smaller WSM after comparing it to the larger WSM after reading that I can smoke a whole turkey AND a ham on the 18 ½" smoker. Also it's quite a bit less expensive. The WSM arrived intact and in perfect condition. The instructions are simple and assembly a breeze. After reading about the different methods for starting the coals, different recipes, meat prep/trimming etc. (check The Virtual Weber Bullet site) I decided to give the smoker a try by fileting 3 whole chickens. They turned out ok but I was really just testing temperature control and didn't brine my chicken or use wood chunks. The chicken was quite tasty but not what I was after but I felt confident going to my next try, pork butt (shoulder). For this I used an Alton Brown recipe for the brine and rub and it turned out excellent. I didn't add any wood chunks and experienced smokers are probably rolling their eyes at me but it really did turn out great. I wanted to do things in steps so that I could familiarize myself with the temperature control. This pork butt took 11 hours for 2-8 lb butts at around 210 degrees. Amazing how long the charcoal briquettes last in this thing and how steady the temperature runs. For the record I used Kingsford Competition Briquettes (Costco). My third try with the WSM was this past weekend where I did 3 racks of baby back ribs. I used a rib rack and it worked pretty well where nearly all rib parts were exposed to the heat/smoke. I decided to skip the brining and just added a dry rub only and then added bbq sauce and honey mixture during the last hour and smoked them a total of 4 hours. This time I used wood chunks; I didn't have any fruit trees so I grabbed a bag of apple wood chunks packaged by Weber and they definitely helped make a fantastic smoke flavor. After removing the ribs and letting them cool I coated them with another round of sauce/honey glaze and seared them on my Genesis until the glaze bubbled. They turned out very good although I think next time I'll brine them; not that they were dry but I think it might let me smoke them longer. I didn't go for fall-off-the-bone as I kind of prefer to have a little pull left in my rib but let's just say I look forward to experimenting with this terrific smoker all summer long. I couldn't be more pleased with this product after just 3 tries I'm feeling much more confident and have plans to do another double pork butt for a buddy's birthday this weekend. Also I tested the lid's thermometer last night by dipping the end of it (using tongs) in boiling water and it was pretty much spot on at 212F. That's good to know as it gives me some reassurance that the cooking temperature is pretty accurate at least at the lid. Weber got this right. I don't know what I'd do differently on this but I may get lazy later on and invest in a remote thermometer so I can track the kettle and meat temps from inside.
S**E
This is a Great Smoker!
I have probably a dozen cooks on this smoker so far and all have turned out well. I like the small size of this smoker...perfect for smoking 2 slabs of pork spare ribs on the top grill with room on the bottom grill for more. I'm using this smoker with a Maverick digital thermometer I bought from Amazon too...the type of thermometer that shows pit temps and has a probe for food. My advice, buy the Maverick thermometer and forget about using the thermometer that comes in the lid. You want to measure the temp at the food grate where you are cooking and not the temp in the top of the lid, and the Maverick Thermometer has both a transmitter and a receiver so you can view pit and food temps up to 200' away from the smoker. I often use the smoker while I'm inside while it's hot outside, and by having a receiver thermometer, you can keep an eye on your cook w/o standing over it FWIW I also have the 18.5" WSM and I bought a pit blower for it. The pit blower is a fun gadget to use but not really necessary so I don't use the pit blower on my 14.5" WSM. As stated...it just isn't needed. You can keep a fire going at a steady rate (temperature) in this pit without the blower, and by using the Minnion Method of charcoal keeping, you can read about elsewhere, and speaking of which, there is a great online community for the Weber Smokey Mountain smokers (Virtual Weber Bullet). In fact, that forum links to Amazon's website to purchase this pit and other Weber accessories for this smoker I have absolutely no complaints using this smoker, and I felt I did a lot of research before buying it. If you've ever used a Weber grill, then you will realize this smoker will reflect Weber's high quality standards found in their other products. Seriously, if you are looking for an easy to use smoker, then look no further, and buy and use Kingsford charcoal with it (in the blue bag). There's quite a bit of information about what type of charcoal to use and not to use on the Virtual Weber Bullet Forum By adding chunks of specific wood for smoking, you can achieve true wood smoking on this charcoal smoker. I had a horizontal wood fired smoker 14 years ago which was lost through a move, and I wanted to replace it with another smoker of the same type, but I'm glad I bought this smoker instead as it is simpler to use, smaller, less expensive and you can still get the same great wood smoke taste with this one, and use less wood, and the fire is way easier to keep at a constant temperature I'll say this...if you want to smoke packer briskets, you'll need to use the larger Weber Smokey Mountain smokers, and is why I bought the 18.5 WSM smoker, which easily accommodated a 15 lb. packer brisket, after trimming. You could smoke a brisket flat on this 14.5" WSM but if you want to smoke a packer (point and flat) then you'll need the either the 18.5" or the 22" WSM. I think I have the best of both worlds owning two of these (one 14.5" and one 18.5")
A**R
14.5" WSM Perfect if You Aren't Cooking a Lot of Meat
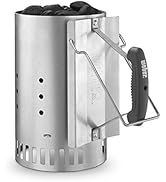
I got the 14.5" WSM with no customizations and no special accessories other than gloves, a starter chimney, and starter cubes. I had never smoked anything before in my life. First I did an initial burn-in (which some YouTubers recommended) with block charcoal that burned very hot and let it burn all day. The next day I more or less followed the instructions from a video on a 6 hour cook. I did 2 half-racks of pork (babyback) ribs from the supermarket. I used Kingsford blue (original) charcoal for this (burns cooler), making a crater in the center for the hot coals and filled the water pan 3/4 full. One rib rack went on lower grate and one on upper grate. The WSM maintained a steady 235-240 F temperature for the first 3 and 1/2 hours with no effort. Then I took off the cover and turned them. The water pan keeps them very moist and also helps maintain the temperature. Taking the cover off to turn the ribs fed the charcoal with oxygen and the temperature went up as high as 275 F. I was able to get it back down to ~240 by closing the vents for a while and again I was able to maintain ~240-250 F temperature. I swapped the ribs on the lower grate with the upper grate, just to ensure consistency, but I could not really tell any difference between the two. After six hours, I took the ribs out and they were perfect, falling apart tender, and absolutely delicious. The 14.5" WSM will allow me to save on charcoal over the larger grills, and it is super easy to take apart and move (even when hot if you using the gloves). Maybe I just got lucky on my first attempt, but the 14.5" WSM seems to be perfect for me and my meager needs.
D**D
Another happy owner after a year of steady use.
There are a lot of positive comments about this smoker and most people go to great lengths to explain their happiness. There's a good reason. I've been grilling for a very long time but barbeque wasn't done much over the years because the results just weren't worth the effort. Now I understand that the proper equipment is essential. You'll have a very hard time making good barbeque in a $50 Brinkman. If you're talented enough to do that you're probably not cooking on one of those anyway. This smoker isn't cheap but it also isn't a Big Green Egg or a decent side smoker in terms of expense. Most of the side smokers are hard to regulate and most don't cook evenly without some extra work. Find a blog on side smokers and you'll find lot's of "fixes" and "fiddling" to get the heat even. This Weber is really easy to use for low and slow cooking and it doesn't require much "tending" on a 10-12 hour cook. By the way, you definitely can use a couple of Weber chimneys to get a good, quick start on the fire without petroleum based fluids if you opt to buy one of these. Lighter fluid is generally a bad thing. You either have to burn up a good bit of your fuel to get all of the lighter fluid gone or, even worse, you stink up your food with it. We've been using this smoker for about a year now and I'm happy with the purchase. The 22.5 is a surprisingly big boy for sure when you take it out of the box but now I can do 8 racks of ribs if I want. If you don't ever need to do that much, the smaller one may be a better choice for your needs but they both do the same work in the same way. If you've ever seen a Weber kettle grill (and who hasn't?) this equipment will be very familiar to you; same porcelain on steel construction, same vents and still made in the US when I got mine. Several people mentioned being disappointed with quality of the access door and I agree with them that it should fit better out of the box but, with some careful bending you can get a good seal and then you don't have to fool with it again; it stays put. It's made from fairly thin stucco embossed aluminum that you can easily shape with with your hands. Just take your time to get it shaped a little better to the smoker barrel and you're all set from then on. After getting used to tipping it sideways to remove and replace the access door, it really does work quite well and the size of the opening makes it easy to add fuel or wood chunks during the cook. I've eaten barbeque from Texas to Virginia and it's always a favorite choice when traveling somewhere because it's all a little different. I've had dry rub ribs at the Rendezvous in Memphis and wet ribs in St. Louis and pulled pork at Dreamland in Tuscaloosa and chicken and rib plates at Johnny Harris' in Savannah and I like Luther's in Houston for brisket! My point is that I've had some REALLY good barbeque but now I can duplicate what the Rendezvous serves right on my patio. My pulled pork is as good as anything I've had in ANY restaurant; ever. The best barbeque I eat is at home now. The restaurants just aren't likely to take the time to do what you can do with this smoker and maybe Big Bob Gibson's book on how to do it....which is well worth the $16 in my opinion. If you want to do some truly great barbeque at home, spend the money for good equipment and take just a few minutes to learn some rubs and sauces. If you can read, measure and tell time, you can make some excellent smoked meats without buying someone else's WONDER SAUCE (aka ketchup, vinegar, salt and a few minor spices)to slather on the meat and call it your own. What you can make from scratch is cheaper and better than most of what you would buy. And, when you're done, you'll be justifiably proud of YOUR barbeque and probably a very popular cook with the people who get to eat it. I mean, they're just not going to be getting any peach roasted pork shoulder anywhere but your house......Lord that's a good recipe from Big Bob's book! As we say in parts of the south, "that stuff is so good it'll make your tongue slap your brains out." Get the smoker, get some books and have some FUN if you like to cook outside and show off a little. You'll be famous and popular in no time.
N**1
WSM for the win!
I've had this now for nearly 10 years. It's been through it all, including getting violently knocked over during a storm causing the lid and cook chamber to get deformed a bit, yet we're still here churning out one great meal after another. The WSM's ability to hold temperatures is the gold standard amongst all charcoal cookers on the market. I would buy this again and again and cannot possibly recommend this cooker enough. One tip for anyone starting out with this or looking to improve: Foil over the water pan but keep it empty at all times. It will act as a heat deflector while also giving you better control over the smoke flavor (via wood chunks). WSM for the win!
R**R
Why didn't I buy it sooner!
Received my 22.5" WSM yesterday, set it up in about half an hour. I'm not sure if the cook book others have mentioned was missing from the box or perhaps Weber no longer includes it but no matter, I'm no newcomer to BBQ. There are no assembly instructions in the book that I DID receive however there is a nice exploded diagram showing where all the parts should go and I believe this should be enough for all but the most mechanically challenged. Everything fit together nicely without any "Jimmying" or banging and all the fasteners were included. Well .... it was a beautiful day and still plenty of daylight left (12:30 P.M.) so I decided to fire it up and get it seasoned. I have a 30 gal. plastic trash can that I keep filled with Mexican mesquite lump charcoal for my trusty old heavy iron sidewinder (offset) pit so, I decided to use that instead of running to the store for briquets. Filled the charcoal ring about level and threw in some mesquite chunks, then dumped about a quarter chimney of lit charcoal on top, sprayed the inside of the center section and lid with Pam cooking spray, filled the water pan and put on the lid. Started out with all the vents wide open and within 30 min. the temp. was at 200 degrees and climbing so, I closed two bottom vents. Temp. continued climbing till it reached 225 deg. and held there, very nice! As I said, it was a beautiful day and I couldn't feature letting that fire go to waste so, I put on some beer brats and a "Fatty" (to help with the seasoning of course :->) and let them smoke for about two and a half hours. Now, I'll be the first to admit you'd have to try pretty hard to mess up something as easy as that but I gotta tell you they were amazing! After I took the meat off I let the fire continue to burn still holding at 225 deg. until 6:30 P.M. when I closed all the vents. This morning I cleand it up and found it still had about a third of the unburned charcoal remaining. I'll use briquets when I do the first long smoke for brisket or butts and expect it'll give me 12 hrs.+ burn time without any problem. My old sidewinder pit will work you to death on a long smoke because it uses so much more fuel and if its cold outside I may as well just forget about it (barbecueing). Now I expect to finally get a good nights sleep without having to babysit the pit. I give it 4 stars instead of 5 because the thermometer fogged up. I know that's nit pickin and you need a good meat thermometer with a probe anyway but it just looks bad on an otherwise high quality (and expensive) product. A final word on the Minion method (that's what the method I used to start my fire is called) for those just starting out. My very first attempt at real barbecue (not grilling) took place 30+ years ago using what's affectionately referred to nowadays as the ECB, which stands for "El Cheapo Brinkman" water smoker. I could fill a book writing about the inadequacies of this unit but, to their credit, the method of starting the fire was outlined in the instruction manual that came with it and I've been using it ever since. If you want long burn times its the only way to go. In addition to the WSM I also purchased the Pitmaster IQ temp. controller. It came in the day after the pit so, I haven't tried it out yet but, from what I've seen it may not see much use. The WSM is rock steady all by itself. Where I live (So. Texas) the wind is a constant companion, it often blows 20 to 30 mph and can make fire tending a real chore. I bought the Pitmaster as insurance for those difficult days. UPDATE on the Pitmaster iQue 110. After a good deal of head scratching and hair pulling and some help from my son who is an engineer, I think we MAY have this thing figured out. It appears (to me anyways) that this device will only function properly within the confines of a specified air flow of between 5 and 15 cfm. You must have your pit configured to allow no more than 15 cfm and no less than 5 cfm air flow through the combined top and bottom vents, this takes some trial and error as no two (pits) are exactly alike. Too little flow and the Pitmaster cannot recover when the temp drops out of range and too much will not allow the temp to fall when it gets too high. I finally settled on this configuration; Two bottom vents fully closed, the Pitmaster air manifold vent fully open, and the top vent slightly more than half open. I've gone to great lengths to seal up the air leaks on my WSM (lid gasket, high temp tape, etc. etc.) and you may or may not need to do the same depending on how tightly yours fits together, mine was like a screen door! Anyway, I can say with some confidence now after several trial runs that we seem to have it nailed down to the point where I can get some sleep at night while barbecueing. If you buy one of these be prepared to do some experimenting but all in all I'd say its worth the money.
H**O
28 Grand Championships on this smoker and counting
November 2017 Update: All it takes is one WSM-18 to win a Rib Championship, even caveman pitmaster style when no foil or electricity is allowed. See pics. ----------------------------------------------------------------------- My BBQ team Slap Yo Daddy BBQ from Diamond Bar, California, has been competing using these smokers which I bought off Amazon with free Prime shipping. They work flawlessly and are easy to use and clean up. Our WSMs regularly allow us to win Grand Championships even when we go up against other smokers costing over $15,000. The key step once your smoker arrives is to ensure you season it properly. New WSMs will tend to overheat until you are able to get grease and gunk on the inside and around the rim where the lid sits to ensure an air tight seal. The fastest way to season is to do the following: Phase One - cover the water pan completely with aluminum foil and run a full load of lit Kingsford briquettes and let it run as hot as it can with no water in the pan (over 350 degrees) to burn off any manufacturing residue. Clean out the ash and proceed to phase two. Phase Two - fill the charcoal basket 1/2 full of unlit briquettes. Then put in a 1/2 chimney of lit Kingsford briquettes in the middle. This will allow a slow burn for 3-5 hours at 72 degrees outside temperature. Adjust the vents to get 275 degrees on the dome thermometer. Put bacon strips, chicken parts, pork fat, or any other scrap meat you don't plan to eat. The key is to get fatty meats to generate lots of grease. Toss in a couple of tennis-sized wood chunks to generate smoke. Repeat Phase Two at least twice before you cook meat that you want to eat. Phase Three - When you cook meat you plan to eat, take a tip from me and don't use any water in the pan. When I cook, I just cover the water pan with foil top and bottom. I foil it twice so I can remove the second layer after the cook and refoil it. That way, I don't have to clean my pan. It works just as well, AFTER YOU SEASON YOUR WSM, when you cook without water in the pan. Dry heat allows the crust to form faster on the meat (called the bark). Once the crust forms on the meat, you can introduce moisture. I just spray water with a regular spray bottle to encourage bark formation after the initial crusting (Maillard reaction) has begun. To test for properly formed bark, use your finger nail and scrape the meat surface. If the crust has formed, it will not come off when you gently scrape it with your fingernail. If the crust comes off, the bark has not set (still wet) so don't spray until it sets. Let it cook longer and check back in 15 mins. You'll get much better results this way. We've won many awards with this technique. When it comes to cleaning your WSM, never wash the insides. Get a good grill brush and scrape down the insides and dome. You need the "aroma" which takes several years to build up. I NEVER mix my meat WSMs from my seafood and hotdog WSMs. Nothing destroys the aroma faster than cooking fish/seafood/hotdogs in a WSM used to cook chicken, ribs, pork, brisket, and tri tip. That's why you should buy a pair if you plan to cook seafood/fish/hotdogs. Better yet, get a Weber Kettle for those meats. Remember to always empty the ash from the bottom and grease on the foiled water pan to avoid fires and any rancid old oil smell before you cook. When you need to clean the grates, put the grates in a big plastic trash bag, put on gloves, and spray oven cleaner on the grates while in the bag and let sit for 1/2 hour. Hose off the grates. It's as easy as that. To clean the outsides, I use Simple Green spray. Enjoy your WSMs. They are awesome and built to last. -------------------------------------------------------------- Updated March 18, 2014 - in response to questions on fire and temp management on the WSM-18, I added a link with more tips [...] OK. A reader notified me that Amazon deleted my link to my bbq team website where I feature easy recipes of the backyard cook. No worries, you can find it if you Google my team name. It's got pics and such. For the words, I cut and pasted the info for you as follows: Fire Control Before I describe how to season your new WSM, I want to explain the basics of fire control in a barbecue pit. Regardless of the pit you're using, they all have three major components that you'll need to learn to control to maintain proper cooking temperatures: 1) the air intake, 2) fuel you're using, and 3) the exhaust vent/chimney. I use Kingsford Blue briquettes so my description assumes you use the same fuel. If you use something else, your mileage will vary. I've used KF Blue since I started competing in 2008 and with over two dozen Grand Championships and 80+ first places including a first place USA in chicken in the Kansas City Barbecue Society Team of the Year 2012; I know KF Blue works well. Besides, I buy them on sale in the summer months for half price and stockpile them for my classes and contest year where I use over a hundred 20-lb bags annually. Yes, I do use other types of fuel like lump charcoal and pellets but I like to compete using KF Blue (no, they are not my sponsor) because I can fly into any city in America and drive my rental car to Walmart to pick up one bag of KF Blue and win a Grand Championship. In the WSM, there are three circular intake damper vents at the bottom that can be opened or closed as needed to allow more or less air to enter the pit. More air and the temperature goes up and less air causes the pit temperature to go down. The circular fire steel fire ring holds your charcoal and you can adjust the amount of charcoal depending on how long you need to run the pit. If you run it for chicken (2 hours), you only need to fill the ring about 1/3 way. If you want to cook ribs (6 hours), you will fill it about 2/3 way. If you're cooking brisket and pork butt (> 12 hours), you want to fill it all the way going past the top of the charcoal ring until it is overflowing. Be sure to remove the excess briquettes that have fallen over the side of the charcoal ring. Do a bit of Jenga and create a volcano shaped crater at in the middle of the overflowing mound of charcoal by removing excess briquettes and returning them to the charcoal bag. When you're ready to start cooking, carefully dump a half charcoal chimney of lit briquettes into the crater. Over the next 12-16 hours, the briquettes will burn gradually outwards as the temperature stays constant. I cook my long haul meats at 250F and everything else (chicken, ribs, tri tip, beef ribs, etc) at 275F. If you are using a full overflowing load of briquettes for a 12+ hour cook, the standard deep WSM water pan won't work because it sits too low and will bump up against the top of your briquettes. No worries. Just remove the deep water pan and use the silver aluminum heat shield instead. You need to unsnap the heat shield and wrap it in double layer of aluminum foil and use that ultra-light pan in place of the deep water pan. If you have access to a WSM circa 2008 and earlier, those older WSMs come with a shallow water pan that does not bump into the briquettes. Alternatively, you can go to Home Depot and get yourself a terra cotta planter base that's the same diameter as the WSM water pan. I don't like the terra cotta approach as it's added weight I have to carry when I transport my WSMs which have already accumulated over 100,000 miles of travel all over the US. Of the three components I mentioned: intake, fuel choice and amount, and the exhaust, the most effective component to maintain constant temperature is not the intake nor the fuel. It's the exhaust. Many beginners I come across are not aware of that. All seasoned pitmasters know how to intuitively draft their pit using "clean" smoke to color and flavor their barbecue meats. The draft refers to the vacuum effect when you open or close the exhaust vent of your pit. When you open the exhaust vent on the WSM, you allow hot air to leave the pit and this creates a vacuum suction to draw air in from the bottom intakes. Thus, by skillfully manipulating the top vent, you can control your WSM like a pro. Many beginners constantly fiddle with their intake dampers in hopes to maintain a constant temperature with less success than leaving the bottom vents untouched and fiddling with the top vent to control the draft within their WSM. In future articles, I'll address the mechanics of damper control on the WSM (e.g., old school versus automated blower systems) and the science on dirty smoke, white smoke, clean smoke, blue smoke, sour smoke, etc. For now, just give my technique a try and see if it works for you. Once you have seasoned your WSM using the steps below, follow my technique to light your pit and leave one bottom vent open and the top vent half open. Allow your pit to come slowly up to temp (it may take 30-45 minutes). If the pit starts to over temp, gradually shut down the top vent and it will calm down. New WSMs invariably overheat until after half a dozen cooks so be prepared to cook with top and bottom vents all completely closed in your first few cooks. If you have the top vent completely open and one bottom vent completely open and your pit does not come up in temp, you can open a second bottom vent, followed by a third. Usually when you open the second or third, it means you're out of fuel. You can toss 20 briquettes through the fire door and be careful not to snuff out the fire. If your fire is already out, you have to light your briquettes before you toss them into the WSM. Here's are a couple of tips if you need ramp up temps quickly. You can prop a ½ inch piece of wood to keep the WSM dome lid ajar. Alternatively, you can open the WSM fire door and let air in to crank up the temps. With both of these quick fix approaches, do not leave your WSM unattended as the temps could rise fast and you'll burn your meats.
E**U
14inch is way to go, 22 & 18 too big
2021 Update: The smoker finally got stuff growing inside after about 5 years, which made me sad. My final thoughts are The 14 was definitely the right choice for me. It gave food lots of smoke flavor we loved. The only drawback for these things is the monitoring of the heat as with very long overnight cooks the wood/charcoal can get critically low impacting the cook. This is also why the 14 was a good choice as was not heavy with food loaded to remove the top pieces from the pit and add more fuel. That’s really the main drawback with these things, the monitoring part. That’s why I didn’t replace the unit when it failed and bought a Traeger instead Ironwood instead. Still happy though with this purchase and it’s 5 year service life. Great intro to smoking foods. End 2021 Update. First off after reading all the reviews I was convinced to go with the 22inch version and call it a day. That would have been a big mistake - that is the problem with buying products online, you don't get a sense of the product. Fortunately I have a bbq shop near my home that stocks the 22 & I can tell you it is huge (like a New York style round trashcan) and heavy (50-60 pounds?) Looks like more for commercial purposes than home cooking. Once I saw that monstrosity, I realized my choice was between the 18&14 inch size. After much research and measuring, I realized the 18 inch version was too big as well (& must be equally heavy) - the 18 inch seems like the right size for someone who entertains for 40+ people regularly - overkill for someone wanting to invite his family over or cook for his own family. To put it in perspective, you can fit two pork butts on the 14 and 4 butts on the 18 - I recently did one butt and had enough pulled pork for 6 adults and 6 kids, and there were left overs that could have fed at least one more family (2 adults and 2 kids) - this means I can feed 12-16 with one butt and 24-32 with 2 on the 14 - more than enough. There is a reason Weber started making the 14" again - it is perfect for a small gathering. Also, the 14 uses less fuel and will cost less per use in the long run (for example if you smoke 2 butts in the 18 (versus its capacity of 4) u need to use more fuel because of the bigger space to heat up. Remember the unit is engineered/designed for use of Both racks (which makes the 18 more efficient for 4 pork butts versus the 22 for example). Another bonus is the 14 kept the temperature very consistent and did not overheat like some have noticed with the bigger models (must be all that charcoal) Finally the 14 is portable (and used around the world by bbq teams that compete) and easier to clean given its smaller footprint. My 14 had enough room for us to cook a slab of 5 pound brisket bought at our local warehouse club and an entire slab of baby back ribs cut up into 3 parts. The ribs were perfect and moist - the brisket was perfectly smoked and tender. I did this for my family and we could have easily fed another 8 people. Using the minion method of heating coal (in middle area) there is was enough fuel for an overnight cook 13+ hours at 200-210. I couldn't be happier with the 14inch size and am convinced it was the right call as it is efficient and portable. As a bonus cleaning it was easy as well. If you are on the fence, go with the 14" and use the 100 bucks saved on accessories and food. You will thank me as the others are overkill unless you have a business or cook regularly for 40 (18") or 70 people (22"). Happy smoking!

B**N
Great little smoker
I went for the smaller of the Smokey mountain, I had a big get together and smoked a brisket for over 5 hours along with doing BBQ usuals, the Weber done me proud, didn’t have to faff about with it too much, set it up as per instructions and you can’t go wrong 👍
G**O
Perfecto
Excelente control de tenperatura
G**S
Seriously the best ever
Edit: June 26th 2015 - I see this smoker is no longer available via amazon.ca (amazon prime) and that the other two stores who sell it have it priced over $500.00. I paid 360.00 for this early January with amazon.ca. Local bbq stores / home depot also sell it for $360.00 still. Do not pay much more than that for it, or at least shop around! What an absolute joy this smoker is. Purchased it off the positive reviews from amazon.ca and the 600+ 5 star reviews from amazon.com. I ordered this from amazon.ca and paid the extra 2 or 3 bucks for next day shipping - hoping to have it arrive before the weekend as a chinook was to be passing through and temps were around 15C. The smoker arrived in time, however, it didn't ship with the 3 grills needed to cook (boo!). Yes I was bummed but I have to say the Weber customer support was *awesome*. Phone support from 7am - 9pm Central time was a nice surprise as I called after work and assumed to get an automated message saying to call back between 9-5 or something. The lady on the phone took my serial number down (on the top lid vent) and said she would expedite the grills to me right away - no questions asked. These arrived 2 business days later via FedEx. Mishaps do happen from time to time at assembly but support was great to get me back in grilling action. Now for the smoking: I read a few tips on the weber and there was a great write up for this unit on amazon.com (it's the top rated review - can't miss it) where the guy is basically a competitor and runs a school on smoking. Follow his tips and you'll be pleased. I did my first smoke with beef ribs. Temp was about 2C and pour cold coals in the smoker. Then you light the coals in your chimney starter: http://www.amazon.ca/Weber-7416-Rapidfire-Chimney-Starter/dp/B000WEOQV8/ref=sr_1_10?ie=UTF8&qid=1422715633&sr=8-10&keywords=weber+kettle I was new to smoking and didn't quite get you had to prelight coals and use those to get your smoker going. At least that seems to be the most common method. I let that chimney starter sit on my gas BBQ and stuff paper under it (or light it on the coals on bottom rack of smoker). It doesn't take long for the briquettes to start up and go on their own after. Once those are glowing hot you pour them over top the unlit coals in your smoker. Open up all the vents (top and bottom) and let it get to around 200F. Ribs go on and temp was around 225-250. I closed the 3 bottom vents 1/2 way to keep it around that temp. The top vent ALWAYS leave fully open. I was able to manage the temperature quite well by bottom vents. These beef ribs cooked for about 3.5 hrs at 225 and were awesome. Basic seasoning with salt, pepper and some garlic powder. I also used 3 chunks of weber hickory wood. http://www.amazon.ca/Webber-17056-Hickory-Chunks-5-Pound/dp/B000LNY4C6/ref=sr_1_1?ie=UTF8&qid=1422715927&sr=8-1&keywords=weber+hickory This really gave the ribs an amazing taste but some find it pretty strong. Over all, I was really pleased with the ribs. Smoke 2 - Pork ribs Same steps above but this time 2 hours into the smoke I took them off and put some sauce on all sides. Wrapped them in foil and put them back on for another hour. Wow - just amazing. Wife and I loved them and had friends over to enjoy too (after initial trial run I felt confident to serve guests :) ) Turned out perfect. I also put on some potatoes, dill, butter and onions in a foil wrap and let them stay on for 3 hours too. Veggies turned out great. (poked a few little holes in foil to let smoke in). On this run I used the weber Applewood chunks. It doesn't take like apple but the smoke taste was a little weaker than hickory. Rib update: For absolute fall off the bone ribs, I have found the key is to cook around 200 - 225 for 3 hours. Then take them off, sauce them up with bbq sauce or even salsa and wrap in foil. Put back on the smoker for another 2-3 hours. Insanely good. Yes you are looking at a 5-6 hour cook but you have *got* to try it. I also would put on a wood chunk every hour for the first 3 hours. Once wrapped in foil I did not bother. I find the smoker easy to use and more importantly - fun!. It's now Feb and I suspect I will do a few more winter smokes but really looking forward to summer and trying a 12 hour smoke on some larger types of meat. Having this simmer all day long giving off smokey goodness ... For the price of this thing, it can't beat. Add to cart and move along! gm Edit: The smokers after 2009 I believe (as shown in the picture) do have a built in thermometer. I bought a second one and inserted in the side cut out for a probe (also built in by design now from weber) to see if the one from weber was accurate. Both read exactly the same so if you buy this newer model, you should be fine with the default weber gauge. Edit 2: I recently did a roast and purchased the igrill mini to monitor inside temps: http://www.amazon.ca/iDevices-IGR0001-iGrill-Mini-Thermometer/dp/B00I25PGZO/ref=sr_1_sc_1?ie=UTF8&qid=1423847806&sr=8-1-spell&keywords=igril+mini This thing is really awesome and for long cooks or meat that you need to monitor temp, it's a breeze and could watch the temp of the meat while inside on my ipad or iphone (also works with android) Edit 3 (Oct 8th): Have used this all summer almost every weekend. Briquette prices seemed best from Walmart or the odd Super store special. Walmart also surprised me with their selection of wood chunks in the bbq section. Very large chunks, inexpensive and wide range of wood.
J**M
El
Es un buen ahumador lo conseguí en una promoción de 8,900 pesos. El gran tamaño de la bandeja de agua ayuda mucho a controlar fácilmente la temperatura. La doble parrilla maximiza el espacio, la escotilla que tiene permite hacer las recargas sin interrupción de la cocción. El único contra, es que consume más carbon de lo que un kamado haría.
D**Y
Poor design
Split it trying to fit it
Trustpilot
2 weeks ago
3 weeks ago