🎉 Light Up Your Holidays with Creativity!
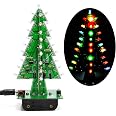
The Gikfun 3D LED Christmas Tree DIY Kit (EK1697) is a synthetic craft kit designed for the holiday season. Weighing only 0.02 pounds, this lightweight kit features brilliant white LED lights, making it a perfect festive project for families and friends to enjoy together.
| Plant or Animal Product Type | synthetic |
| Item Weight | 0.02 Pounds |
| Package Quantity | 1 |
| Occasion Type | Christmas |
| Seasons | winter" or "holiday season |
| Colour | White |
| Light Color | White |
| Built-in Light | No |
| Special Features | Led light |
C**L
Xmas tree
Bought this for my son. He really enjoyed making it. Quality components and good instructions. The effect when made is fantastic.
M**R
Fun!
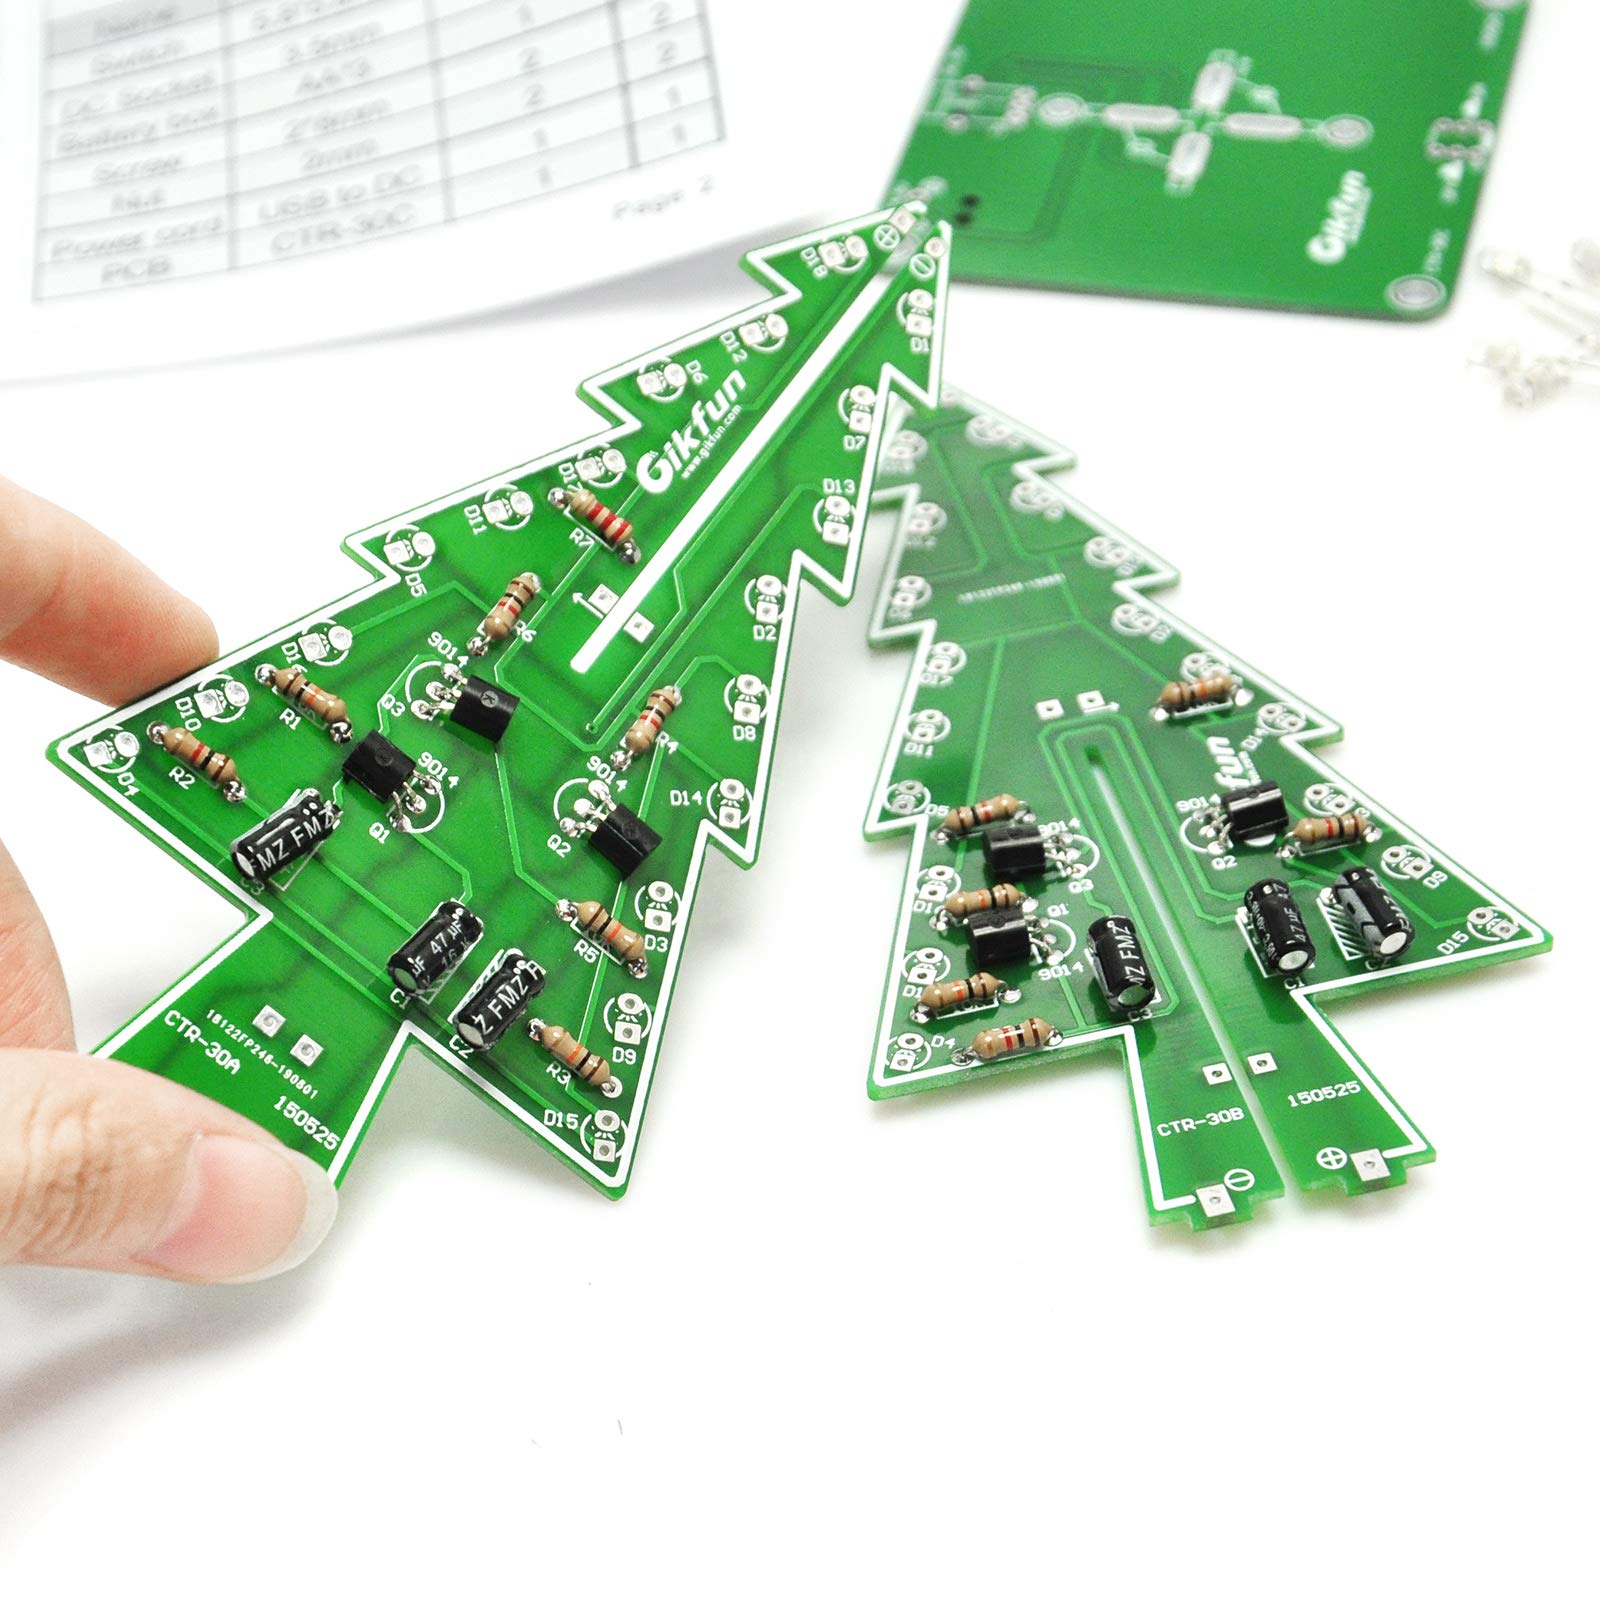
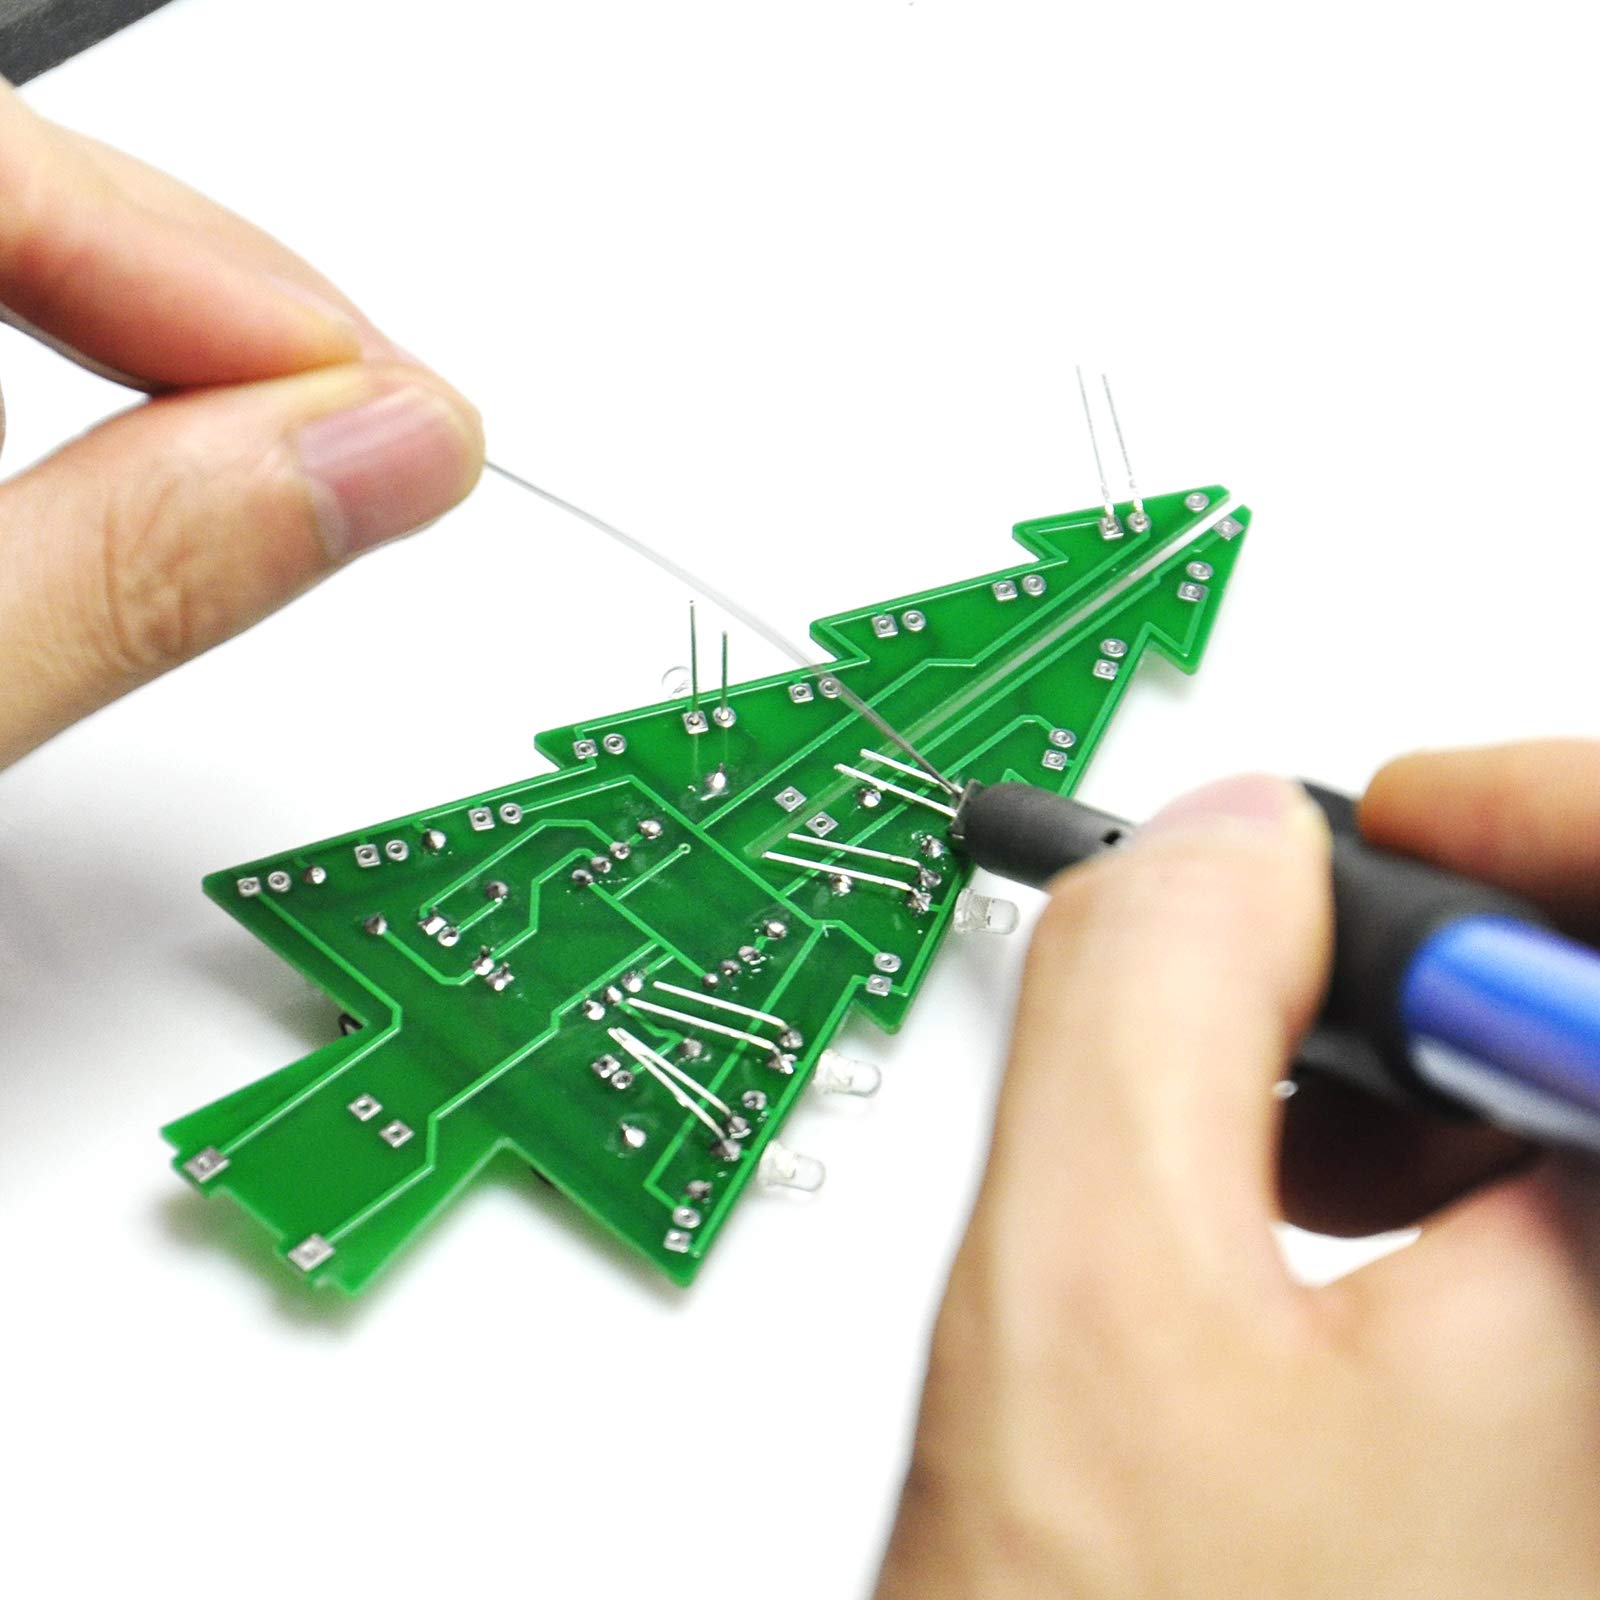
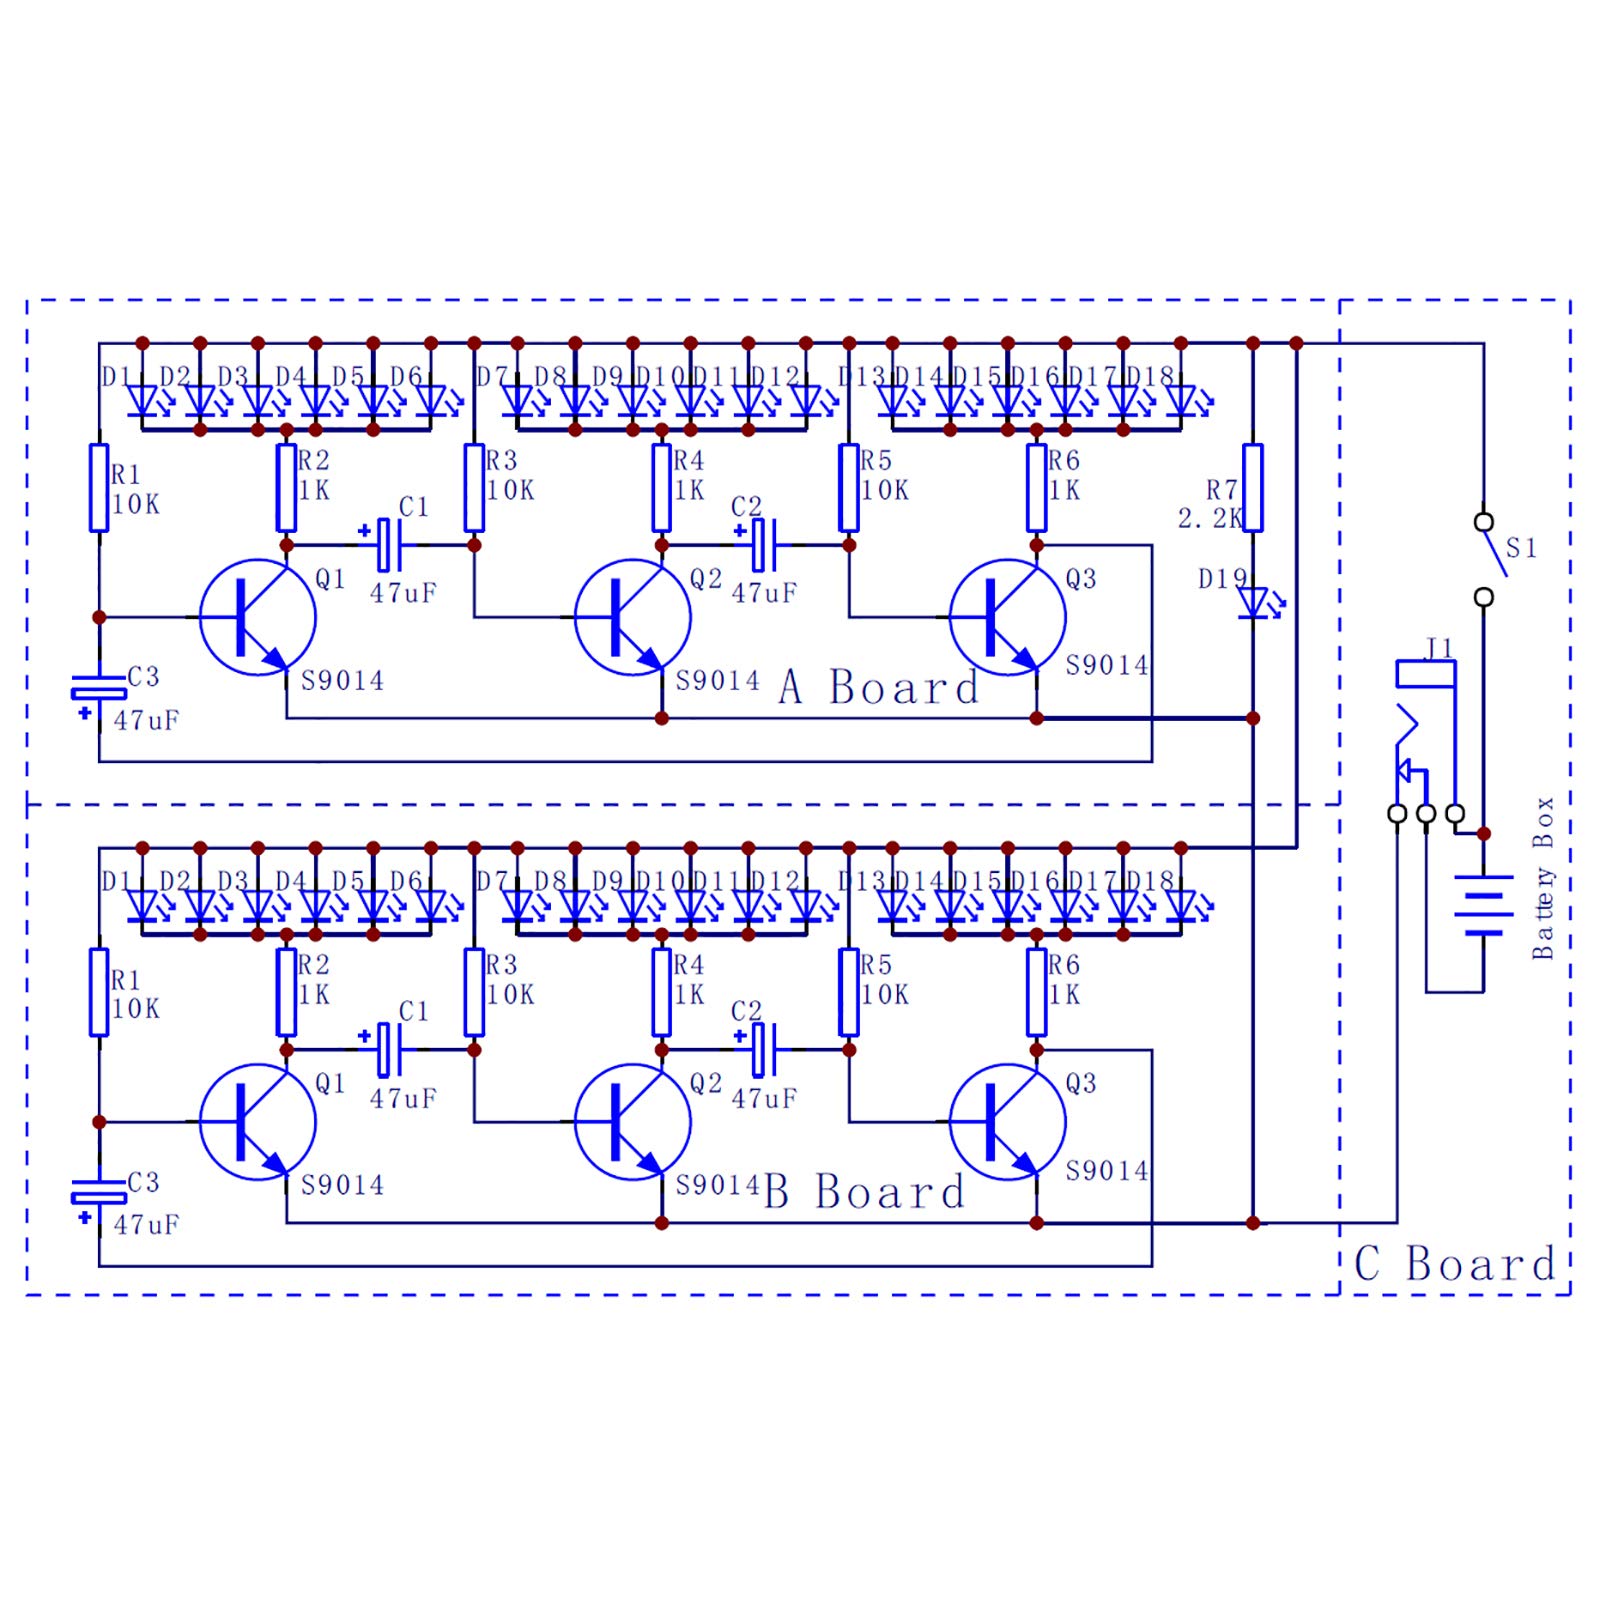
The media could not be loaded. Easy to solder and follow instructions, each tree board took about 20 minutes. Battery powered or USB / mains powered, a USB cable is included in the kit. The hard bit I found was fitting a cross-shaped thing into a cross-shaped hole when you've made all three boards and you are fitting it all together. That part took me about an hour. But it's worth it, it looks really good, and I've had lots of compliments from my engineer colleagues. I'd definitely recommend it!
D**3
Good practice and neat results
This is a pretty decent kit. Very pleased with the outcome. The only fiddly bit was attaching the tree to the base so you will probably need blu tack to get that part done, also make sure that all your components are in right before soldering because the kit only comes with a couple of spare LEDs.
R**.
Easy to build
Bought for my son so that he could practise soldering. Not too complicated so job done.
B**.
Twinkle twinkle......
Great wee project... I did it over 2 nights.. because I took my time.. I really enjoy these wee projects... helps with my soldering skills... plus.. as soon as my son saw it.. I lost it. So I'm having to buy another one. Magic.. 🤣
L**S
Very impressive
My 9yr old asked for a soldering kit for Christmas, and he was really pleased with this. The lights look great, and it was fairly straightforward to do.
P**E
Not all the lights worked
One of the sets of LEDs on the "A" board would not light up. Spent ages removing all the parts from the board and re-soldering to troubleshoot but no joy. Returned it instead.
A**S
Easy to build with my 4yo son.
Easy to build. It works perfect
J**.
Incredible value! Good for learning and looks great after! Even without a pi!
The media could not be loaded. Was the first time I really soldered in years. Used to modify electric rcs when I was younger. Not great with resistor knowledge but this was easy. I jumped in a little too quick and realized there were 2 types of resistors here (1k and 10k) and thought I put one in the wrong spot. There are 6 with an orange stripe and 6 with a red stripe. Orientation doesnt matter. Start with the resistors and put the orange striped ones in the holes marked 10k with an R(and a number).... Then put the red stripes in the other R marked slots/holes. So 3 orange and red striped resistors on 1 board and then do the other the same way. At this point you have 12 resistors installed. Next grab the black pieces that have 3 metal tabs coming out (they're called the triodes). You'll have to figure out which way to bend it as when you combine the tree halves they might bump, but that can be carefully bent back the opposite way if so. After 3 of those go in the spots with the 3 slots/holes do the other board. Next is the elestolytic capacitors which have a positive and negative so orientation does matter. Like the LEDs the long side is positive. Install these the same as everything else, using 3 per board in the 3 spots with 2 slots/holes near the bottom of each board. Next up, the most tedious part. If you got this far you know how to bend wires and snip excess off while soldering things onto the board. Well goodluck! Go and solder 18 LEDs oer board ! When you're done feel awesome. This is where I lost direction eventually. I installed the 5v adapter and the battery pack to the base and the tree to the base and no matter what I tried only 1 side would light up and the 5v killed it everytime. Maybe it was shorting it out. I just ended up hacking the hole thing with just the battery pack adding 2 extra wires to power the both sides of the tree/boards simultaneously. I figured after all that I wasnt really gonna sit there using my pis power to run the thing for that long and just installed a fan hat on my pi anyways. So for learning simple soldering and having to follow through with a lot if peices, this makes this kit INCREDIVLE AND INVALUABLE for learning whether you're getting it for your 12 year old or yourself at 50! It's so cool when it's done!
Q**E
Definitiv kein Kinderspielzeug
Anspruchsvoller als man zuerst denkt. Etwas Löterfahrung sollte vorhanden sein. Die Anleitung und der Druck auf der Platine genügen vollauf.
T**Y
Great kit that's beautiful when done
Don't get side tracked by the bad reviews. Very rarely are these type of components bad ..... more likely bad techniques in soldering. I've built 3 of these with absolutely no issues. They are simply beautiful when completed! (Note, this is not designed as a beginners soldering kit, a little experience is needed)
D**R
Alles bestens
Alles bestens
J**N
Fun project, had different expectations
Definitely good project for the money, good for improving your soldering skills. I will say you do need some kind of experience probably to do it. One of the things I didn't like (and maybe I read the listing wrong) I didn't know what it was going to do but I thought it would light up and stay solid but instead it changes all crazy colors and flashes different patterns. Like I said, fun for the money
Trustpilot
1 month ago
1 day ago