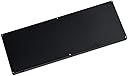
Idobao x YMDK ID75 75 Keys Ortholinear Layout VIA Anodized Aluminum Case Plate hot-swappable Hot Swap Type C PCB Mechanical Keyboard Kit (Black)
Keyboard Layout | Neo |
Hand Orientation | Ambidextrous |
Button Quantity | 75 |
Water Resistance Level | Waterproof |
Power Source | USB |
Switch Type | Linear or Clicky or Tactile |
Connectivity Technology | USB, USB-C |
Special Features | waterproof |
Number of Keys | 75 |
Style | 典的 |
Theme | Mechanical Keyboard |
Color | Black |
Material | Aluminum |
J**A
So far so good! Working extremely well for a minimal and cheap kit. Great build!
So far I'm exceptionally happy with the results from this. It works right out of the box with VIA and QMK with no problems. It shows up as a normal Idobo 75 (though I assume it's a knockoff, ultimately the difference is probably moot.) I had zero troubles customizing it in software (though a lot more trouble figuring out how to actually design my own custom layout, haha.) The case is a lot heavier than I would have expected from aluminum (it feels more like steel to me, but it's definitely aluminum) and perhaps a bit excessive, but it does work well and no doubt helps that extra bit more in preventing the keyboard from sliding around. I did find that the rubber bumpers that came with it didn't like to stick though. I had to replace them with some of my own as one not only came loose but was completely lost right off the bat. The LED effect is customizable, so if you're like me and don't want it to be excessively bright as per the default it's easy to tone it way down or turn off entirely. You can also change the colors in several ways and use effects like "breathing" if you're so inclined, though I find most such effects to be distracting and single color simplicity to be best.Space on a 75 is a bit limited of course. Do bear that in mind when picking this out. However, ortholinear key formats are not common or easy to find, so this is actually among the highest you'll normally see (60 or even 40 is much more common for ortholinear.) Watch out for keycaps too. They're often designed for the usual staggered layout and don't necessarily fit comfortably in a linear layout out of their originally intended positions. I also found the typical multi-switch keycaps (like shift/etc) wouldn't even fit across two keys (though with a 75 I didn't actually want to give up keys anyway, there were just a couple I wanted to do this way and none would fit across two.) The linear design necessarily puts the switches a bit further apart than on a staggered layout and > 1 switch keycaps not explicitly designed for an ortholinear aren't going to work. This is not a fault or flaw of this particular kit, just differences in designs that one needs to be aware of.As a side note, as someone mentioned the USB port can be a bit loose. The solution to this is actually really simple and since I did it I've had zero problems. Before you actually put the board in, use some needle-nose pliers or a medium-fine hemostat to just very slightly bend the top and bottom of the casing near the middle very slightly inward. (Just a tiny bit mind you.) This makes the connection hold much more tightly and I haven't had a single accidental disconnect event since I did this. It really is best to remove the board if possible because the port can bend a bit off the board, but if you're very careful you can do it while it is in place without removal (a finer hemostat is probably necessary then as pliers are just too big.)Initially I had thought it sat completely flat. I even cut and drilled some pieces of wood to attach to the bottom. Somehow I did not see that, within the package, are two little black feet that can indeed screw into the bottom. Thus you have both the option of it sitting flat or not by whether or not you screw in the feet (though they go in from the bottom of the case, so you have to remove the bottom plate of the case to attach them. The feet are rather nice too. They have a heavy metal casing that gives them a bit of weight but a soft rubber ball in the middle to keep the keyboard from moving around. Much better than the stick-on bumpers in fact. I guess the only complaint I have about that is they're stuck in the packing foam rather than simply placed in the bag with the other loose parts (which I feel would make more sense.) This is more of a nitpick than anything however.UPDATE: I had a minor issue where sometimes when I turned on the PC the keyboard wasn't working until I unplugged and replugged it a few times. I began to suspect the issue was maybe in the bootloader maybe coming up in debug mode or something and I flashed the official VIA Idobo firmware from VIA's website (caniusevia) and it has since worked right off the bat every single time. If you have the same issue try that. Just flash with the QMK Toolkit from the QMK site.UPDATE2: I have since had zero issues. I've also learned that all you need to do to use QMK and still have VIA support (handy for adjusting lighting on the fly if nothing else) is export your JSON keymap from the QMK creator online as usual, convert to a keymap.c with "qmk json2c jsonfile.json -o keymap.c", move that into the home folder's idobo\keymaps\via and then just compile otherwise normally with "qmk compile -kb idobo -km via". However, you can also create a custom folder (I named mine just custom) with your own rules.mk file that says "VIA_ENABLE = yes" in it somewhere to keep the original VIA setup clean and then just compile with -km custom (or whatever you named it) instead. There are extra rules you can set such as disabling extra light effects to save storage space on the board's main chip (which is very very limited,) so a custom setup is actually a good idea. This way you have the best of both worlds, but VIA support does use a bit more storage, so if you don't need VIA at all just use QMK with a custom layout without that VIA_ENABLE rule set to yes.EDIT: Coming back to this a while after I've learned more about custom keyboards it seems like this kit may actually be a truly excellent deal indeed. Aluminum cases in general tend to cost quite a bit more than the PCB+case combo here would seem to have. The general build quality of the case is quite good and pretty spill resistant among other things. It does make putting in switches a lot harder -- particularly you have to be really careful as you insert them to not bend the thinner lead on most switches. I found the best way to put them in is straight down with a bit of pressure towards the top and wiggling clockwise and counter-clockwise a bit as I go until it snaps in. Once put together it has a very good sound without any hollow echoing like you'd get from some plastic cases. You don't even need much padding if you want to go silent (though it still doesn't hurt by any means.) The PCB is exceptionally well supported by QMK and VIA without jumping through any hoops or using any beta builds or anything. Coming back to this with what I know now I feel even more than before like I got a truly excellent deal with this kit.
G**Y
Decent platform for getting into building custom keyboards.
As is, out of the box this is a great board kit at what I think is a fair price. Just add switches and key caps and be happy. I decided to try Gateron Milly Yellows because they are pre-lubed and I never see myself hand lubricating a set of switches. With those and some XDA shine through pudding caps, this board feels and sounds great. It's remarkably quiet. The firmware that it shipped with had VIA and VIAL support for key-mapping, macros, LED lighting etc. Though in my case VIA could not adjust the underglow, VIAL could though.This next bit was a mistake on my part. I had thought that the product I ordered came with per key LEDs. Here on Amazon ONLY the Clear Acrylic case version has per key LEDs.If you go to YMDK's website you can have them add LEDs to any case configuration. Might be a better option if you don't want to do all the work to add them yourself. Still I had the sk6812 mini-e LEDs on hand from another project so I decided to install them.I will add some helpful tips that I wish I had before starting the modification.1: The LED order appears to be last to first on the keys. So bottom right to top left if you are looking at the board face up. See last pic where I have an LED in the first and last key spot and the last key lights up but not the first.2: The orientation of the LEDs. If looking at the bottom of the PCB, the GND pin is going to be bottom left. (pin with the triangle) If you look really closely at the PCB you can see in the silk screen that this solder pad is slightly rounded.3: There is a zero ohm resistor that acts as a jumper to allow the underglow only versions of this kit to work. See 2nd to last pic. When you get all the key LEDs in the underglow will stop working unless you remove this resistor/jumper.Some other things to watch out for. There are 2 different possible micro controllers you might get if you order this according to YMDK's website. A newer RP2040 (Raspi Pico) or as I have Geehy-APM32F103. Only the APM32F103 version is in the upstream QMK firmware. This information is only useful if you plan on re-flashing the firmware. If you get a RP2040 version. I believe you will need to ask YMDK customer support for the source code and binary file. I have heard they don't like to give that out even though the GPL license to use QMK firmware states that they must.So overall, the hardware is good. Decent price. Solid build quality. I would recommend this to keyboard people, ortholinear fans, DIYers and QMK enjoyers.
P**N
ortholinear
The only thing I can think of that would be better than this is if it were 90-100 keys, closer to a full size keyboard. It has everything else I wanted in a keyboard (ortho, hotswappable, case mount) plus extras like the cool led lights. I'm not a heavy layer user so I would prefer a larger keyboard so it could have a layout with a full numpad.However, ortho is a fairly small niche, and this one wins the mid size game, easy to build, looks and feels awesome, easy to set up and flash with QMK. Though remember to assign a reset on one of your layers so you don't have to press the reset button on the PCB when you need to flash it again.I don't solder and sometimes change out switches, so hotswappable pcb is a must. I use akko switches and they fit very easily.
M**E
Good Value
Only been using for a few days, but I'm impressed with the build quality and the weight of the case. Worked right of the box with VIA. RGB options are also very cool and subtle. I'll post pictures once I have my keys and format finalized. No hole on the base of the case for reset, but the keyboard is very easy to dissemble from the back.
Trustpilot
1 week ago
1 week ago