🚪 Secure Your Space with Style!
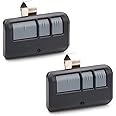
The Garage Stop 41A5034 Safety Sensor Eyes Only is a universal replacement kit designed for compatibility with Craftsman, Liftmaster, Sears, and Chamberlain garage door openers manufactured after 1997. This safety sensor kit ensures your garage door operates safely by preventing it from closing when the sensor beam is interrupted. With easy installation and a lightweight design, it’s the perfect upgrade for your garage security.
| Brand | GARAGE STOP |
| Color | One |
| Style | Modern |
| Item Weight | 3.88 Ounces |
| Assembly Required | Yes |
| UPC | 650079930786 |
| Manufacturer | Garage Stop |
| Part Number | 785-09222025 |
| Item Weight | 3.88 ounces |
| Product Dimensions | 4.75 x 5.5 x 1.75 inches |
| Item model number | 785-09222025 |
| Batteries | 1 Lithium Metal batteries required. (included) |
| Item Package Quantity | 1 |
| Included Components | 1 Compatible 41A5034 safety sensors eyes only kit, Mounting Hardware, Installation instructions |
| Batteries Included? | Yes |
| Batteries Required? | Yes |
| Battery Cell Type | Lithium Metal |
T**R
Great replacement for what could be an expensive repair
A garage sensor malfunction can be an anxiety-inducing experience. Do I need a new opener? Did the entire device fail? Did Alexa destroy it? A lot of times, it could be that the two sensors near the garage door base have failed. This will do the trick. You don't need to replace the entire wiring to do this.TIPS -Make sure you cut the power first...you can do this by removing the sensor wires from the garage door opener housing (no need to power down the house).Unscrew the sensors from the brackets.Before you start cutting, make sure you measure how much line you need to connect the new sensor to the old wire. Always leave way more than you need, since you can always bind the wires with a zip line.Now, using wire strippers, you will need to remove about one inch of the coating on both sets of wires (the new sensor and the old wiring). Here is where it's tricky - one part of the wire is white, and one is striped. if you match them up, they should work, but I know some people had to flip them.Once the wires are connected, you can then go ahead and plug the wires back into the opener housing. What I found was only one of the sensors lit up, and I could never get the other one to stay lit. DUH!!!!! You will need to line them up for them both to get full power. Once they both light up, reattach the, to the bracket, and you should be good to go. Works perfectly...
A**R
REVERSE WIRE CODING- TRUE ALSO- REPLACES LIFTMASTER 41A4373A
These worked out- I was gambling since the liftmaster was from Aug 1997, and the instruction manual parts indicated 41A4373A for the safety sensor kit, There was no reference in the item description for that part number, and I just wanted people in the same situation to know that they can save the $20+ by getting these over the item that is described as a direct 41A4373A replacement. You do need to switch the wires' coding during connection as everyone else noted, and the brackets we had were on the same side as the LED, which blocked it a bit, but you can still marginally see the light status. As for the push and pray wire connectors, you do need a strong finger push or better yet a pair of pliers to get the connector landed all the way home on the wires, or they will pull out. Use the tips of your strippers to get that orange button seated into the clear body all the way. Good stuff to save my 25 +yr old opener on an 18X7 heavy door. Problem was repeated failure to close especially on cold mornings. door would cycle rapidly at various points of travel and return to open, blinking light, to indicate safety sensor circuit issues. 41A4373A only had 1 green LED on each side that would do nothing to indicate activation, this set has an effective indicator so that you can align the beam/receivers.
R**N
Didn’t work, not OEM part
If I could give 0 stars I would. I’m a professional garage door repair tech and I am very disappointed with this product and seller. I got these to help a friend out off the clock in an attempt to save them money and that back fired. These are not OEM LiftMaster sensors even though they advertise the full part number in the discussion (deceptive sales tactics). The hardware that came with the sensors were not threaded so they couldn’t be used. Luckily I had extras from work. After splicing the wires black to black and white to white none of the sensors worked on either of the 2 doors. I then revered the splices to make sure a polarity mistake didn’t happen from the factory, this also didn’t work. I then plugged the sensors directly into both motor terminals to rule out logic board and the wiring to the opener being a possible issue. Nothing worked. So we went to Home Depot and bought the Chamberlain sensors and they worked on first install, came with useable hardware, and were legit OEM as advertised. If only one set didn’t work I’d say it’s a fluke but both is just a bad product and waste of time attempting multiple ways to make them work. This job should have been 15-20 min but took almost 2 hours with the Home Depot trip factored in. Hopefully this review saves you from wasting your time.
T**S
Wiring definitely reversed! Don't ignore this warning like I did the other ones
Not fun to trial/error this when you have to go up and down the ladder a bunch of times (thank god I didn't use the wire connectors before confirming the functionality 100%, or else I would've wasted them by disconnecting and trying again). So yeah, don't ignore the warnings: the wiring is reversed.Also annoying to diagnose: the orange sensor will turn on when wired properly, but the green sensor won't turn on unless it's pointing at the orange sensor. Especially while I was figuring out the wiring issue, it wasn't easy to figure out whether the orange sensor, the green sensor, or the both were acting up (I was only trying to replace the one broken green sensor in my garage).Finally, I didn't realize the included wiring was only 15 inches (I had assumed 15 feet, which is about the length of my current wiring). As I wasn't 100% sure the wiring wasn't the issue with my situation, it gave me a mild panic when I realized I might have to buy extra wiring if my existing was the issue.
S**D
Works Great If You REVERSE The Wiring
The media could not be loaded. Just as others noted and I had read the reviews to know when installing, the wires on the new units are labeled/color coded wrong.My existing wiring is all white and white with a black stripe. The black stripe is often the negative indicator. The white and black wire on the units which are also marked with a negative symbol, needed to be connected to the solid white wire of my existing wiring. The white positive wire on the units I connected to the white with black stripe existing wire and BINGO! Hand in front of the one with the green light and the green light goes out.Finished up my wiring connections and then mounted the units which fit in my existing brackets. Could have been a 10 minutes job without the wiring testing but still only 20 mins.I still don't know which is the emiter and which is the receiver but the green light is the only one that goes on/off. The amber light stays on all the time.
Trustpilot
2 weeks ago
1 day ago