🔧 Level up your tile game—precision and speed in one pack!
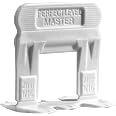
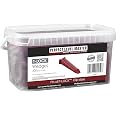
The T-Lock PERFECT LEVEL MASTER 1500-pack of 2mm tile leveling clips offers professional-grade, tool-free installation designed to eliminate tile lippage on floors and walls. Manufactured in the EU for superior quality, this system saves contractors time and ensures flawless results, making it an essential upgrade for any tile installation project.
| Manufacturer | Perfect Level Master |
| Part Number | 1500CM-2MM |
| Item Weight | 13.17 pounds |
| Package Dimensions | 16 x 16 x 10 inches |
| Item model number | T-Lock ™ |
| Is Discontinued By Manufacturer | No |
| Size | 2mm |
| Color | White |
| Item Package Quantity | 1500 |
| Batteries Included? | No |
| Batteries Required? | No |
R**S
Good, but a few thoughts on their use.
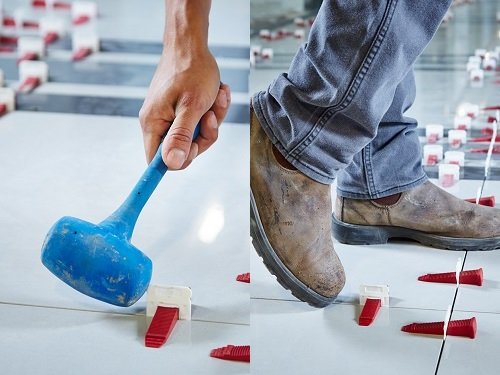
The principle behind this product is impressive. Utilizing these along with the Wedges do make the floor MUCH easier to level. But there is a few important considerations:1) Make sure (extra sure) that the grout lines are free from the majority of floor cement - especially around the clip. Clean some of the lines cement away from the edge before putting down the next tile (many many good videos on YouTube)2) IF you need to stop for the evening before the floor is done - make sure you clean the cement from the side of the tile - AND - most important, install clips as if you were going to continue. This will make your life much much easier for when you start again.Overall they are a great product but keeping the grout lines clean and clear will save you all kinds of time of cleaning up before grouting!
G**E
Perfect tile install
Works great as advertised!
D**L
Great quality product
We have been using these for years. I would not accept anything that does not work well. Tips: on marble you need the shims to be clean so you don't scratch the marble. If you mortar the clip in too much it wont break off as easily as it should. You will end up trying to cut it out with a knife. (not good). We try to use non modified mortar whenever possible because its much easier to keep the whole jobsite cleaner. Modified mortar is more sticky and harder to wipe things clean causing clips to get stuck way more often. Modified mortar is better but non modified is fine and has been around much longer. One other tip is if you don't do the whole floor in one day don't forget to install the clips at the end of the row and use a level to make sure that the last row is flat to the rest of the floor.
J**N
Pricey but worth it
I bought these to use for setting some large format tile (16x32). I've done some tile work before, but these are a game changer especially with the larger tile. They enabled me to get good clean lines and level tile without any unevenness with the large tile. They break off easily unlike some cheaper options I've used in the past. Although these are pricier than other options I think they are worth it and provide a better experience.
D**N
Don't try large-format tiling without these
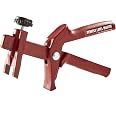
Unless you're a tile pro, you ought to consider using these, especially if your tiles are larger than 12x12. These T-Lock clips, when combined with PLM's reusable wedges, magically bring the adjacent corners and edges of 2, 3, or even 4 tiles into perfect planar alignment. I disagree with the manufacturer's claim that no assembly tool is needed. While the wedges/clips can be connected by hand, you'll loose a fingernail or worse trying -- unsuccessfully -- to get the connection tight; you need a pair of adjustable pliers at least (and frankly, the PLM pliers are worth the time-savings alone). I found you need to check/adjust tile spacing in nearby corners after tightening wedges fully -- the wedge may stick rather than slide as it's forced through the clip, carrying the underlying tile with it. Also, to build on another reviewer's comment regarding pre-installing clips along tile edges when stopping for the day: I found it important to pull the clips up tight against the bottom of the day's final tiles. If instead, you push the clips deep under the final tiles, when leveling the next course in the morning, you'll likely find the wedge tends to set the new work too low because half the clip is held at the bottom of the old thinset instead of the top. Lastly, I echo other reviewers' admonition: You'll soon regret -- deeply regret -- letting thin-set accumulate around the stem of these clips.I'll never do another tile project without clips and wedges, and I was quite satisfied with the performance of these clips.
S**N
This System Will Help To Make A Fantastic Job!
I have used this system enough now that I feel a great review is in order. I run my own Home Improvement business here in the Myrtle Beach, SC area and have used this system many times now. I do not claim to be a professional tile contractor but do know that I am picky when it comes to my work and know how to do it right. This Perfect Tilemaster Leveling System helps you to obtain professional results. I have seen work by self-proclaimed professionals that should be using this system for the "lippage" that is present in their finished work. Many would say what's the big deal with a little lippage, you have to look close to see it. Well why not provide your customers or yourself with the best job that you can when tiling a shower or a floor for it can be a considerable investment and you want it to look it's best. I have not used any other leveling systems out there to be able to compare for when I have prepared the subfloor and cement board properly this system has always worked fine for me.*Tip: There has been much said about making sure that you remove the thinset or mortar from around the clip if there is any present. If you do this as stated all clips will remove just fine.
J**M
Wedge system is my preferred leveling tool. With T-Lock being a slight winner.
Being a Tile Mechanic for 25 years now, I'm glad to see the industry step it up in the tool aspect of this trade.With that said, I've tried all the leveling systems. I've narrowed it down to two.I favor the wedge system for its versatility and minimal bulk. Forget the scew down systems as they will scar softer material, if you don't use the 3rd part of their set-up.Raimondi and T-Lock are the winners imo. With the nod going to T-lock due to its thinner base. All require a 3/4" trowel, even still the tile will be touching the Raimondi base. The T-Lock also seems to break away cleaner and the wedges are virtually unbreakable. Whereas if you hit the Raimondi too hard the sides break off and become difficult to use because they catch the tile moving them forward when you slide the wedge in. Plus the spacer on the ends of T-Locks wedges actually come in handy when you're trying to space that first row of wall tile, especially with large format. No more using needle nose pliers to pull out tiny wedges the next day.
Trustpilot
3 weeks ago
1 month ago