


🛡️ Shine like you mean it — protect like a pro!
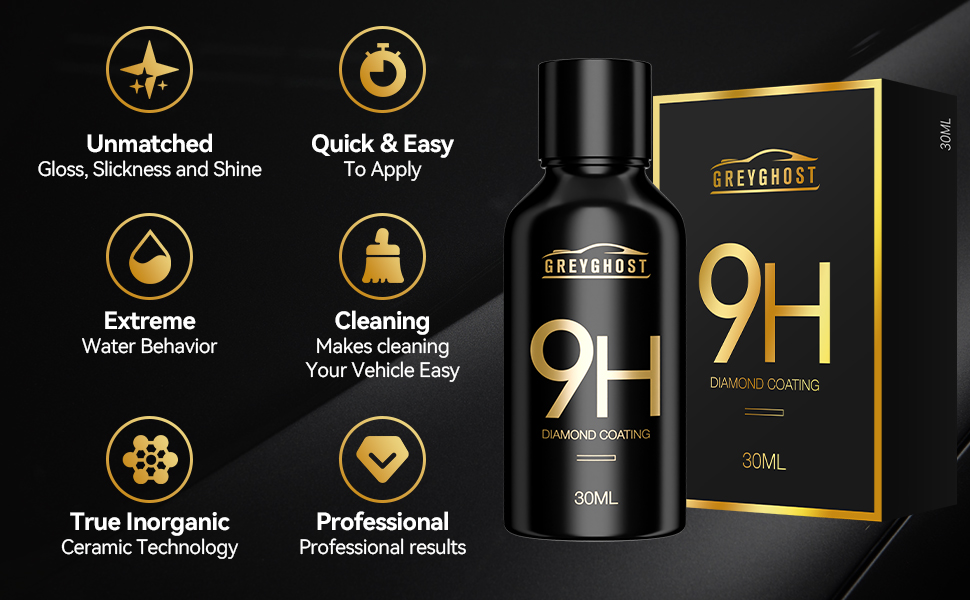
Greyghost Mr Fix 9H Nano Coating Kit delivers a professional-grade ceramic coating that forms a durable 9H hardness layer on your car’s surface. This hydrophobic, anti-scratch formula protects against UV rays, corrosion, bird droppings, and minor abrasions while providing a high-gloss, mirror-like finish. Easy to apply and long-lasting, it’s the perfect upgrade for millennial professionals who demand both style and substance in their vehicle care.


A**P
One year later and still working - With proper maintenance washes
**2 year update (September 2025): the coating gave up the ghost and no longer beaded up after a full Decon on 09/2025. A combination of being too busy, weather not cooperating (constant rain to constant 90deg+ weather) prevented me from doing a full decon until the fall in 2025. I did some touchless washes to get winter grime off, and clay toweled once early spring, but by the time I did the full decon I couldn't bring the beading back.Still a good product, but I think I'm going to switch to the Turtle wax hybrid solutions spray wax. I might need to apply it more often, but it also doesn't really need a full polish to apply it.The attached picture is about 1 year after application in an area that salts it's roads in the winter. I bought my bottle on here from Tracfy, and it went on really easy. You do have to properly prep the surface, which is the real hard work. Full wash, remove any waxes or coatings, then polish the surfaces you plan on coating. There's a lot of labor to get to the easy applicationAfter the salty winter, the pores of the coating had become clogged with salt and iron, so it needs a good decontamination wash to bring back the beading and water sheeting.Soap, foam, and agitation wash are not enough to bring the performance back. You need to do iron decontamination and then use a waterspot remover to soften the the salts that have deposited into the coating. So I first did the steps through an agitation wash.Then I sprayed on DIY Detail Water spot remover all over with some wiping to dis-embed the salts.And for final decontamination I used a P&S "clay" towel combined DIY Detail Iron remover (Claying the car and iron decon at the same time!) with Adam's car shampoo foamed on for lubrication, and a bucket of the car shampoo to dunk the clay towel in between panels.It sounds more complicated than it is, because a lot of the stuff is premixed, and the "Clay" towel slides really easily with all the lubrication. The work is very fast.DO NOT USE AN ACTUAL CLAY BAR. A clay bar will damage the ceramic coating, but the P&S towel is not actually clay, and is safe on the coating with enough lube and the iron detailer.After that deep clean you're good to do less involved maintenance washes until you go through another winter.
R**K
Straightforward application
I have used this product four times on three different vehicles, ranging from a one-year old car to a five-year old truck with a significant amount of paint wear. And then I used up the remainder of the bottles of the product on things like our clothes washer and dryer or our picture windows onto the rear patio.The prep process for using this ceramic coating on a vehicle includes the following. 1.) Foam shampoo / three-bucket wash. 2.) De-ironing / de-contamination. 3.) Compound polishing with an orbital polisher. 4.) Clean all surfaces with isopropyl alcohol. 5.) Apply the ceramic coating. 6.) Buff off the remainder of the ceramic coating with microfiber cloth. 7.) Clean off the hard plastic on the low surfaces like the rocker panels with something like Back to Black.My experience is that doing steps 1-4 one afternoon or evening, and then steps 5-7 the next morning makes the process a little more survivable - trying to do it all in a single day can be pretty exhausting. Buy a big package of microfiber cloths, as you will use them on most of these steps.This particular product goes on quite easily, and removing the excess after ten minutes or so of set time is also simple. When we first started a bottle on the new cloth and hard sponge, we needed to really soak it thoroughly in order to get going, but once the cloth had some saturation, everything works smoothly.At the conclusion of the application process, the vehicles all looked good, and the surfaces were indeed hydrophobic. We did all painted, chromed, and windowed surfaces, and that includes the interior of all the windows. We even did the alloy wheels and the headlights and turn signals. The first time we went overboard with the isopropyl alcohol cleaning, but that is probably better than under-cleaning.Even the well-used older truck, with some noticeable paint degradation, looked significantly better once we had finished. We spent more time with the de-ironing/decontamination and then the compounding, doing two runs with the orbital polisher to help correct some of the more obvious paint chips, on the older truck. This put us in a good position for the ceramic coating.In the months since our first use of this product, the vehicles are much easier to clean. Bird poop, squashed bugs, tree sap, and road dust all just wipe right off. The picture windows on the back of our home are also easier to clean, and the washer and dryer are slipperier, too. And in every application, the surfaces look glossy and deep, which is a big improvement. This is true even for a white car, but the deeper or more jewel-toned your vehicle paint is, the more effectively the product works to liven up the color and depth.
A**M
It works, but how well?
It's a great product. Even filled in swirl marks and gives off a really deep gloss/shine. Can attest that it gives some scratch protection too. I used this on my motorcycle and constantly ride with a backpack with straps banging on the rear seat cowl. Noticed that the usual minor scratches, from that, didn't occur anymore. But seriously, had people asking what year Ducati my 2000 red Honda VFR 800 (with gold wheels ;D ) was. IThe only doubts I have with this product is how long can it really last. I let it cure for 12-24 hours before riding out. A couple of weeks later I used a wet auto wash soap (muc off) to clean the dust and grime and it seemed like some of that shine went away. The other part is the bottle seems to be a one time use for cars and 2-3 time use for my motorcycle.Overall, would recommend if it isn't going to pinch your wallet. You can definitely spend way more money at a professional car wash that will get you lesser results.
J**A
Buen producto por su precio
Funciona bien para el precio que tiene si bale la pena
A**N
Before buying
Before buying this coating just note I’m a Detailer and used this product for a 2020 Escalade 3 row it wasn’t enough to cover bigger size vehicles I recommend 2 of these for larger vehicles if you can use 1 bottle awesome but just in case I recommend 2 maybe 3 just in case.
Trustpilot
3 days ago
2 days ago


