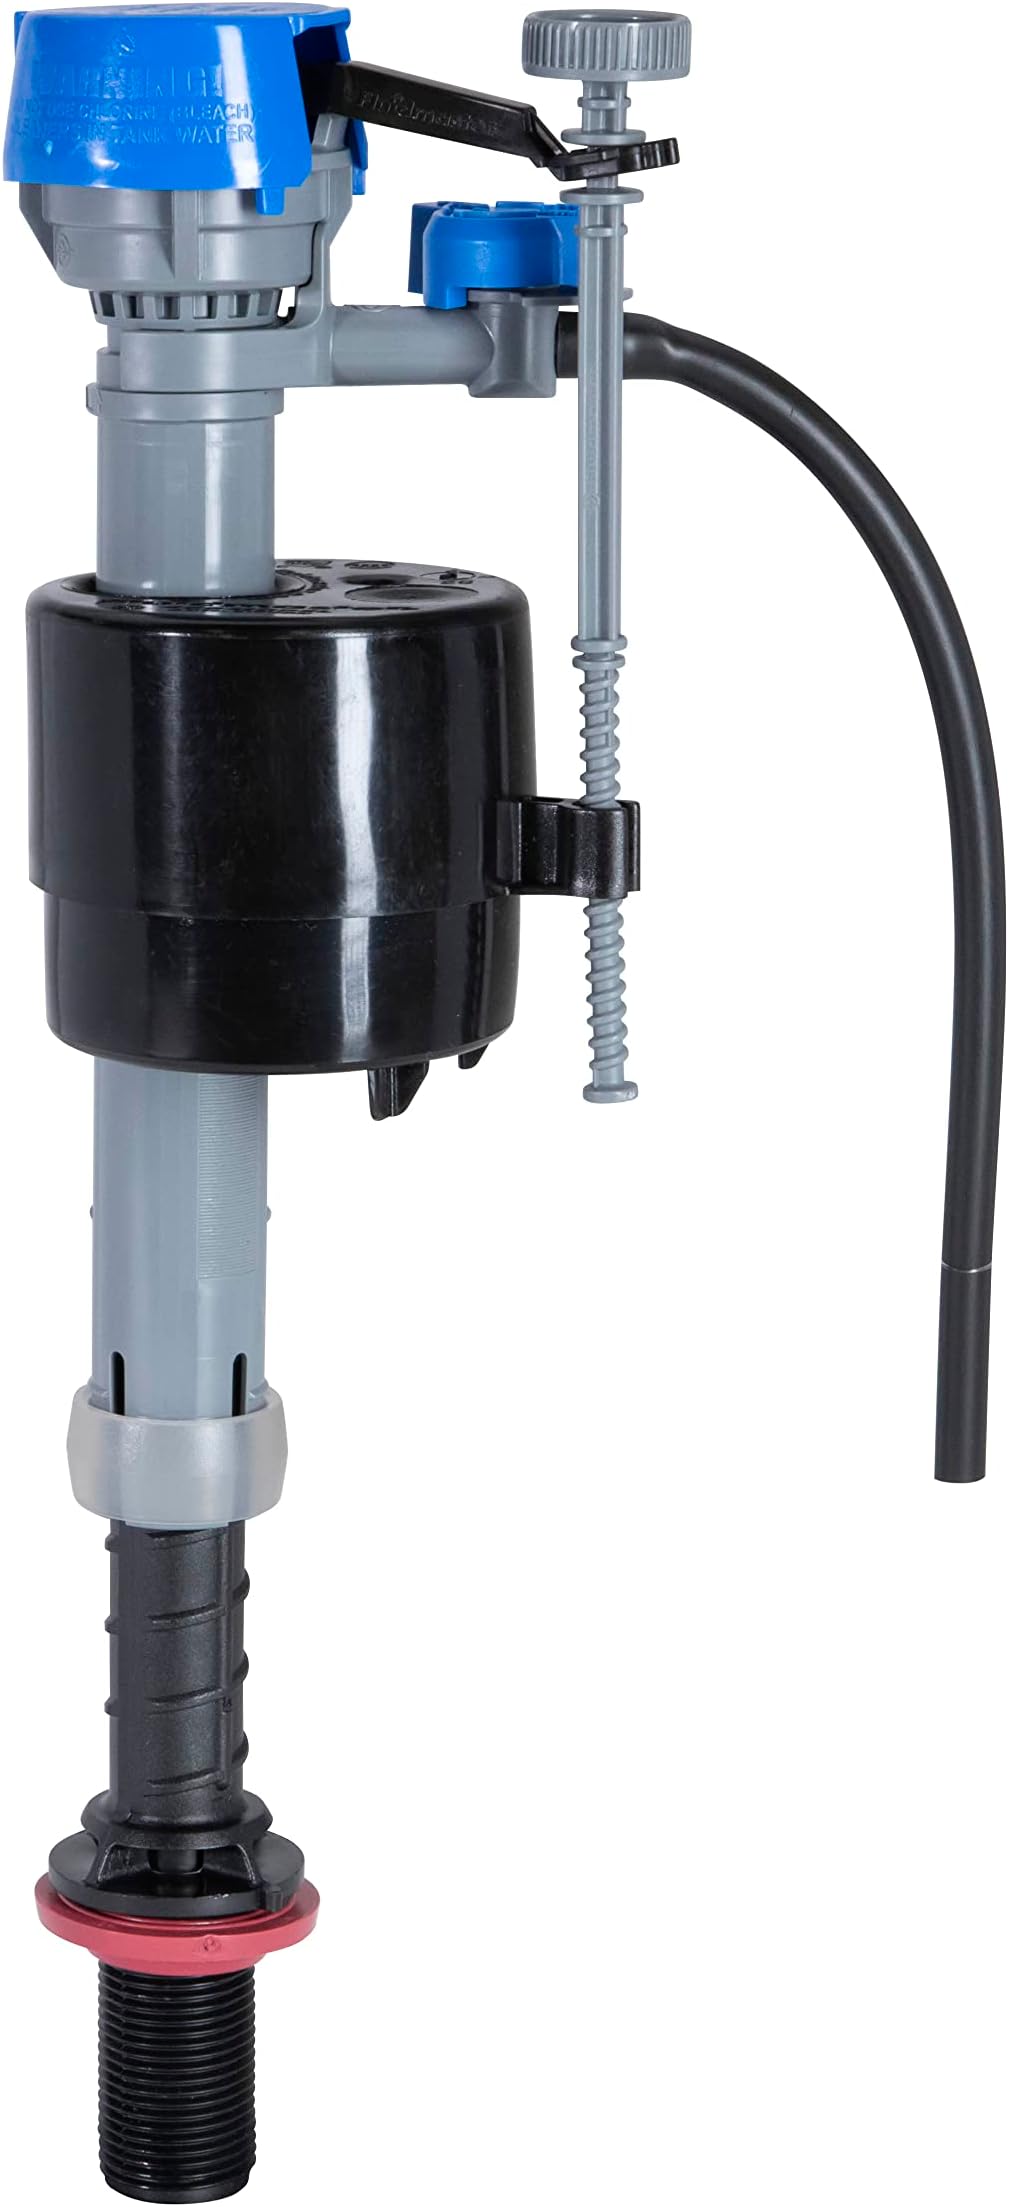
🚽 Upgrade your flush game—quiet, customizable, and built to perform!
The Fluidmaster 400H-002 Performax is a high-performance universal toilet fill valve designed for quiet operation and precise water control. Featuring easy EZ-Twist height adjustment (9-14 inches) and dual water level dials, it fits most toilets and optimizes flush efficiency. Made in the USA with durable materials and backed by a 7-year warranty, it’s the smart upgrade for any modern bathroom.
Material | Plastic, Rubber |
Brand | Fluidmaster |
Item dimensions L x W x H | 3.35 x 4.33 x 13.19 inches |
Exterior Finish | Plastic |
Inlet Connection Size | 0.75 Inches |
Inlet Connection Type | Fill |
Outlet Connection Type | Compression |
Number of Ports | 2 |
Outlet Connection Size | 0.75 Inches |
Specification Met | code approved, anti-siphon design and water saving bowl water level adjustment |
Valve Type | Toilet Fill Valve |
Manufacturer | Fluidmaster |
UPC | 300716763504 039961025913 300719040572 |
Part Number | 400H-002-P10 |
Item Weight | 9.6 ounces |
Product Dimensions | 3.35 x 4.33 x 13.19 inches |
Country of Origin | USA |
Item model number | 400H-002-P10 |
Size | 1- Pack |
Color | Multicolor |
Style | 1-Pack |
Pattern | Control |
Shape | shape |
Item Package Quantity | 1 |
Usage | Professional |
Included Components | Toilet Fill Valve and Parts |
Batteries Included? | No |
Batteries Required? | No |
Warranty Description | 7 year manufacturer |
L**E
was perfect to replace American Standard 400 model anti-siphon
Wow. I had no idea how toilets worked to any real level of detail. I just knew mine wasn't shutting off at the end of the fill.I had a "400 model anti-siphon" Fluidmaster that came with the American Standard toilet. I was able to replace the main part only, leaving the part that attaches to the water supply from the wall where it was. That is the hard part of replacing this thing if you replace all of it, and it involves a bucket and the towels and all that. Plus a tool or two I didn't have. Turns out you can just leave that bottom black part in place (assuming it doesn't need replacing because of a malfunction in that part), move the white plastic part that goes up and down - it's the white thing in the drawing that is on the grey part that is on the black thing. The white piece can be pulled up and then the grey part and everything with it comes off and the new one can go on in the same place.The problem for me was that the white thing in the one in the toilet wouldn't move at first and it is a very awkward angle to try to do much with it. Having practiced with the entire new one, that white cylindrical piece moves easily, but that wasn't the case with the one that had been under water for a long time. I moved it around on its axis a little with some pliers, tried to grab it with a towel. Ten minutes of frustration and very awkward angles, some lost skin - it was annoying - and finally I got it to come up and the whole original one came off. Ten seconds to replace the whole thing after that. You'll have to get the height right but there are at least two ways to adjust that.Then I notice it's taking a long time to fill. Oddly, noticeably long. Over two minutes, which was pretty long given my recollection of the original one. Spent quite a while with AI asking questions. When I directed the refill right into the tank then it only took half the time. More time with AI and now I understand. Anyone who knows about this - plumbers, people who know how things like this work, won't need my comments, but I had no idea how all of this actually works. Now I do. It turns out that the refilling tube that goes into the overflow tube, which is the thing the water starts gurgling into when the valve isn't turning off - that is to refill the bowl, not the tank. The tank is filled at the bottom of the item we're discussing, which is the whole shut-off valve assembly in the picture where it's for sale here. So turns out that even though the bowl is virtually filled all at once at the end of the flush when the vortex thing stops and you let go of the handle, it still needs a little bit coming in to make sure it's always at the optimal level for each flush, but hardly any. And if more comes in, it just quietly goes out into the sewer system, that is, out of the toilet completely and off into whatever the flushed stuff goes into.So in my initial setup, I had the fill tube set to maximum thinking I was going to fill the tank faster that way. But since that tube was going directly into the overflow valve, which it is supposed to, at the top setting, which is adjustable on this thing in a very obvious way, a large portion of the refilling water was just quickly flowing out into the sewer system. And that's why it was taking so long to fill even though the water comes out fairly powerfully from the refill tube. It's just that with the refill tube stuck into the overflow tube, a lot of that powerful flow was going into the bowl and quietly out of the building.Again, the refill tube isn't the only place the tank fills from. And the refill tube does need to go into the overflow valve to make sure the bowl is filled to its optimal level, which is predetermined by the physical size and shape of the "trap", which is an s-shaped structure that keeps the water in the bowl but then lets all that out at the moment that the flush action releases most of the water in the tank into the bowl, which is then enough to overcome the weight of the water in the trap and send everything down into the plumbing and out into the sewer. The trap is what keeps the water in the bowl and it's also constructed in a way that allows all the water to go out when its level of inertial seal is overcome.I wouldn't have been able to get any of this right if I didn't understand all of that, which is why I'm explaining it. Aside from the frustration and lost skin, the actual replacement with this thing, once you get that white thing to move up, is like a thirty second process. But since the volume of flow of the refill tube is adjustable, you have to understand how all that works to know how hard to make that setting/flow. Although now that I know, the answer is that if your bowl is filling quickly and easily and properly right at the end of the flush like it should, you can turn that flow on the refill tube to as low as it goes and some water still comes out - and that should be more than enough. You'll notice the adjustment mechanism for that flow at the base of the refill tube where it comes off of the shut-off valve, which is the entire thing we're discussing that I just bought here.Now the refilling of the tank to be ready for the next flush is around 1:08 instead of 2:05. 2:05 felt very, very long. 1:08 feels closer to normal.
R**.
Universal and Easy Installation
We received a notice from the water company saying we had a possible water leak and were using 12 gallons of water an hour consistently. We couldn't find any leaks so ignored the notice. A week later received another notice saying we needed to hire someone to come find the leak.We called a plumber who found the problem . The problem was with the guts in our toilets. He said he would install new ones and quoted $500 for the job. No thanks!I bought 2 of these and they were delivered the next day. Within 30 minutes I had both our old ones out and the new ones in. Very easy installation. They work great and the next day we received another notice saying that the water leak had stopped.I have seen a couple of reviews saying that theses leak from the blue knob. One of the 2 we bought does drip water from the blue knob, but only while the tank is filling up and stops dripping when the tank is full.These are pretty much universal. One of our toilets is a low flow toilet and the other was a standard toilet. It fit in both of them with no problem.I would recommend these.
M**B
SO Easy to Install! Saved hundreds doing it myself!
Can’t say enough good things about this product! I changed it out by myself in about 15 minutes.I was expecting at least a little water drip after installation but there was nothing! I used hand towels to soak up the water in the bottom of the tank after flushing most of it out. I laid a towel on the floor and put a tub under the tank to catch any leftover water.I snipped the tube to make it fit better. No tools other than scissors necessary… not even a screwdriver.I wish everything worked as well as this!You can do it! Don’t call a handyman. Look at some youtube videos to see how toilets work.*picture is of the previous part ( I took it to remember how it was supposed to fit, didn’t need it!)
J**N
More than hand tighten
The instructions say to hand tighten only but this is likely not a good idea. It needs to be tight in order not to leak and also so that you can tighten the supply line without the valve getting loose.
S**Y
Easy to Install and Configure--Better Than the Prior Generation
I replaced my long-serving prior generation Fluidmaster red-top valves with these. The ones I replaced were 18 years old in a Florida house with no filtering upstream of the valves, so they held up great! But all things come to an end, and when one started having a small leak in the top seal, I figured it was time to replace both toilets at once and be done with it for another however many years.These went in perfectly, replacing older Fluidmaster 450s. The seal on the bottom was easy and secure. Setting the fill height was a big improvement over the older model--I didn't have to worry about the works running into the side of the water closet. The next big improvement was being able to set the bowl fill level, which the old valves just filled to a fixed level.Installation was smooth, adjustment was easy. They're both flushing and closing securely a month later with no weird stuff like whining/whistling noises (as happens with other brands.)Highly recommended!
G**Y
Works as it should
This refill assembly replacement works well, and installation is quick and easy. Make sure you drain the toilet first, and then soak up any remaining water in the tank before installation. Also helps to have a bucket handle for when you removed the old unit from the tank.Before you install, make sure to read the directions, ALL of the directions. The manufacturers periodically make small changes to the product, or adjustments to the installation instructions.Doublecheck that you properly adjust the height of the unit, BEFORE you install it.Doublecheck that you correctly installed the flexibly waterline coming from the top of the unit, into the solid vertical stand pipe inside the Tank.
Trustpilot
2 months ago
2 days ago