
DOWNLOAD THE APP


Customer Services
Copyright © 2025 Desertcart Holdings Limited
DOWNLOAD THE APP
🌪️ Spin into style and weatherproof your yard with Outvita’s 8FT power performer!
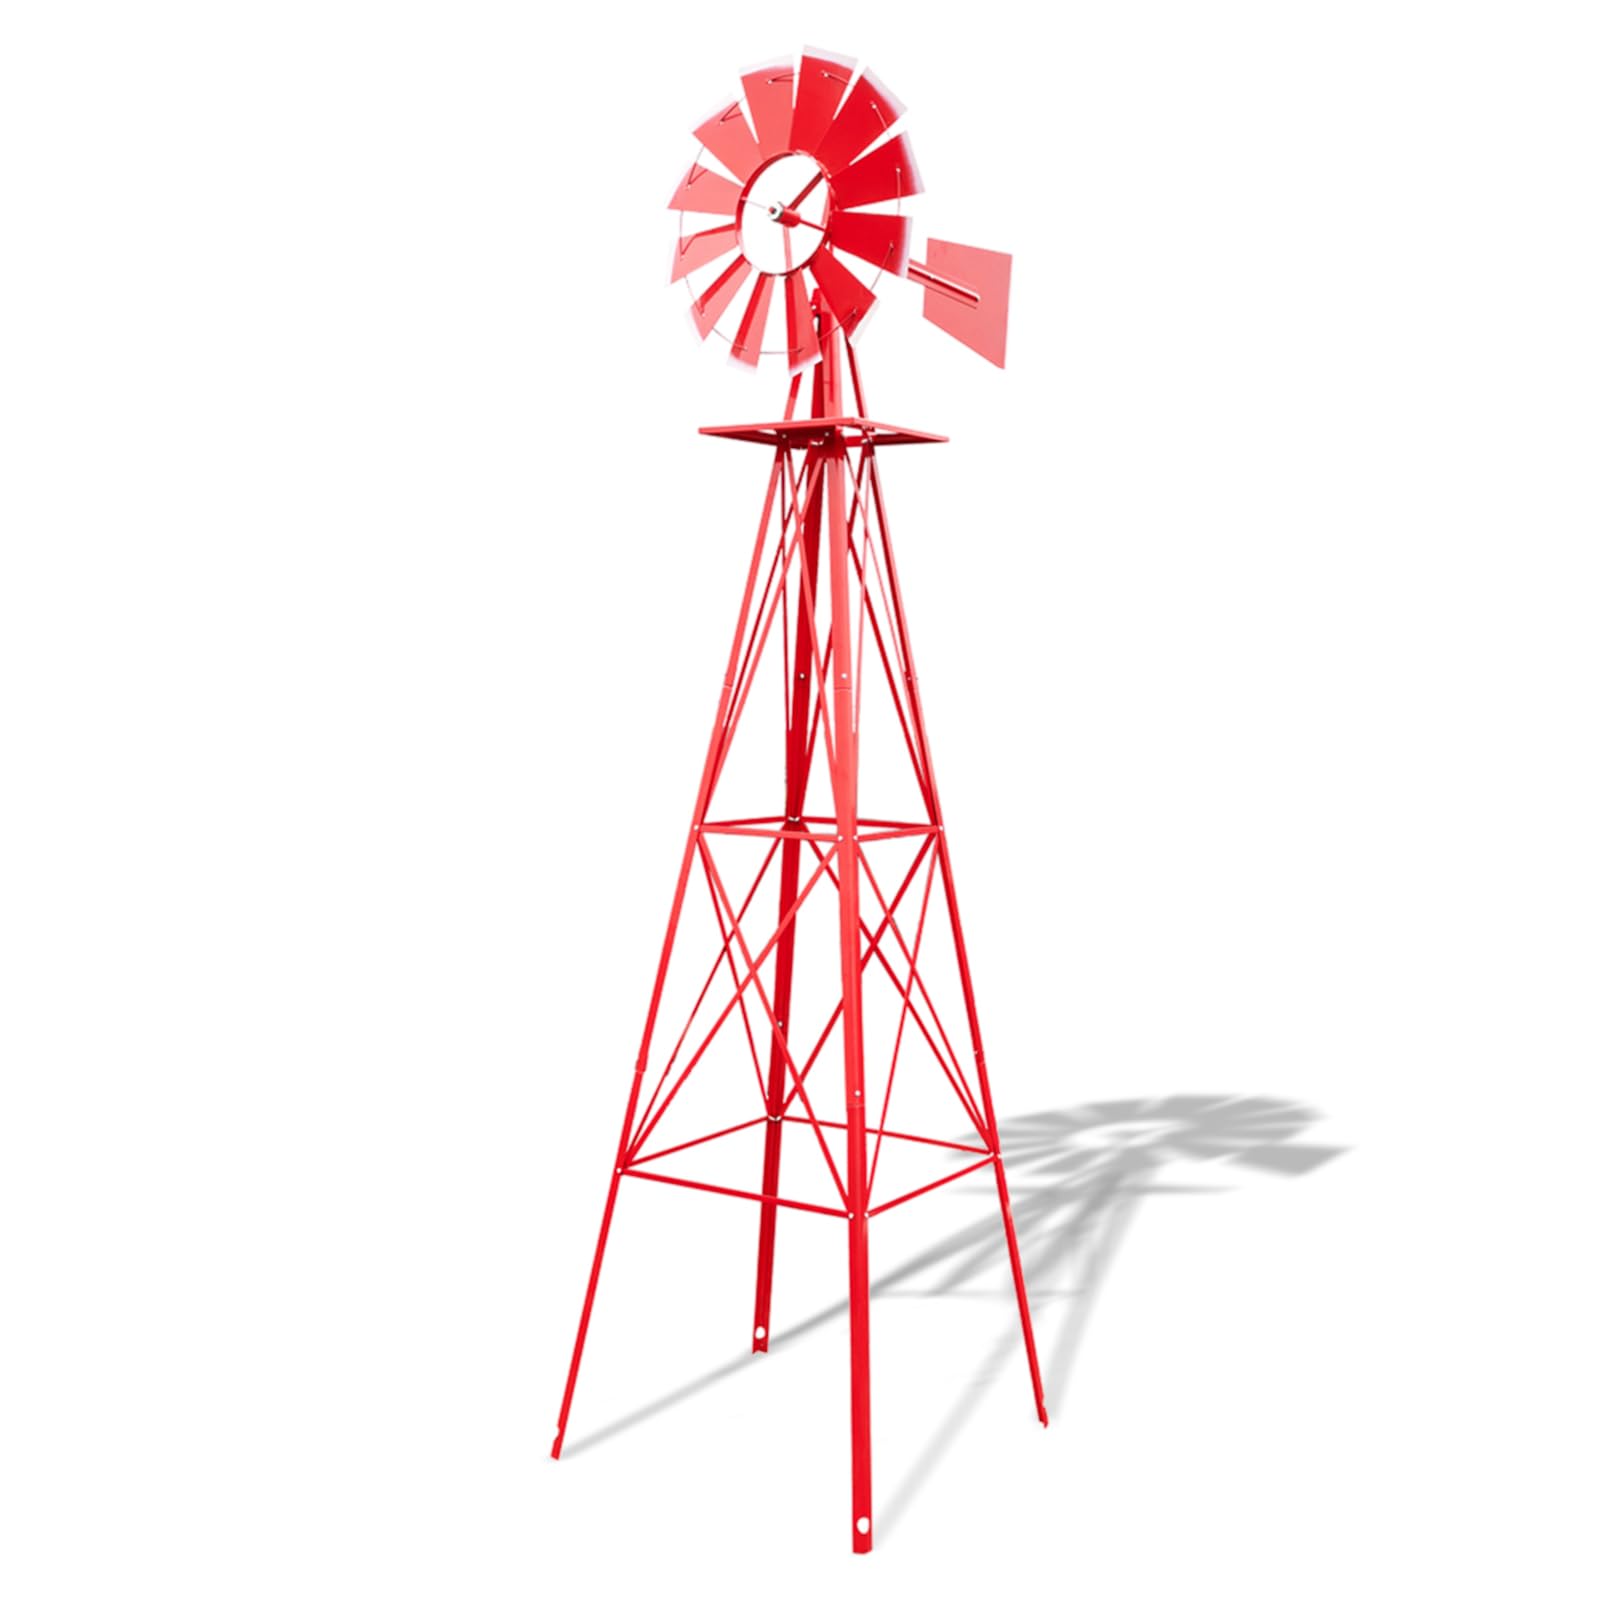
The Outvita 8FT Ornamental Windmill is a heavy-duty, rust-resistant metal weather vane designed for gardens, yards, farms, and seaside settings. Measuring 8 feet tall with a stable A-frame construction and smooth roller bearings, it provides reliable wind direction and speed indication while serving as a vibrant, durable outdoor decor piece.


| ASIN | B0BF5S6TRG |
| Best Sellers Rank | #156,666 in Patio, Lawn & Garden ( See Top 100 in Patio, Lawn & Garden ) #144 in Wind Sculptures |
| Blade Shape | Round |
| Brand | Outvita |
| Color | Gray |
| Customer Reviews | 4.4 4.4 out of 5 stars (238) |
| Item model number | OV-WINDMILL |
| Manufacturer | Outvita |
| Material | Metal,Steel |
| Number of Items | 1 |
| Product Dimensions | 26"W x 96"H |
| Special Feature | Rust Resistant |
J**E
Well worth the money
Kinda hard to figure out instructions had to just look at pictures and finally got it together...it's definitely worth the money .good size and love sitting on back porch watching it blows ...l9ve the fact that all screws were the same that helped out tremendously.....looks great
J**A
Nice looking and working windmill for yard or garden
I purchased the Outvita 8FT Ornamental Windmill, Heavy Duty Durable Metal Weather Vane and received it in a timely manner and in very good condition. It is packed in hard styrofoam inside a 28"x32" cardboard box with straps! So, it arrived by UPS without any problems or damage to the product. It took me about 2.5 hours to assemble the weather vane by myself. The instruction for assembling the product are adequate, but you will have to use a little mechanical ingenuity to determine how some of the piece fit together. For example, do the legs of the weather vane bolt to the inside of the "master head" or to the outside (answer: outside). It came with everything to assemble the unit and I wasn't missing any pieces that were listed on the instructions. All parts were noted on the instructions. There are no small lock washers provided, just 41 small bolt/screws used to assemble everything. So, I am a little concerned that the nuts will stay on the bolts without the lock washers......time will tell. There are only 4 bolts (one for each leg) that attaches to the "master head" that holds the "windmill" and "rudder". Seems like there should be two bolts to secure each leg to the "master head", as this is where the most stress will be, instead of only one. I most likely will add these extra bolt holes and 4 extra bolts myself at a later time! All in all, the unit was painted nicely. I have assembled it and installed it in my yard. I did not use the 4 ground stakes provided but decided to use 4, 2 foot pieces of rebar, to secure the windmill to the ground. The stakes provided are four, 1/4" chrome plated steel stakes, 1 foot long. I had a previous windmill and used rebar to secure the windmill without it ever moving or tipping over, even in high winds. The windmill is up and running and runs smoothly and quite. The bearings are sealed bearings and shouldn't need greasing, since there is no way to grease them. I did lightly grease the spindle the bearings turn on to primarily keep it from rusting since it wasn't painted. The blades turn nicely and evenly, with only some very small wobble to it, but it is barely noticeable. It spins with just the slightest breeze and I don't notice the blades being unbalanced. There is about a 1/2" space between the windmill wheel and the front cotter pin that prevents it from coming off the spindle it turns on. I added 3 additional washers (for a total of 4 washers) in front of the wheel (there is already a washer provided with the product for the front and back of the wheel that covers the bearings) to keep the windmill wheel from sliding forwards and backwards on the spindle as the wind moves it. I did this for my previous windmill also, and it seemed to work much better like this. The most important thing you can do is make sure the windmill is secured to the ground adequately. 3/8 or 1/2 inch rebar will work well as there are holes in the bottom of the windmill's legs that these pieces of rebar can be run thru so as to be securely anchored to the ground. I placed the rebar thru these holes in the legs and drove each piece into the ground at about a 45 to 60 degree angle, leaving about 2-3 inches of rebar exposed outside each leg (if the legs are pushed into the ground a couple of inches, as you level the windmill during setup, then you will not even see the rebar when finished)! My previous windmill was anchored this way and never had a problem with it blowing over! The product and painted finish are quite satisfactory to me. Nothing wrong with the unit as received. Lots of small pieces of styrofoam to deal with when you are unpacking. No lock nuts for the bolts and screws. The master head needs another 4 bolts installed, in my opinion. Ground stakes provided were not adequate in my opinion. Other than these concerns, I like the windmill and how it operates. Yes, I would purchase (for about $56 with shipping) it again (but hoping I don't have to for several years!)
J**E
quality product
It was easy to assemble. The written instructions aren’t very detailed but the pictures show exactly where to screw in each piece. It was heavier than I expected and the stakes to hold it in place were better than expected and held it in place during the recent wind storm with 40mph gusts! Well worth the price. We love it!
M**T
Great windmill horrible instructions
Overall the windmill is sturdy and the parts seem to be of good quality and the paint (we purchased the red one) is baked on fairly thick. Overall I’m happy with the purchase. The cons the windmill itself isn’t terribly difficult to assemble. The instructions are very very very poorly done. 1. Start with the windmill and rudder. There are two tillers one for each side make sure you put them both on before bolting together. The instructions don’t clearly state this. 2. Their is a “master head” that the legs attach to. Pay very close attention to the legs. First find the shortest legs (A1) these will be is talked first on the master head. Make sure you use the side with just 1 hole otherwise the platform won’t bolt correctly (also not on instructions) **you would be much better off assembling (A1 together with the other two legs A2, A3 first and put all 4 legs together. Pay extra special attention to ensure you are bolting them together with the notched side of A2 and A3 bolts to the inside of the A1) 3. A2 and A3 are the same length but be careful because A3 has a big hole at the bottom for anchoring to the ground. 4. once you get the 4 legs together (skip the bracing for now. Install the top of A1 on the OUTSIDE of the master head. Not in instructions but everything American about me wanted them to bolt inside the master head but it’s not designed that way. If you put on the x bracing before bolting all 4 legs to the master head you will not be able to reach inside to tighten them. Do this all laying down on the floor. 5. now that you have the legs on proceed to bolt the x bracing on 1 side at a time. Pay special attention to the rivets in the bracing. The rivets are the center pivot section. Once you get that figured out you do actually bolt through the river section. 6. Before bolting the bottom of the x bracing to A3 make sure you install the separate cross bracing. Also not in instructions. 7. I think it’s better to install the square platform at this stage. Having the bottom and the middle x brace bolted to the frame you can then install the platform. Reason why is the x bracing the platform and A1 holes all bolt together meaning 3 pieces align on 1 bolt on 4 corners. Unless you have 6 hands to do it when the instructions suggest doing it just simply Won’t work. Now it’s all done you can stand it up. I personally mounted it to the ground first then installed the head. The head is just installed with collar pin and just bend them over. Again they give 3 big washers make sure 1 in before the head 1 after the head and one on the bottom where it goes into the stand. I installed lock washers on mine, then tog welded all the joints together and spit welded the bolts. I also buried the feet about 12“ in the ground and pinned them in on an angle. Concrete the legs in covered it up with dirt and away it went. Some probably think it’s overkill however if you’re gonna spend 2 hours putting it together and spending money on it why not donor correctly? Otherwise 1 strong wind will likely destroy it. The windmill material is good enough to withstand the outdoors but the pins are nothing more than tent pins that will back out! Not if but when! This is 8’ tall and as with most things in life without a proper foundation all else fails.
S**U
Nice design
Beautiful color and design, however the instructions was not clear, it took us over three hours to complete the installation
B**I
Not easy to assemble
Instruction are not the best.
C**L
Real review positive and negatives.
Ok so I’ve looked for this all over! Been bouncing between Amazon, Temu and antique shops. I finally ordered this but didn’t have very high hopes especially for the price but when I got it I was pleasantly surprised! The metal material is very thick and sturdy and the quality is top of the line. It was also bigger than expected. Down side, the instructions have pictures and steps but even with, I had to look up an instructional video on YouTube. I kind of got lost on step one because they don’t tell you how to assemble. It just says put them together with no other detail. I left the cross pattern in front off to accommodate my mailbox and it’s fits great! Even though it look me a while to figure out because of the above, I am still giving it 5 stars because the quality and over all aesthetic impressed me that much.
E**.
Good quality.
Very pleased with windmill. Good price. Good quality. Assembly went well.
Trustpilot
2 weeks ago
3 weeks ago